This is how you can fix that loose trim piece, permanently.
Tools required:
- #0 Philips screwdriver, preferably one that is strongly magnetized
- Similarly-small flat-head screwdriver
- Fine-tipped soldering iron
- A little scrap of extra plastic
Start by unplugging the power cord and removing the battery, and set yourself up at a static-free workstation (ideally) or at least plan on not-moving for a while and have everything handy. This repair was successful at my regular table in a carpeted area, with me wearing cotton clothes and touching the screw on a power outlet nearby before working to dissipate any large static charges. These computers seem relatively static-tolerant but Murphy says you will zap your motherboard if you are not carefeul. You CAN kill your computer if you attempt this work at a not-static-free workstation.
You have been warned.
Click any image to see it full-sized.
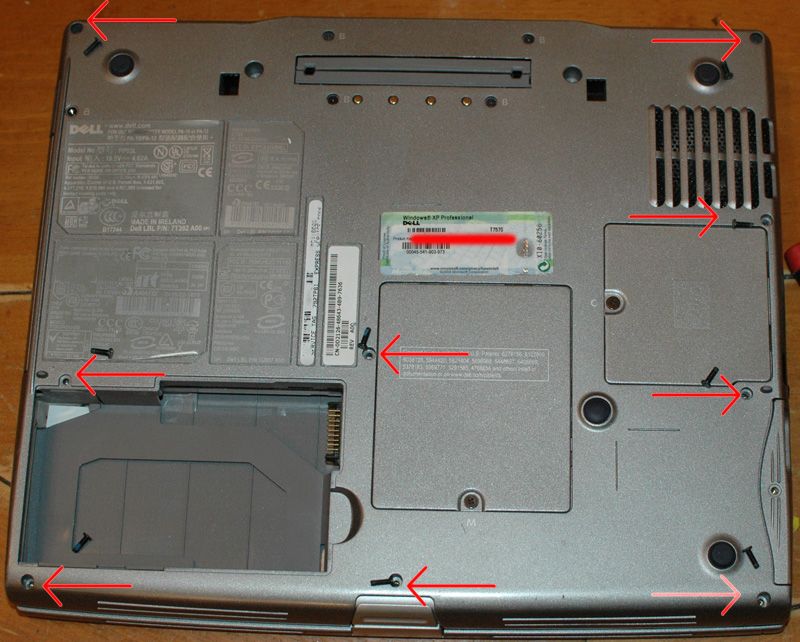
Unscrew the screws that hold the keyboard-surround/touchpad bezel in place. Set them aside in a pile, they are all the same length.
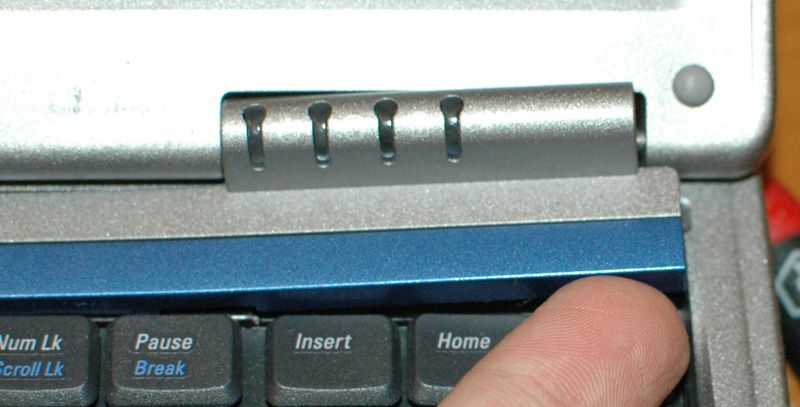
Open the computer all the way flat so the display is laying as close to your bench top as possible. Gently insert your small flathead screwdriver in the little notch at the right end of the trim piece over the keyboard. It takes some moderate wiggle/pull-up forces but this piece is only snapped in place.
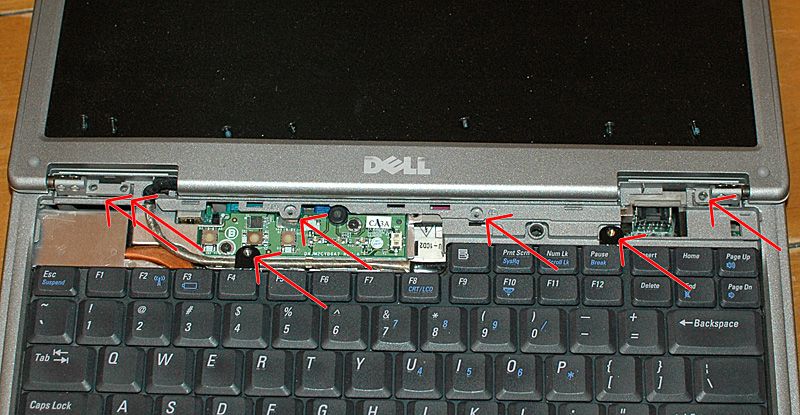
Pull all these screws also. Set them aside more carefully, as they are NOT all the same length.
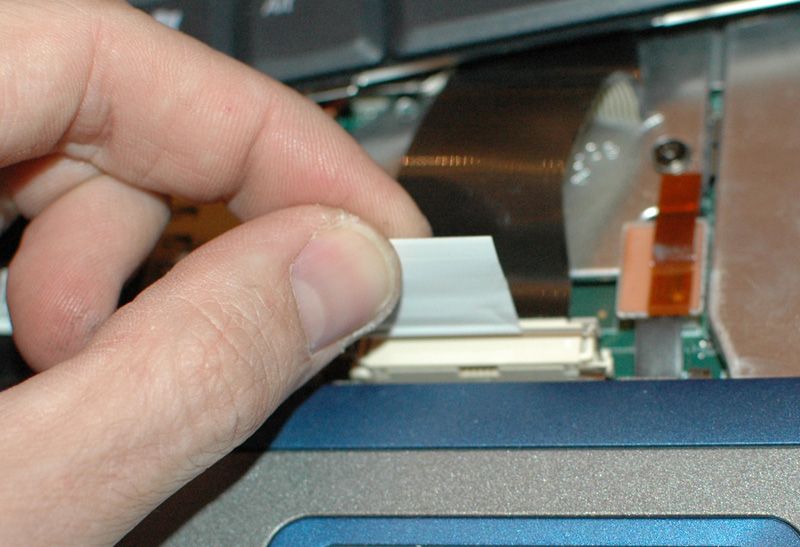
The keyboard will pull right out now; use the pull tab on the connector, do NOT pull up on the cable!
Unscrew the grounding strap by the video cable connector and gently pull up on the tab (not the cable) to remove the connector. The entire top/display module is now loose. Set it carefully aside.
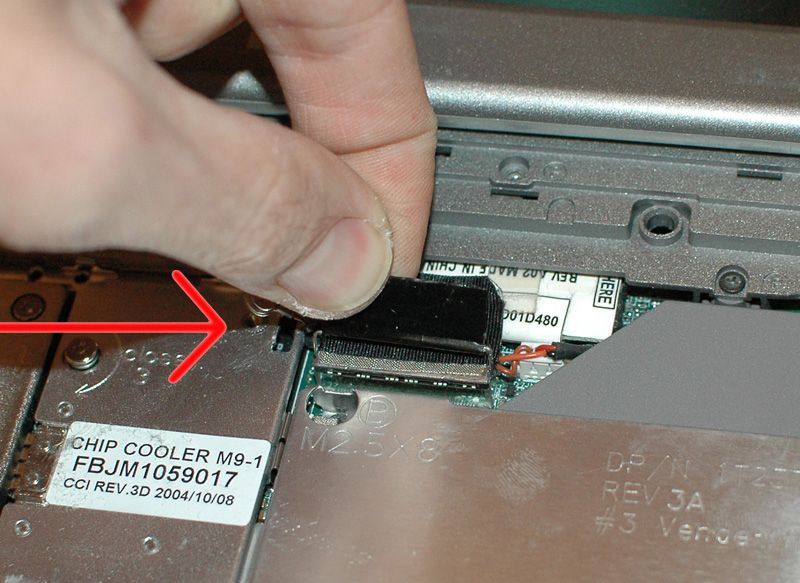
One more screw was hiding under the keyboard.
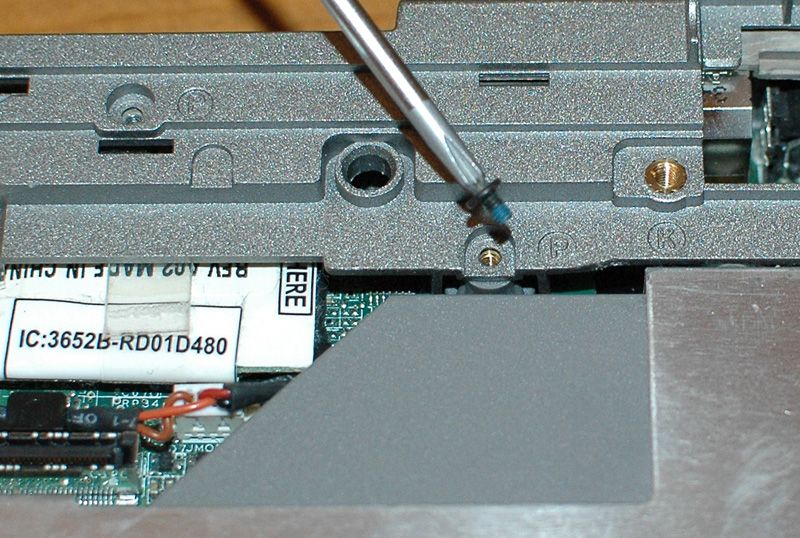
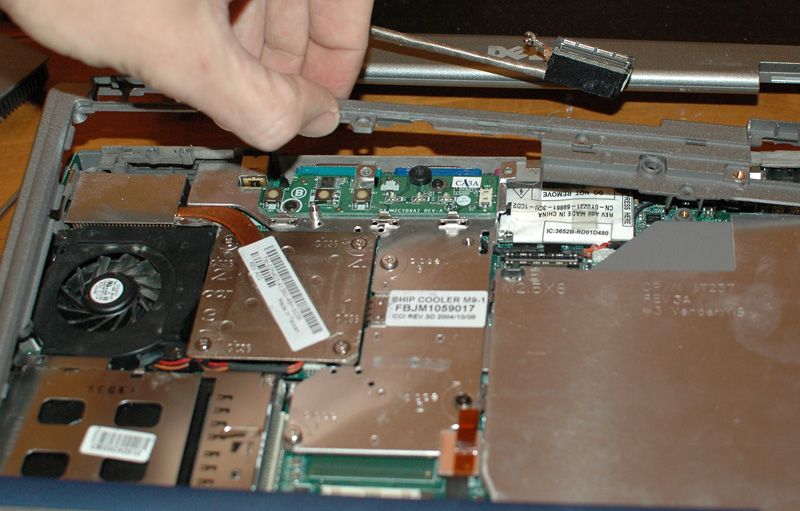
Gently disconnect the touchpad connector.

Nothing else besides plastic 'snap' retaining tabs holds the top plastic piece in place. Gently tug and pull, and the plastic all the way around the top of the computer will pop right off. Do not be alarmed that this sounds like the end of the world. Unlesss you are pulling TOO hard, it is just the snap tabs popping loose with no damage - but don't force it. If you are pulling too hard make sure you got all the screws out, or you will end up buying a new top panel on ebay!*
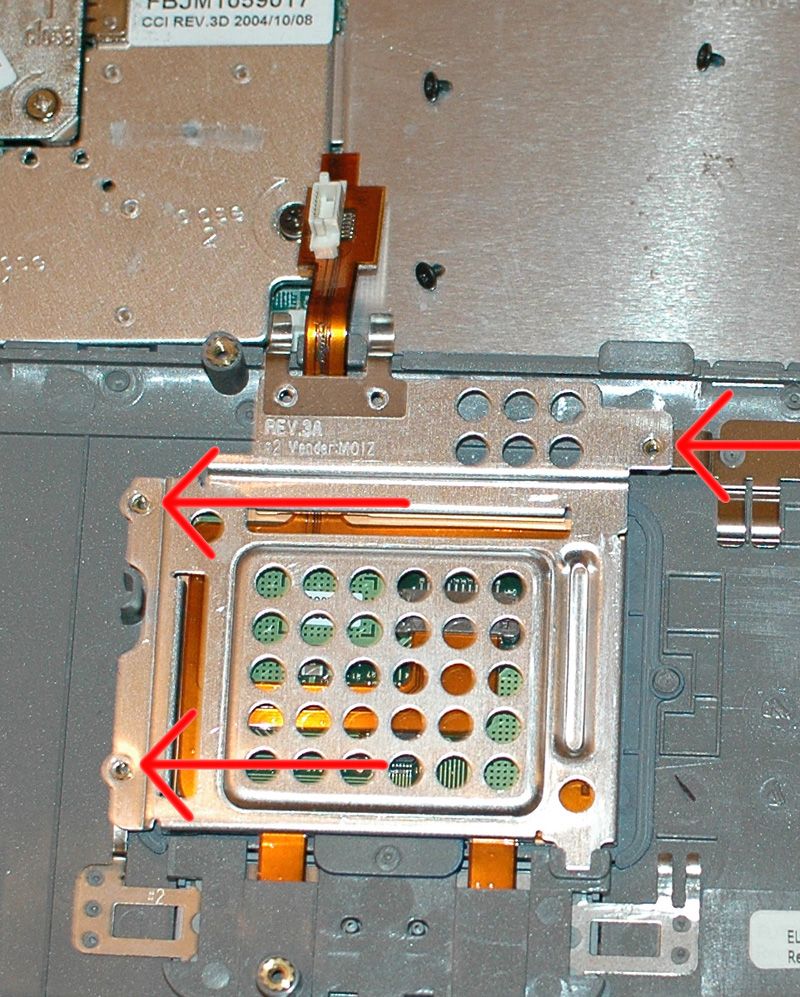
Three screws hold a metal shield in place under the touchpad. This shield may do double-duty as a brace for the touchpad, but on this computer it was not touching the plastic (or at least, not pressing hard enough to keep it firmly in place).
The factory heat-staked the colored trim surrounding the touchpad in three places. Sometimes that was enough, but sometimes the trim piece works loose.
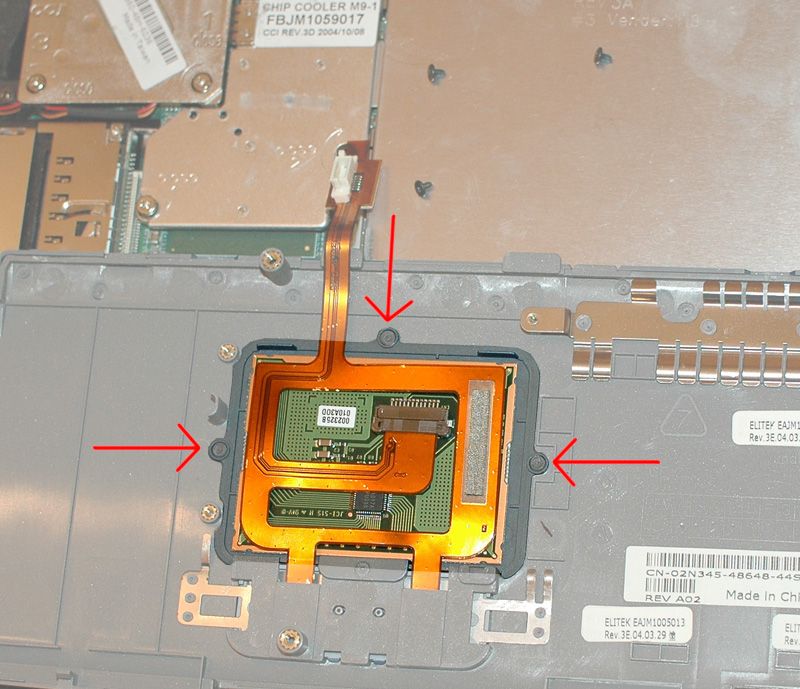
This kind of plastic was heated and injection-molded to form it into a computer part. Re-heating it and adding a little bit of plastic to your computer part will not harm anything when done properly. Just keep the heat as low as it will still melt the plastic (I used 600ish degrees F, and worked quickly) and be VERY careful as you are working.
If you have never done this, practice on a piece of scrap plastic first to avoid destroying your computer! My technique was to cut a little bit of scrap plastic and pick it up with the tip of the soldering iron. Then I stirred the new plastic on the to-be-repaired area with the tip of the iron, ever so slightly melting the trim panel and keyboard bezel, and the new scrap of plastic, into one lump. Be very careful not to melt through the bezel or trim piece! Smooth the finished bead of plastic with the tip of the soldering iron after is the plastic has cooled and hardened.
I used a bit of scrap plastic from another (dead) computer and a gentle touch, and welded the trim panel to the keyboard bezel in several new places, plus I reinforced the three heat-staked spots.
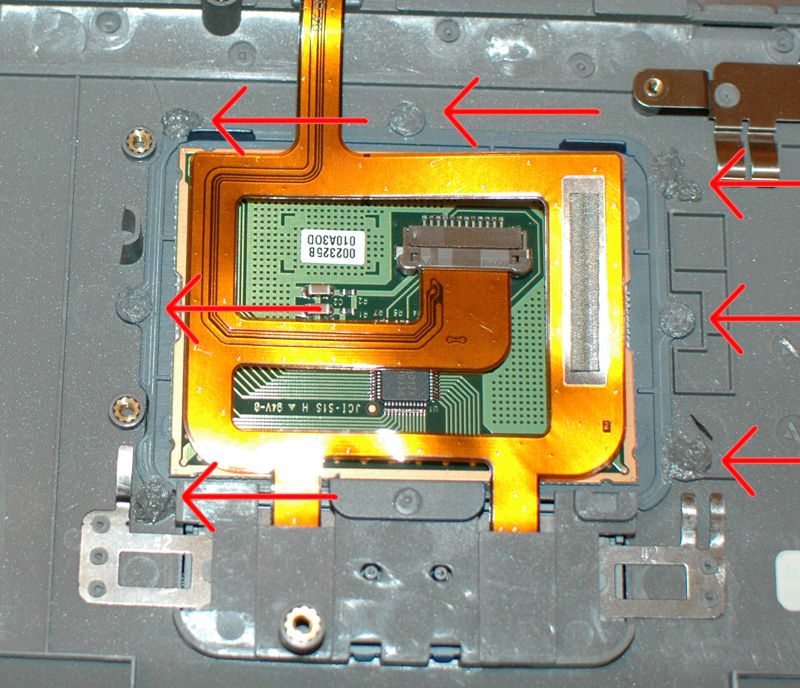
The touchpad flops out, and I welded a couple more spots near the bottom. Be careful here, because one false move and you will ruin the touchpad! Also you need to be careful about the dimensions of your weld spots. Gently trim the welds if they are too big, until it all fits together perfectly again.
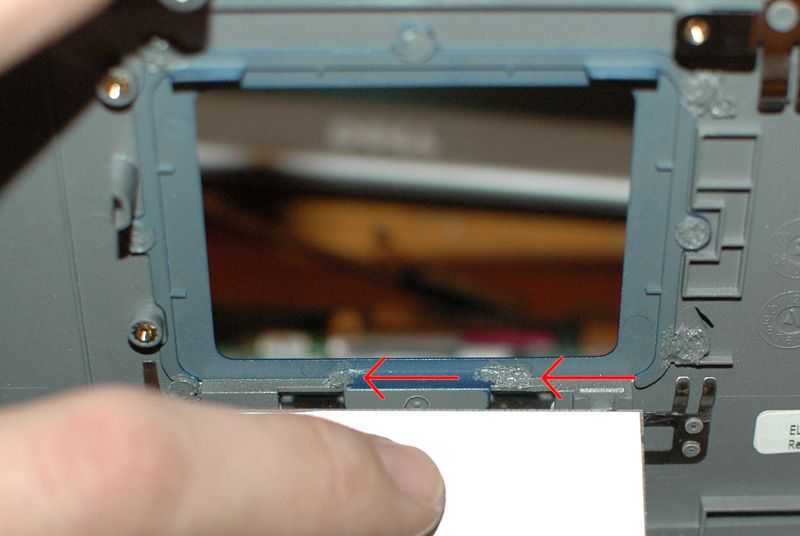
That's it, you're done. Put it back together. Assembly is the reverse of disassembly.
You will notice that now, when you use the touchpad and tap by the edges, it feels like one solid piece of plastic. It is. Congratulate yourself.
********
*Speaking of eBay, if you haven't yet gone to eBay and purchased a 1.6GHz or 1.7GHz processor for yours Inspiron, do that next after you do this.
Be sure NOT to get any processor besides the Pentium-M, and be sure it has a 1M cache and 400MHz bus speed, to prevent buying an incompatible CPU! Also buy more RAM for your computer while you are there. Both of these upgrades should be less than $20 and you would be surprised how much of a boost you can get. If you are rocking a 1.3GHz CPU and 256 or 512MB of RAM, it will be like a whole new machine once you max it out! Before you install the new processor, be sure to visit dell.com and download/install the latest BIOS and you SHOULD be able to use a faster processor no problems - but be sure to buy from a seller that accepts returns, just in case.


No comments:
Post a Comment