Yes, really.
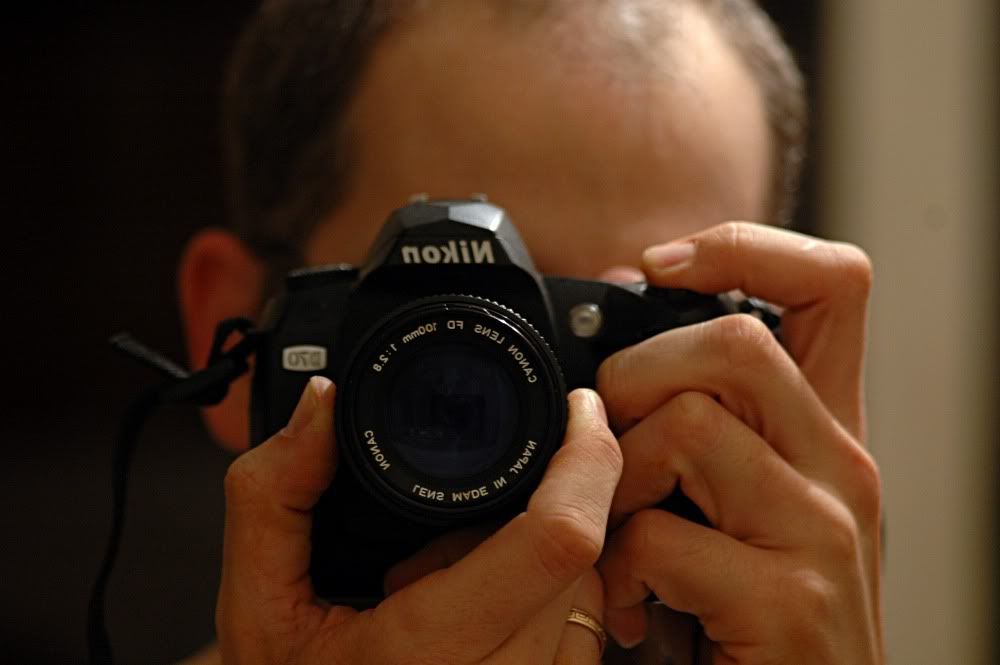
I was curious to know if this could be done. Generally the consensus is that what I have done is impossible. But those of us who watched Alice in Wonderland as children know that "You mean impassible. Nothing is impossible!"
Normally, this is impossible. The Canon FD mount has a flange to focal plane distance of 42mm. The Nikon F mount has an FFD of 46.5mm. What this means is that the Canon lens has to be physically inside a Nikon camera to focus properly. The Nikon F camera flange is too narrow to admit the back of a Canon FD lens if you "only" remove the Canon FD mounting hardware. As you will see if you scroll down a bit, by removing significantly more than just mounting hardware, you can mount a Nikon F lens mount on an old Canon FD lens. It involves a bit of metal work and custom plastic fabrication as well as irreversible damage to the moving parts of the lens itself. Oh, and there is no guarantee it will be possible with every FD lens. AND the rear element of a lens that fits a DX camera perfectly, may hit the mirror on an FX camera.
Bit is is possible for this lens, on my camera.
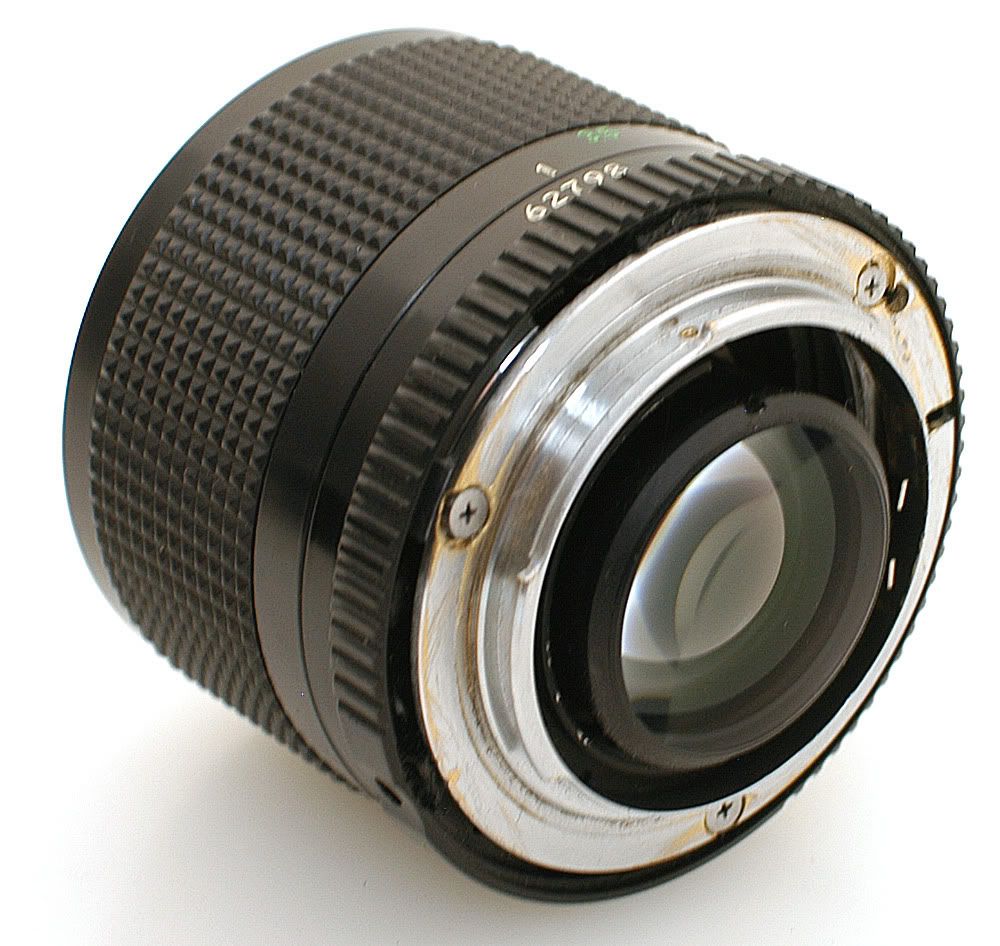
This lens is a keeper, both for general purpose and (especially) for portraiture. I also did a 50mm (and will write that up soon) but that was more a proof-of-concept exercise and I would be happy to replace that with a Nikon 50mm for $100 brand new. Nikon only ever made ONE 100mm non-macro lens (an E series, starting at $100 used in 2012) and that makes this a very odd duck. This lens was given to me, partially disassembled by the previous owner for unknown reasons. The chrome-plated brass F mount came from a defunct teleconverter (Minolta? brand) which was destined for the trash. You can buy a proper F lens mount in metal OR plastic on eBay as a replacement part for various lenses, but you will still have to modify it.
You will need:
The lens
An F mount
A GOOD #0 philips screwdriver
Files, pliers, cutting pliers, drill, etc. Lots of small hand tools. A mill would be nice if you are using a metal mount.
A soldering iron with a very fine pointed tip
CLEAN microfiber cloth
Canned air or Giottos Rocket Blaster or similar
********
Click any picture to see it at higher resolution. There are scores of pictures here, and all of them are drastically reduced to fit Blogger's format. Click for bigger.
Creative destruction: we begin by taking it all apart. Three small screws hold in the metal mounting ring. They are e.x.t.r.e.m.e.l.y tight. Use a GOOD screwdriver of the proper size or your day will go sour in a hurry. These are soft metal and WILL strip out.
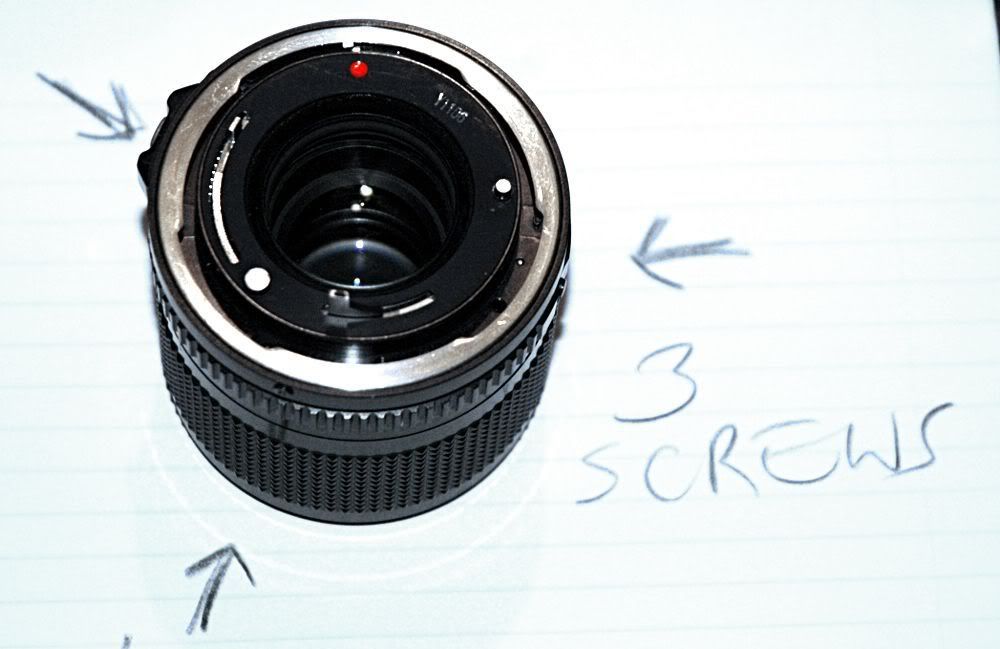
This is now trash. The breech lock ring lifts out with slight resistance.
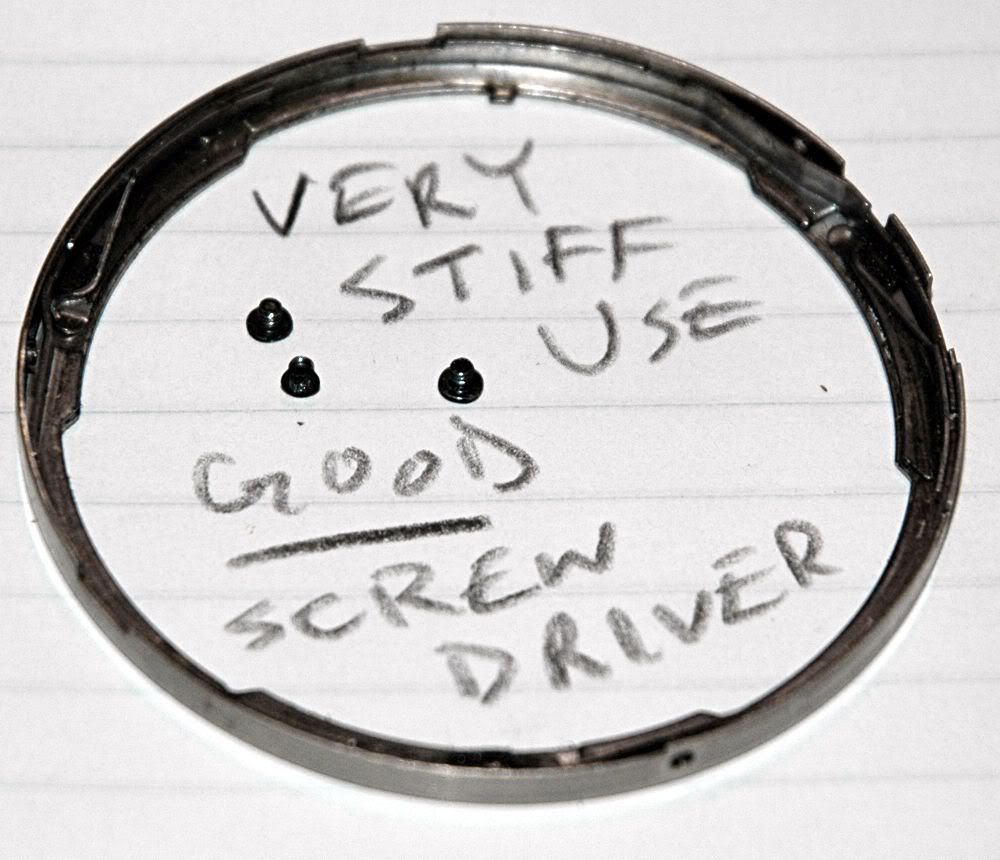
I forget but I'm pretty sure this was screwed in. This was the mechanism by which the Canon SLR used to communicate with the lens. You need none of this for this project, but you might want some of the pieces for something else later. For the purposes of doing this mount conversion, you can toss this mechanism over a cliff.
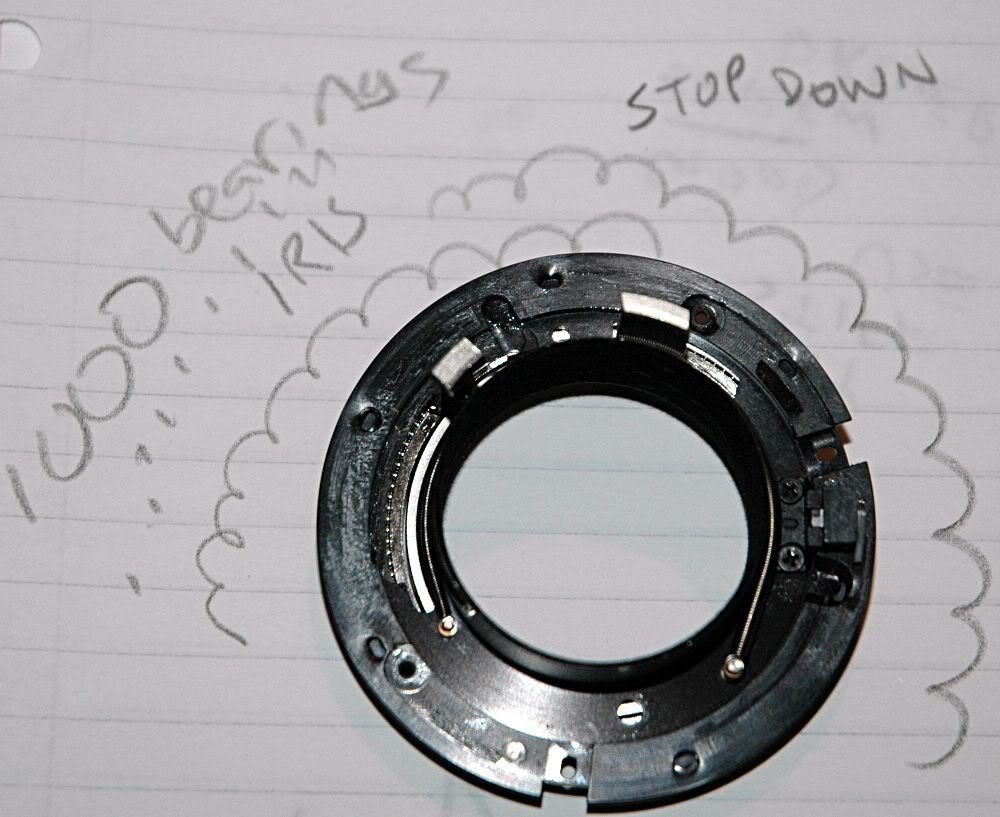
If you know what you are looking at, you know there is a problem here. This lens had a VERY oily diaphragm. I cleaned it and we'll get to how to do that a little later.
You need these four screws. One is silver, three are black. Make a note of which screw goes where and set these carefully aside. Put them in a marked zip-lock baggie if you are smart. You NEED these screws! Three of them will be holding your new F mount to the lens later.
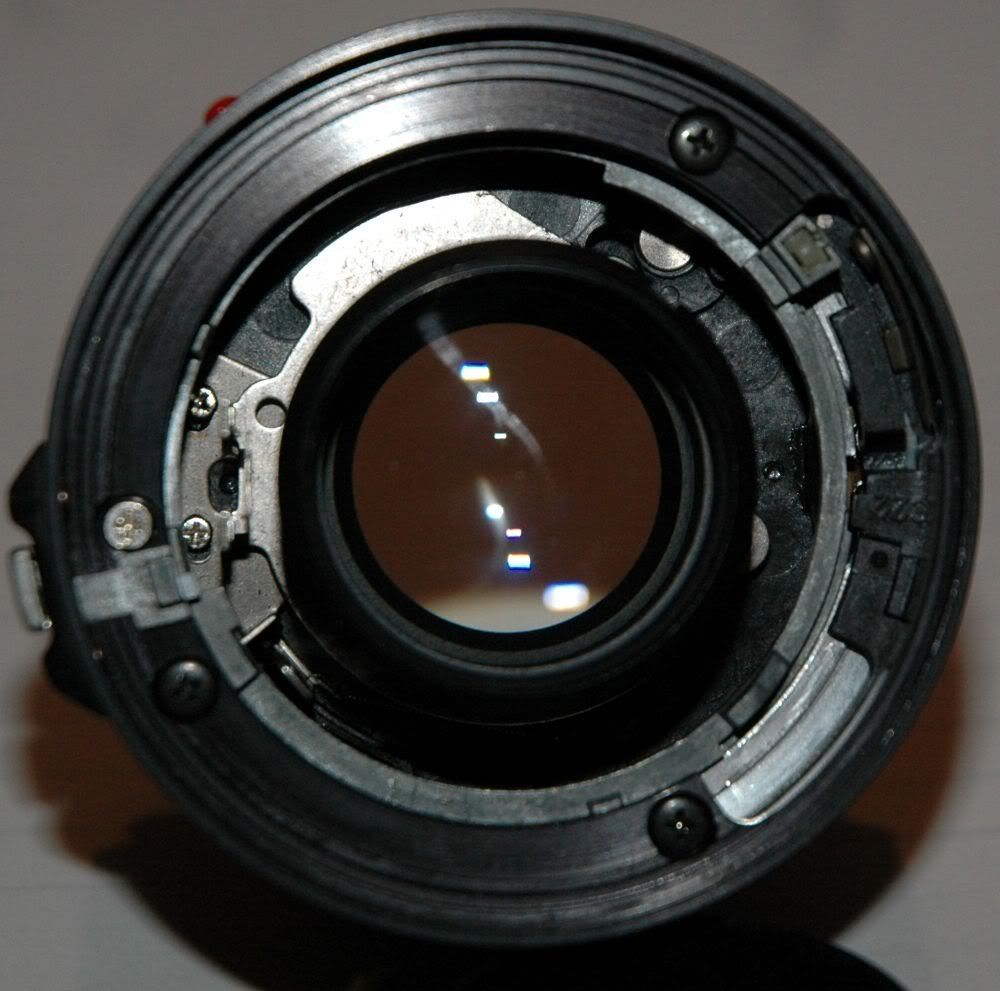 9082
9082The front of this lens is held on with . . . nothing. There are a few plastic retaining tabs. The front ring does NOT screw in. Very carefully pry it out. You might want to pad the lens and/or use a wooden tool, but I used a small screwdriver and great care, and pried the cover/ring out.
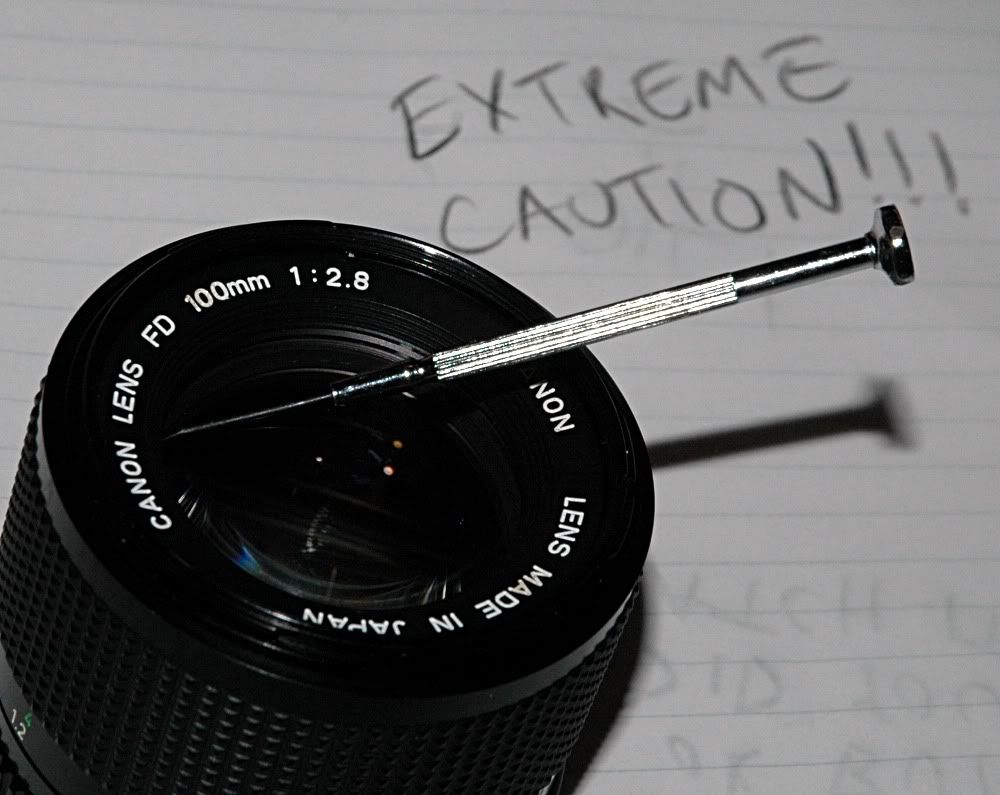
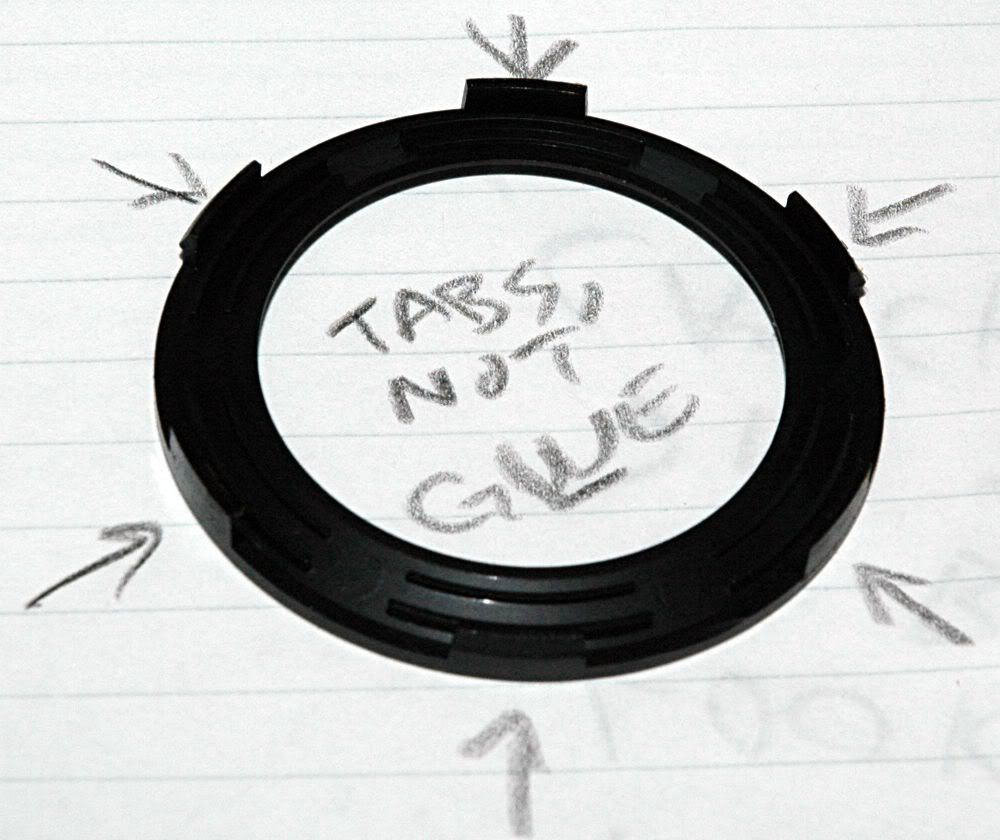
The next thing down the barrel is the retaining ring for the front lens group. Three screws and it will be free. As with the small black mounting ring screws, these are VERY tight.
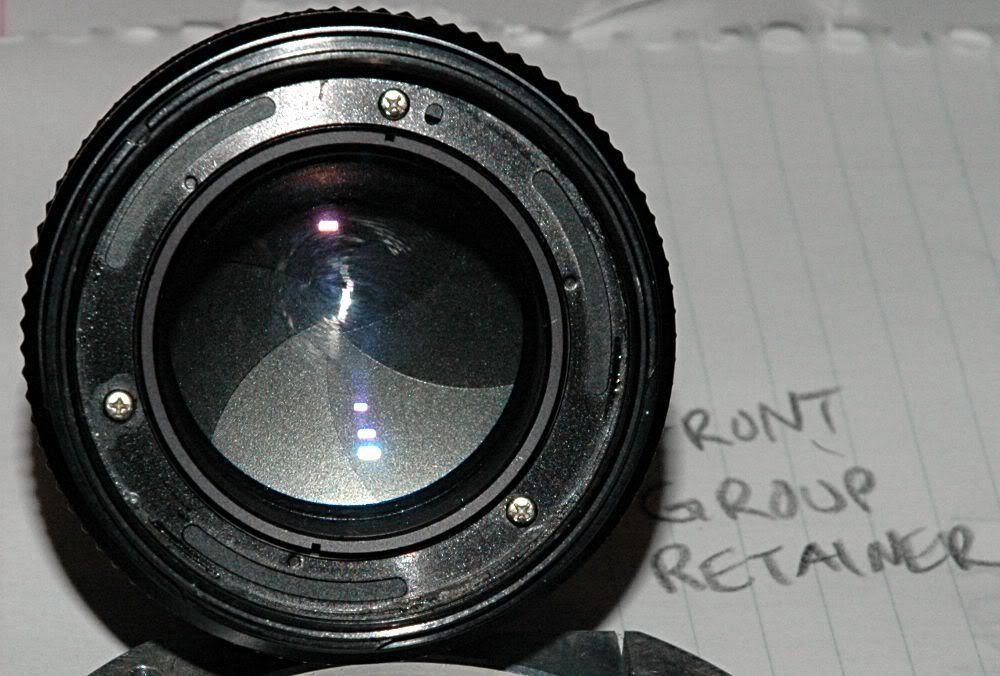
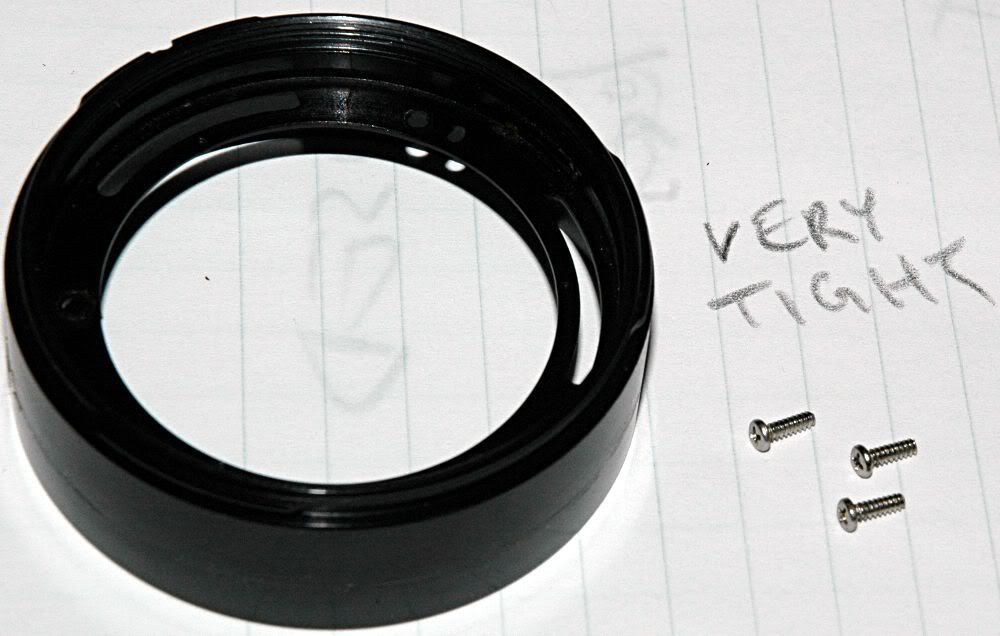
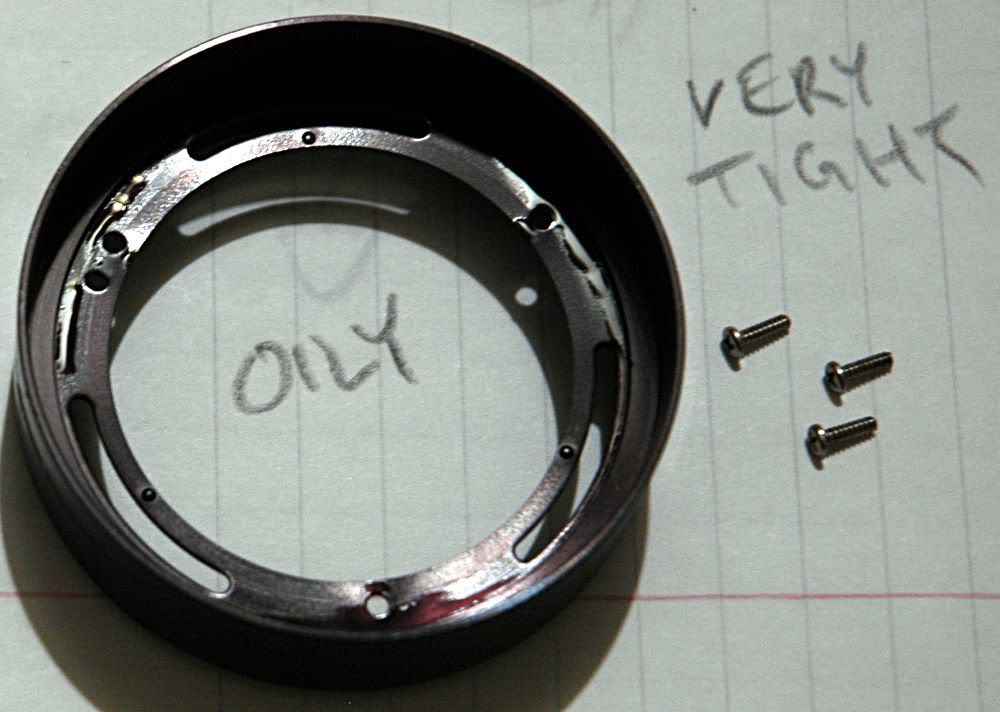
This retainer was covered with oil. This is not a happy sign but we will fix the lens in a minute. For now, clean this with isopropyl alcohol and lint-free rags and set it aside.
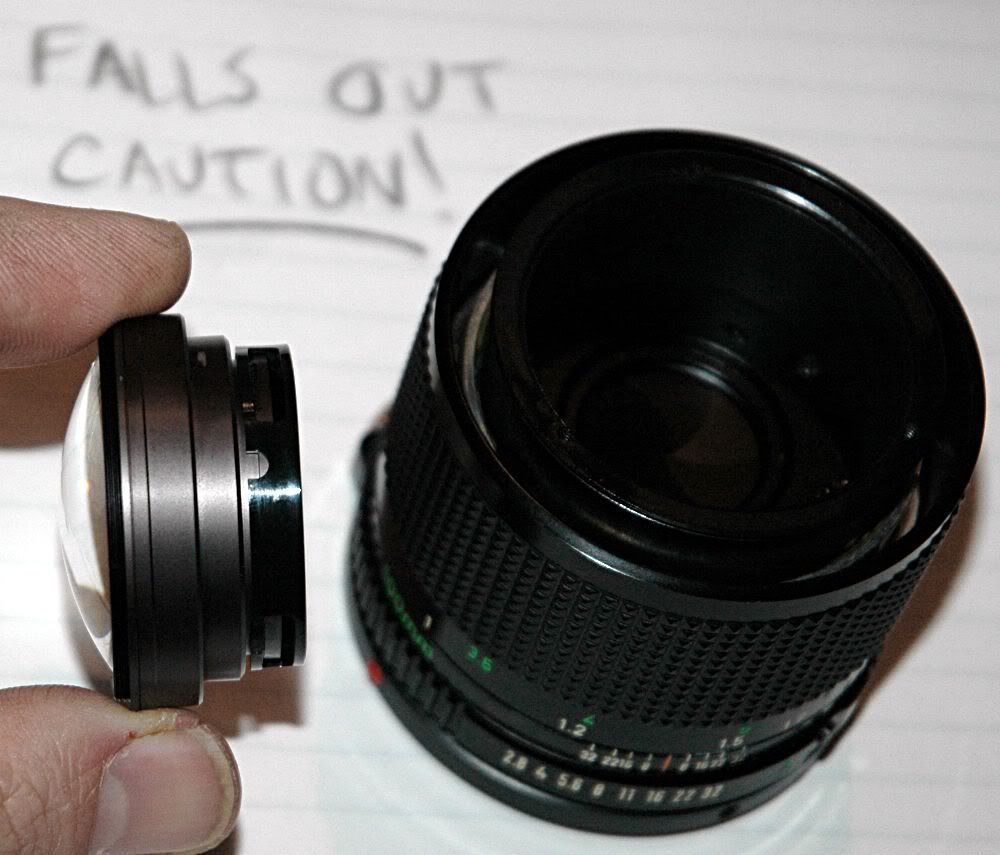
With this retaining ring out, nothing holds the front lens group but gravity. It will fall out. Murphy's Law says it will fall out and be scratched. Set it carefully aside on something clean and soft.
The next thing down the barrel is the focus ring. Around the extreme periphery are three screws holding the focus ring to the rest of the lens.
The spot on the iris is oil. This is the clean side of the iris!
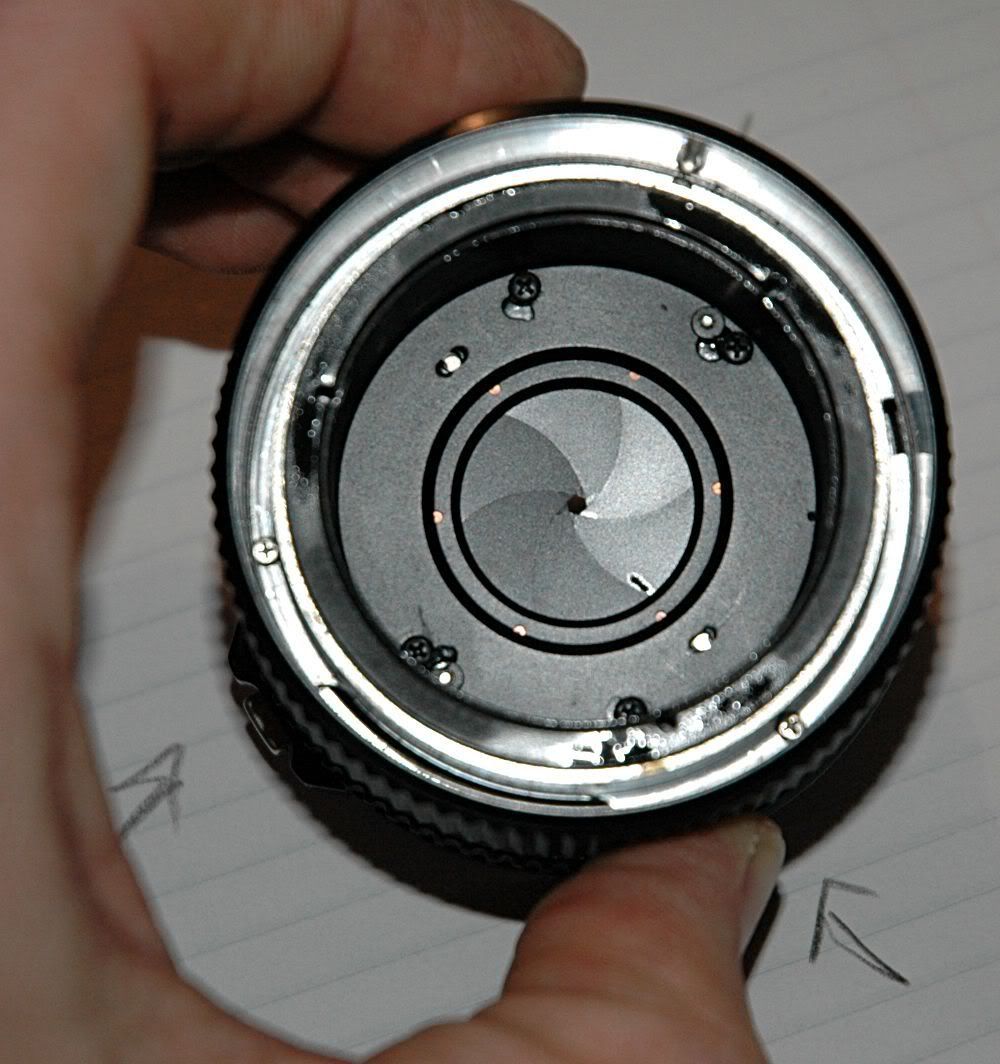
The oily side, by the way, was oily indeed. This amount of oil was preventing the iris from closing at all under its own spring pressure.
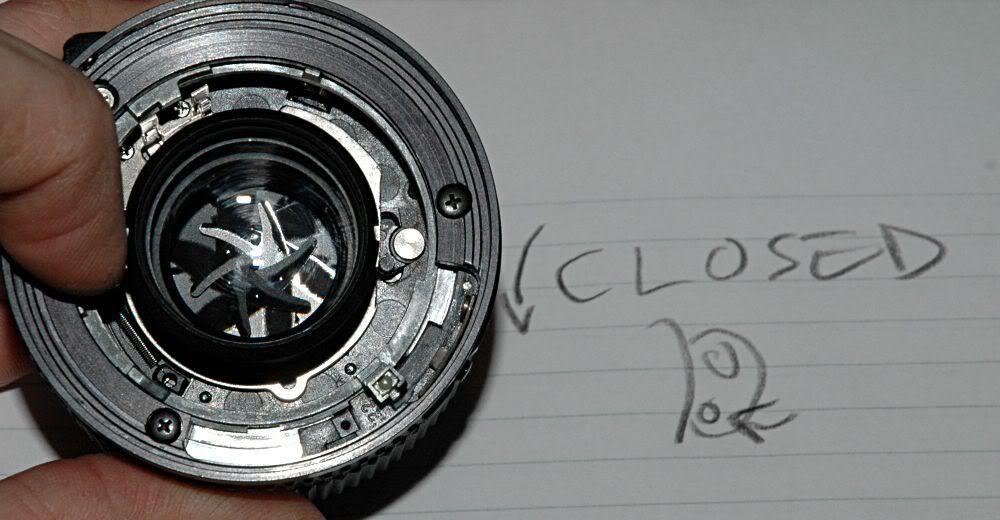
I thought there was a missing spring or something. This little pivoting piece is *supposed to* be spring loaded. It just hung out in the "wide open" position. This is normal:
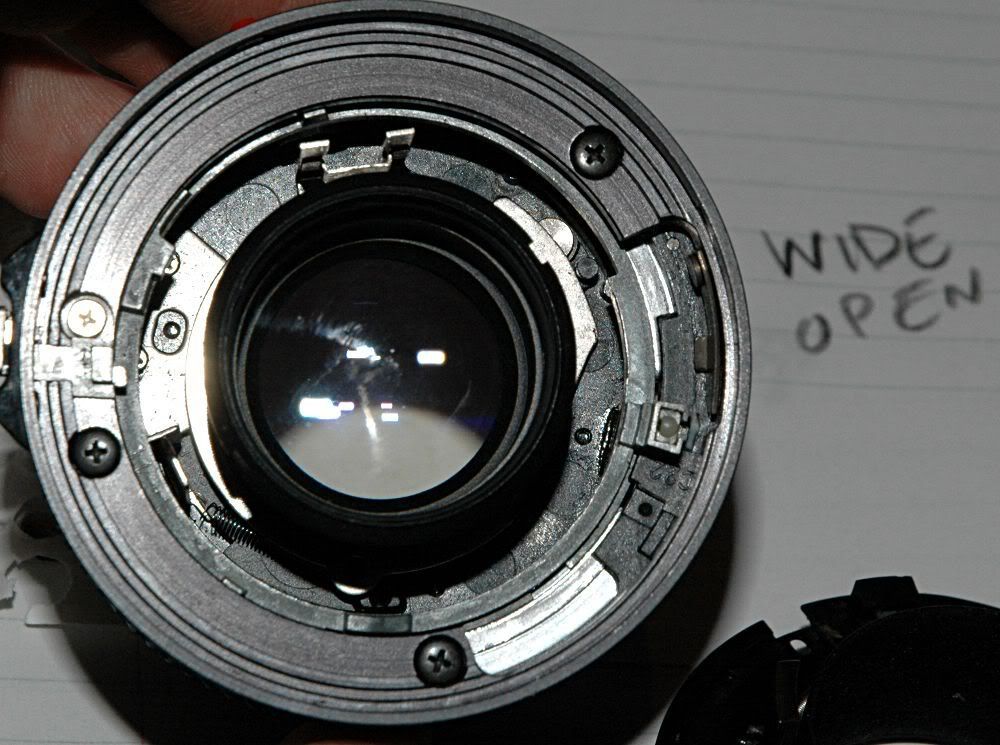
This is not. With the aperture adjustment angle not touching the pin on this pivoting piece, it should move under spring pressure until the pin touches the angle. This one was stuck open.
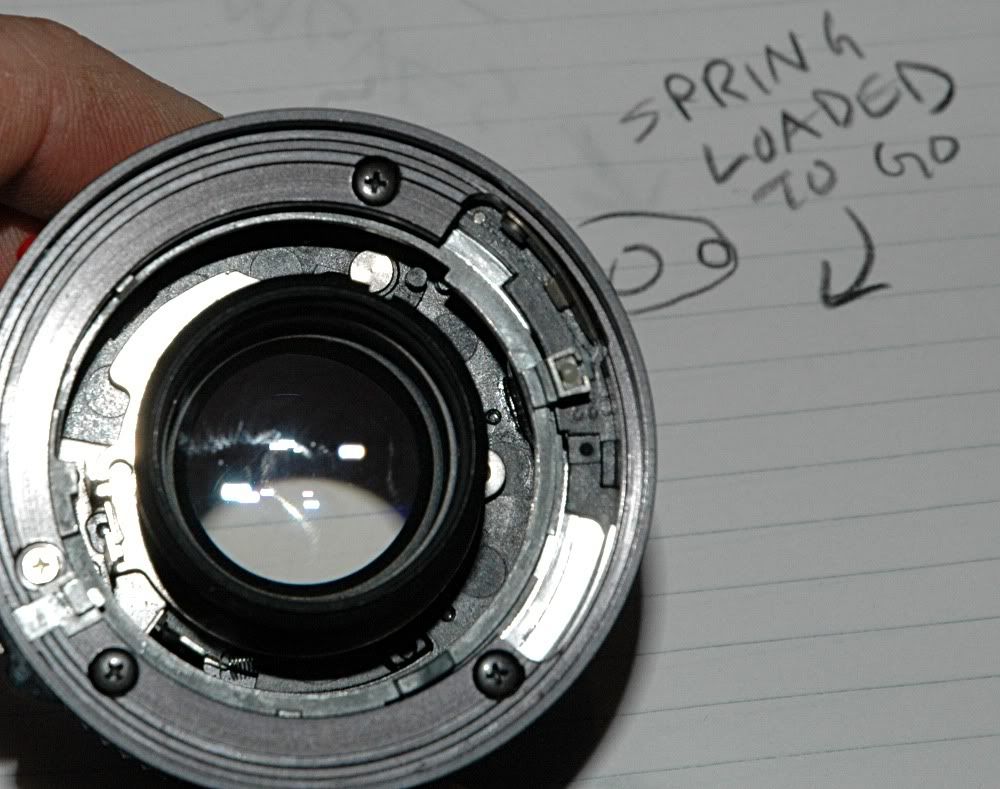
While you are taking things apart, know this: there is a tab on the focus ring which goes into a slot on the inner works. You have to align these to install or remove the ring. It's easy, but you just need to know about it.
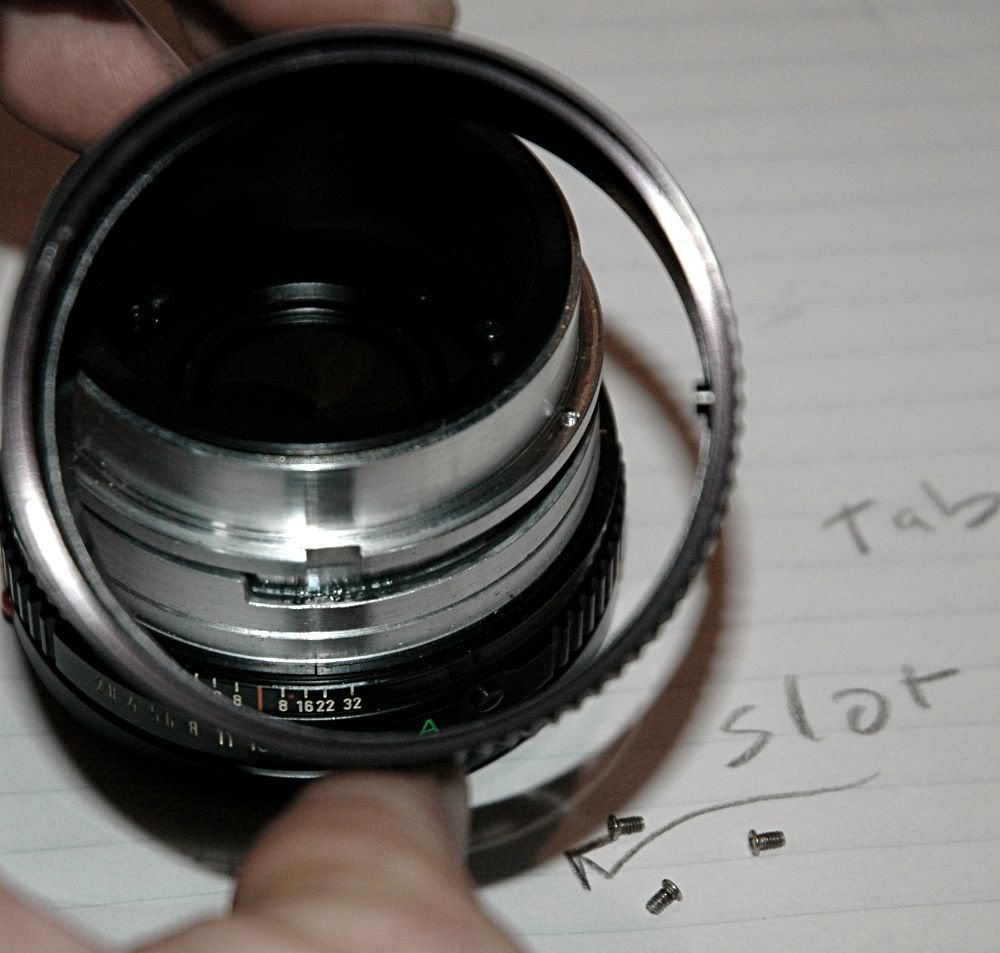
Four more screws and the aperture mechanism is free.
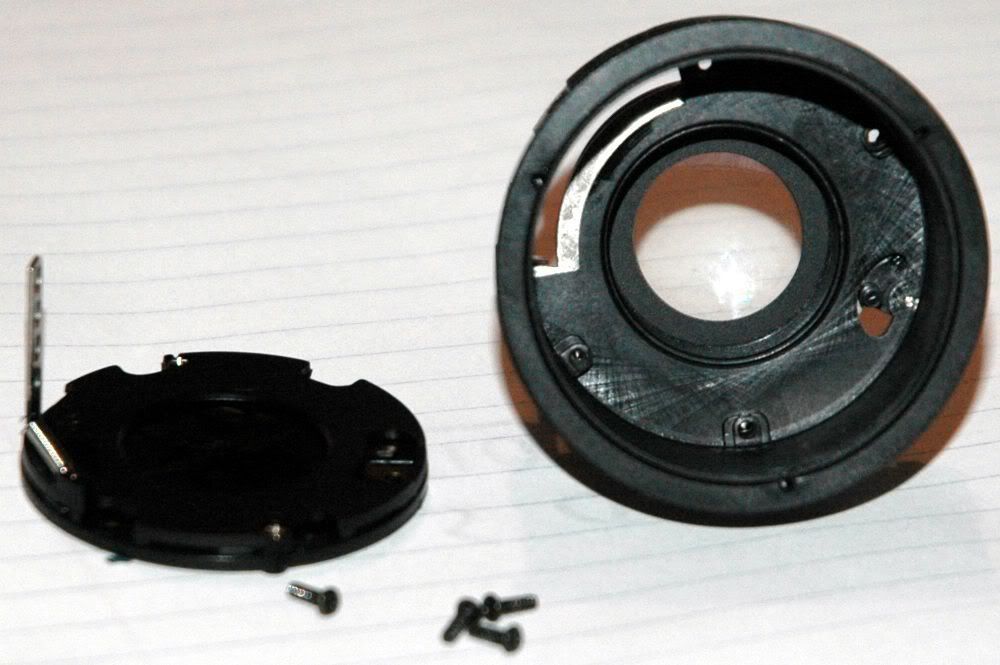
Do not disassemble this, even for cleaning. Unless the blades are broken or out of position, you will regret opening this. These things are tricky to get back together, when you can.
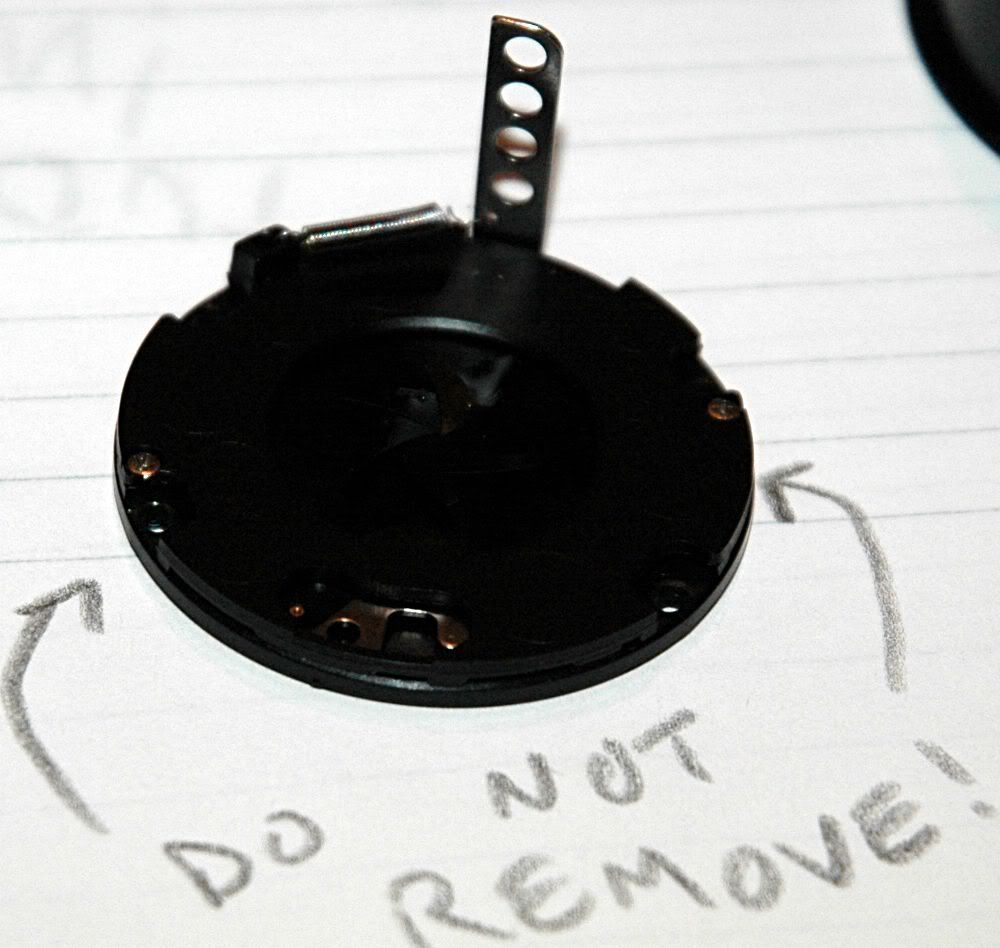
Cleaning the aperture blades is VERY SIMPLE. Soak in isopropanol the entire iris assembly, pins, springs, bearings, levers, housing, ALL like in the above picture WITHOUT disassembly. The isopropyl alcohol will dissolve and carry away the errant oil residues without damaging the mechanism. Rinse with clean alcohol and gently blow the whole affair dry with your canned air. Repeat if necessary. The iris should open and close very "snappy" when dried, and there will be no sign of oil if you did this right. Takes 3 minutes. 5 if you have to disassemble the lens first.
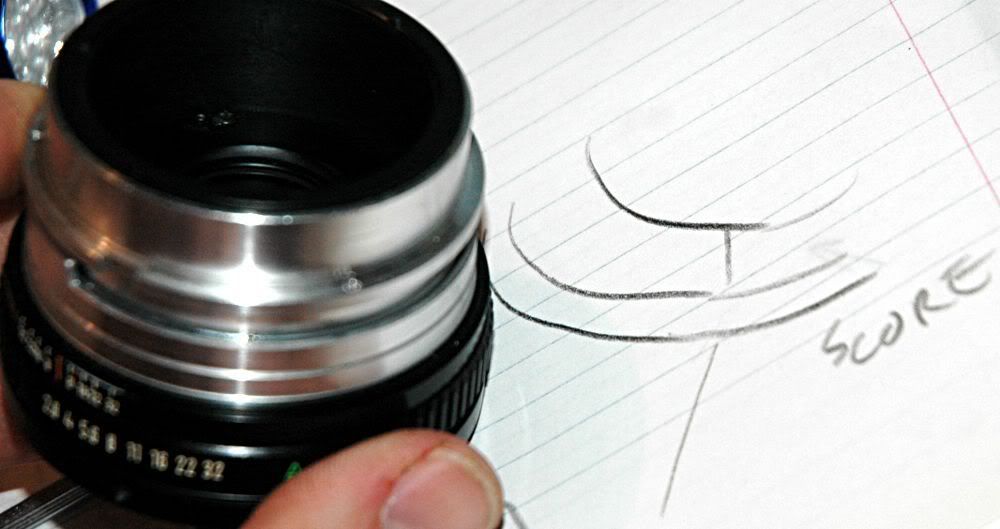
If you unscrew the lens carrier you will have a better look at how this goes back together. I recommend you do NOT disassemble the focusing helicoids! They are a minor hassle to get back together the right way. BEFORE you do that, IF you decide to do it, which you should not . . . scribe a reference mark so you can know you REassembled it properly
AND be sure to set this down carefully. The rear element pokes WAY out there.
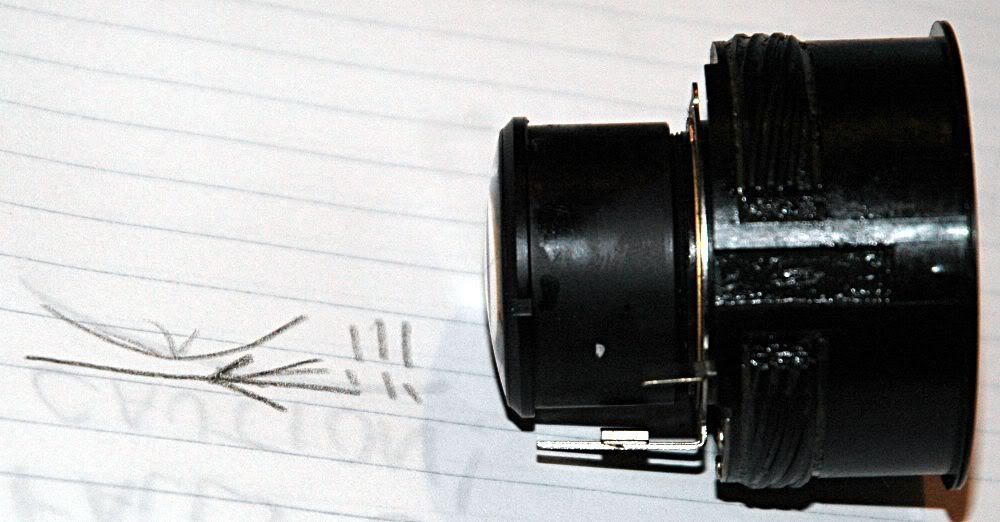
A pin on the pivoting mechanism on the back of the lens carrier goes in a hole in the silvery bit in the iris mechanism. Remember that.
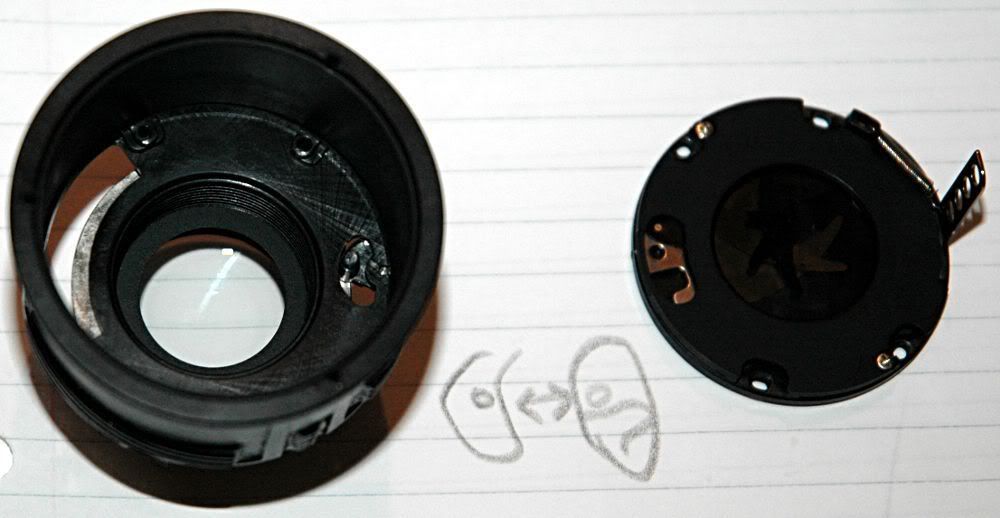
When you reassemble this, if you get it wrong, it will not work.
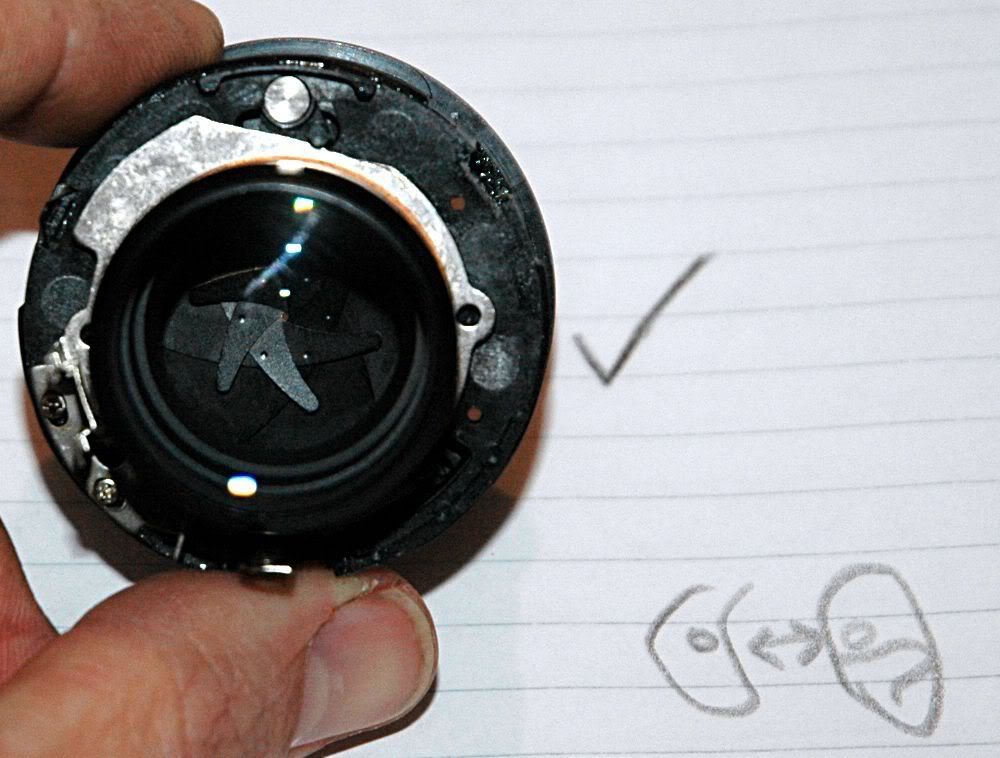
I reassembled it with the back 1/5 of the entire lens body missing. I left off ALL of the mounting stuff and the aperture ring, so I could see inside the back of the lens a little. There are three metal legs protruding from the body of the lens, where the lens mount will screw on. These three legs I rested against the mounting flange on the camera. This was a critical test. This is when I learned that I would have problems with the FD 50mm f/1.8 hitting the mirror inside the camera at infinity focus. Holding the lens in place by hand, I snapped a few pictures.
A bit over a yard away, the doorjamb to my restroom
Refocused on the medicine cabinet a few yards farther away
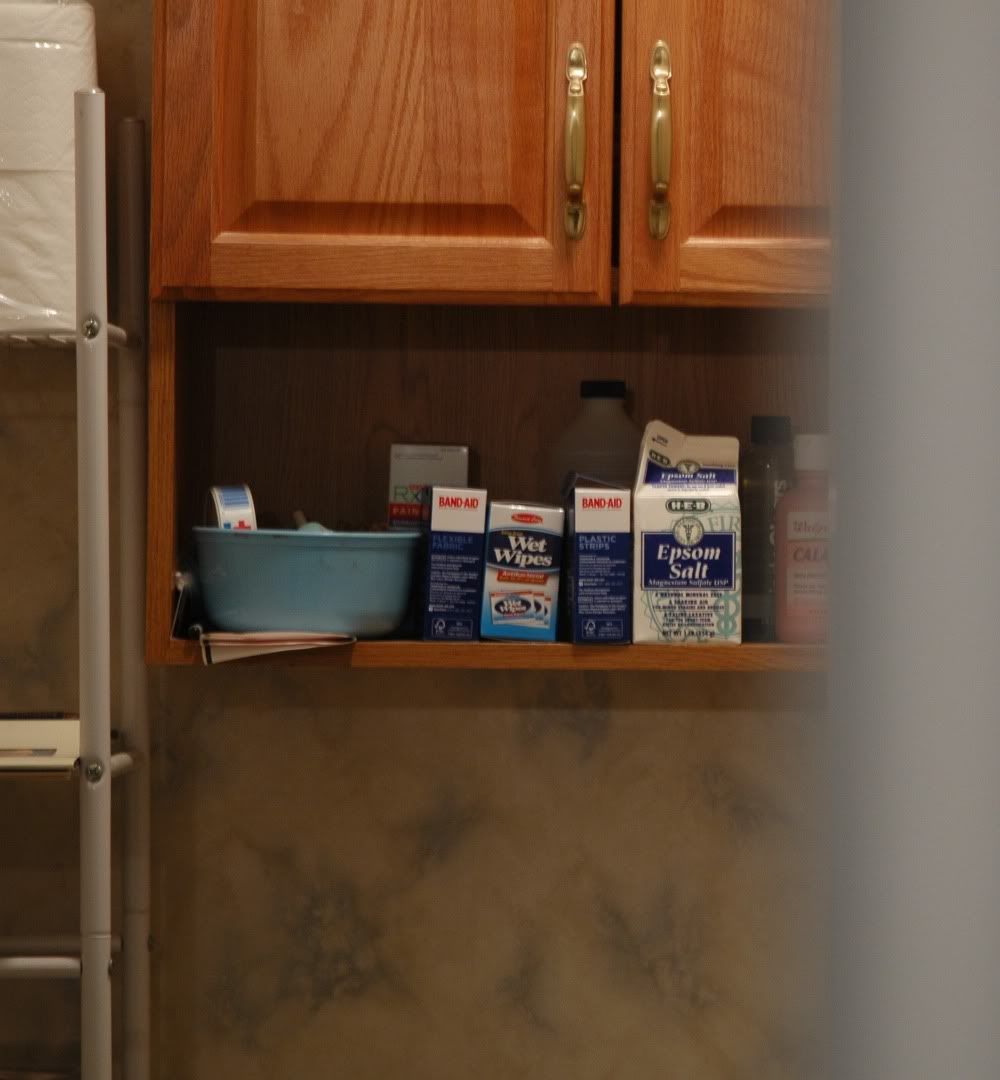
These show promise. Nicely blurred defocus and pretty-far focus without the rear element hitting the mirror. Now for the acid test: Across the street with the optics cranked all the way in (in = farther focus). This picture is not so good. It's at ISO1600, 1/30 second hand held on a windy midnight. It is definitely noisy but it also seems blurry. Remember I'm holding this on the camera with my hand. It was probably focused PAST infinity here because there was no mount. Still, it didn't hit the mirror. That means that when a mount is installed I will have miles of mirror clearance.
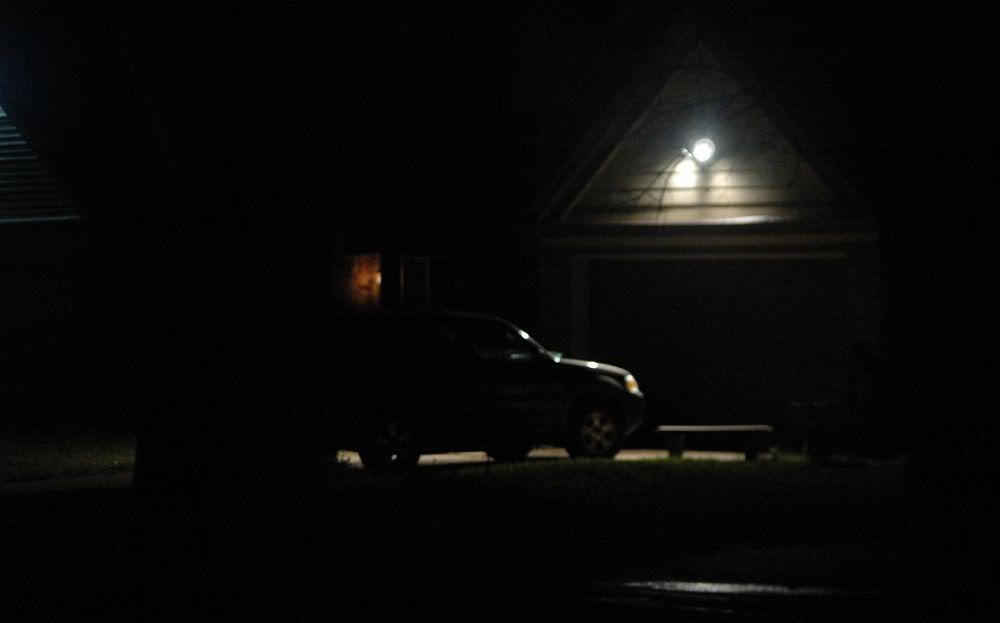
Please note: I am shooting crop sensor camera bodies here. Not film, and not FX with bigger mirrors swinging inside the box. DX. This did not hit the mirror in MY DX DSLRs. Your mileage may vary.
The stop-down lever works backwards from how it would be useful to us. Canon FD mount and Nikon F mount cameras stop down their lenses in opposite directions when taking a picture. This is an insurmountable problem for someone who can't make superdupercomplicated parts. It would be easier and cheaper to buy a Nikon 100 or 105mm lens than to try to make this an automatic-stopping-down lens with automatic metering ability.
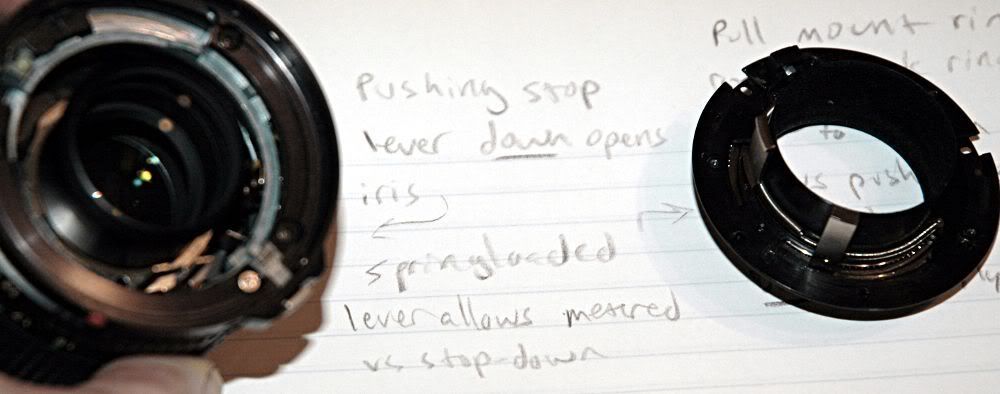
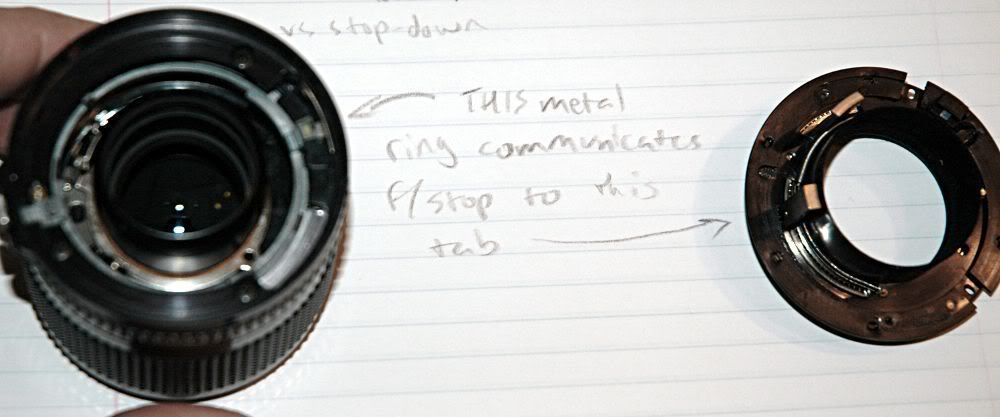
Besides that, the lever pokes out too far "into the camera" to use it as it is with your Nikon.
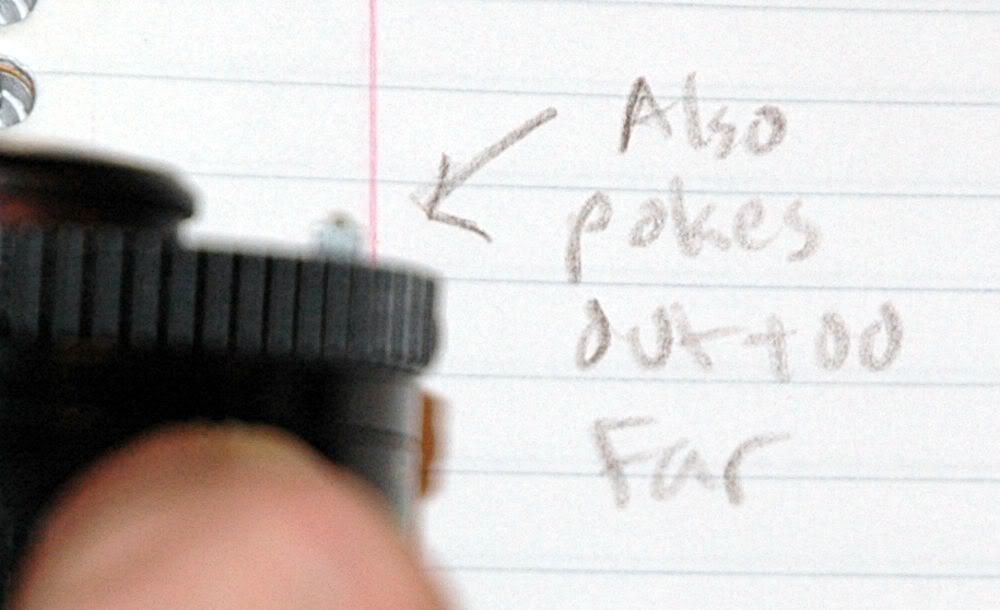
So that's why this is worthless to you. Remove that and . . .

This plain metal ring lifts right out.
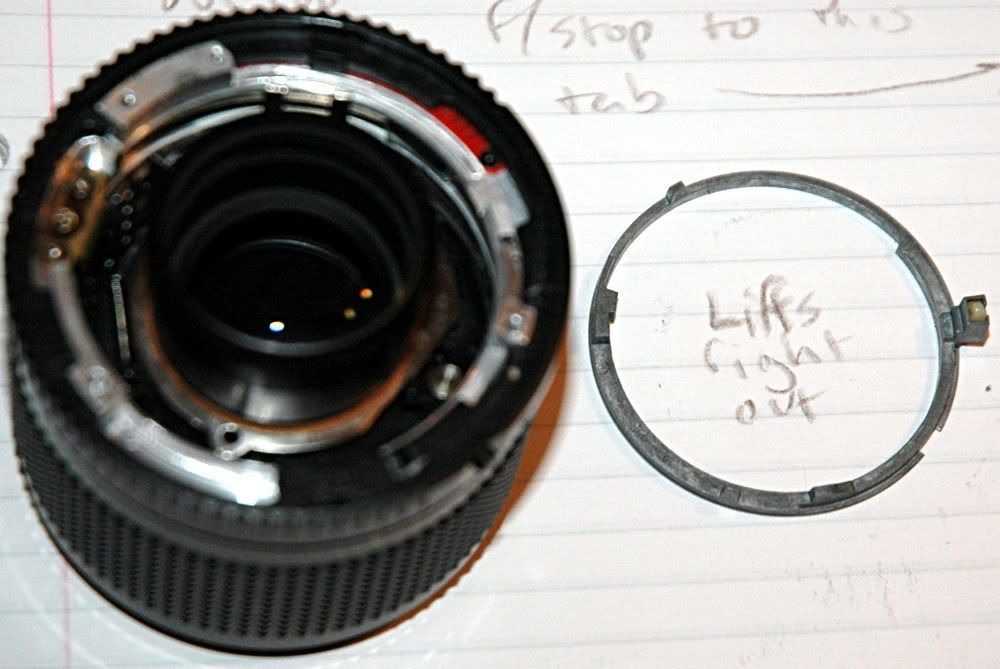
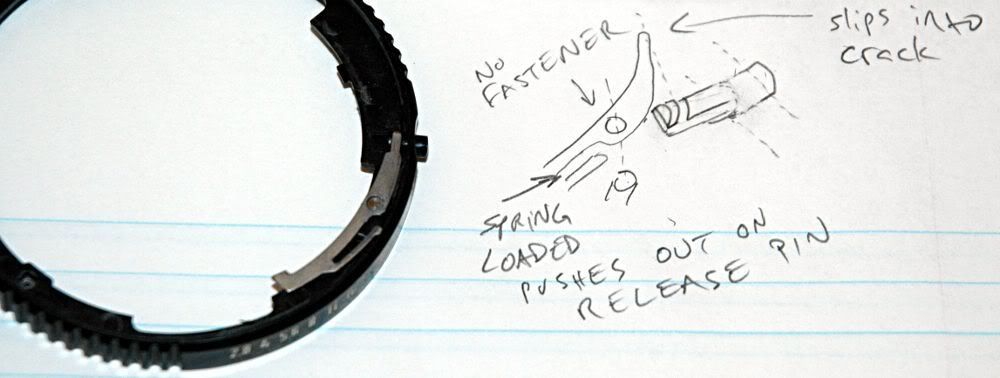
The aperture ring also lifts out. Lift it out. A metal lever is pushed by the button poking out through the aperture ring. You CAN leave it, but I found it made using the lens a little harder. When the aperture is wide-open this little tab can pop out of place inside the mechanism and then you have to wrestle with it to get the aperture ring back into position. I pulled this lever out, along with its mounting/pivot pin and the button that goes through the side of the ring.
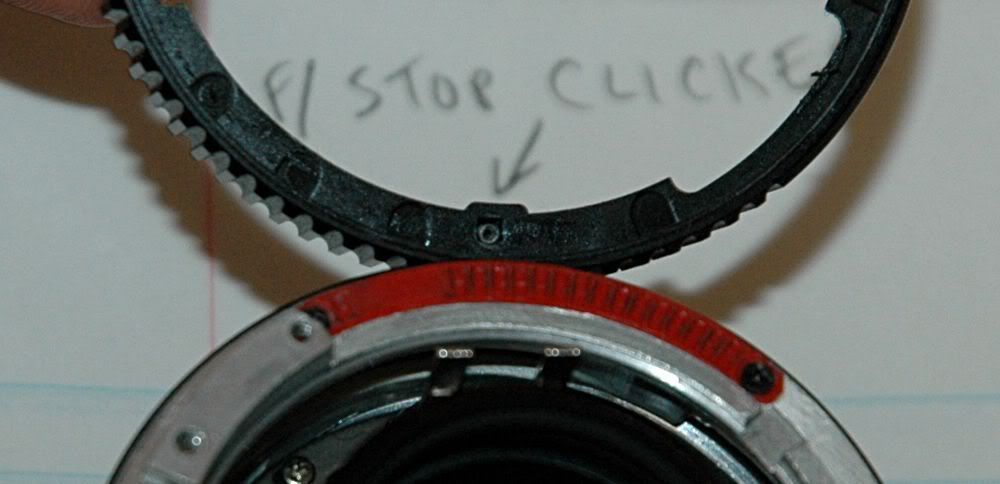
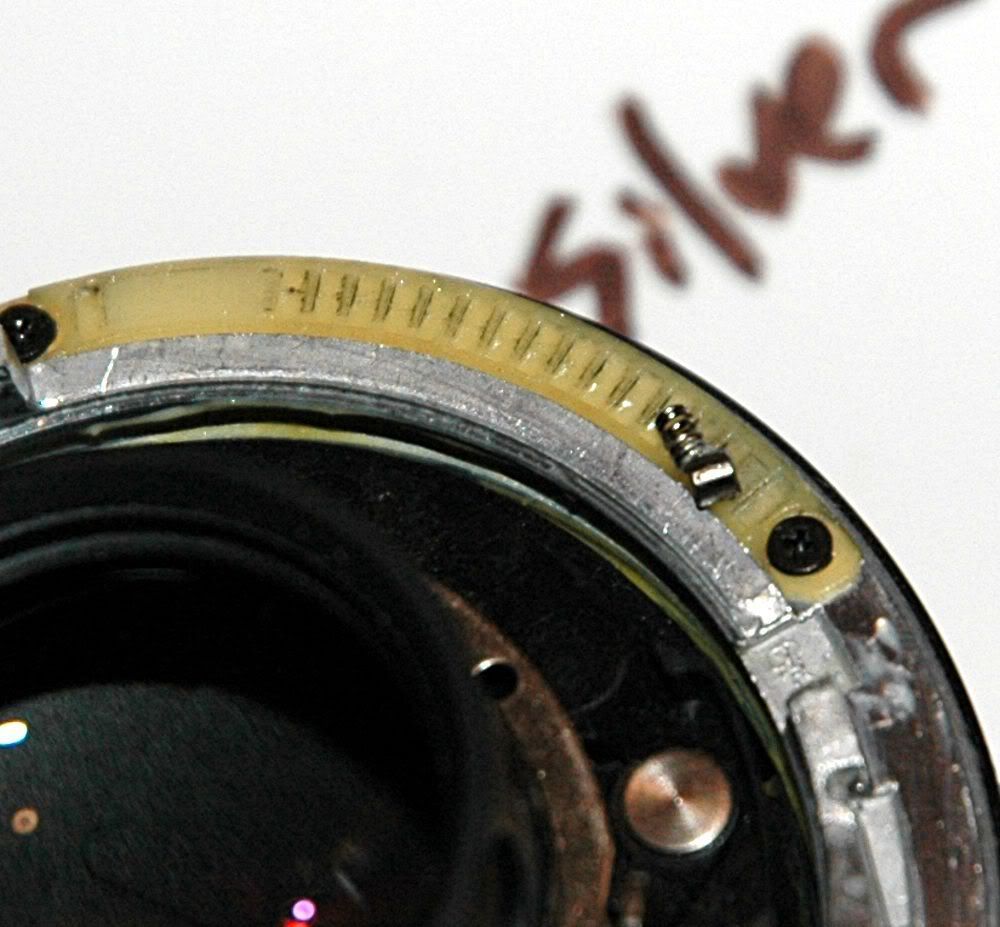
Speaking of things that are left out, I lost something. The f/stop clicks are caused by a metal cylinder sliding into/out of little grooves in this plastic piece. I don't care for it so I didn't try too hard to find it. If you want to have clicks to indicate aperture and a little bit of a stop-holder, do NOT lose this little cylinder. It is spring-loaded by a little spring in a little hole in a little housing protruding from the aperture ring. The grease is all that holds it in.
It's tiny. Teeny. I managed not to lose it on my 50mm, here is what it you will be crawling around on the floor looking for if it flies out:
You CAN leave in the metal tab and plastic button assembly. If you do, you will have to take care to assemble the f/stop ring properly. It only fits on one way.
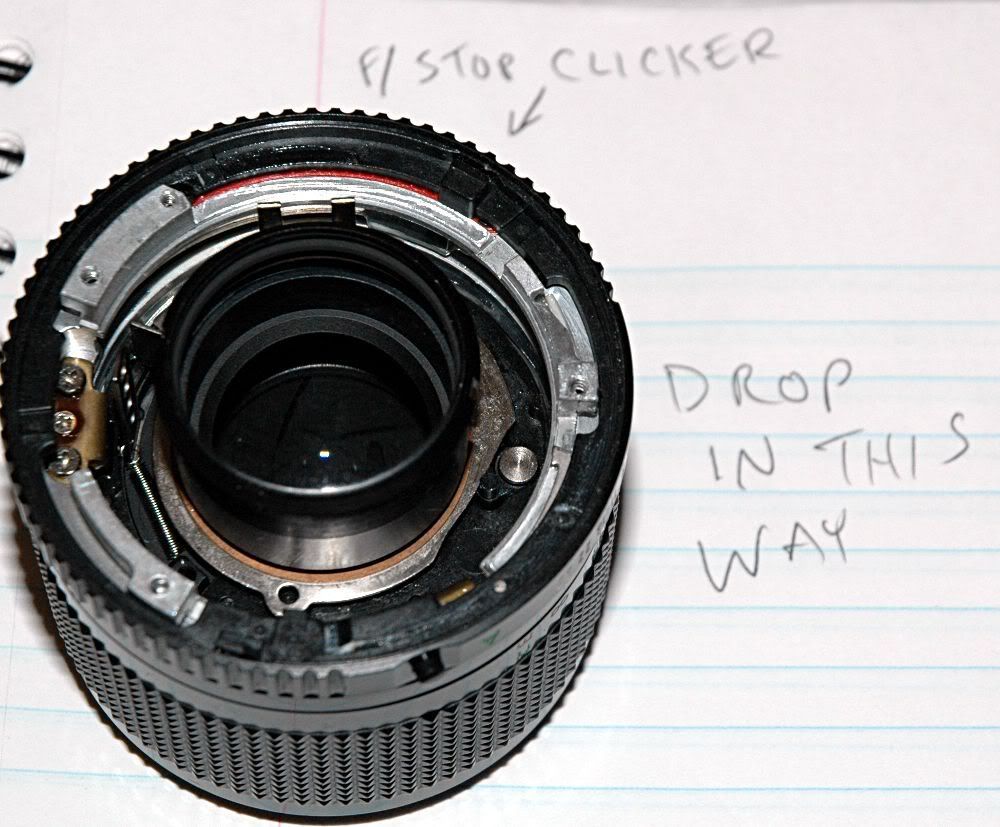
Push the button to retract the lever into the ring:
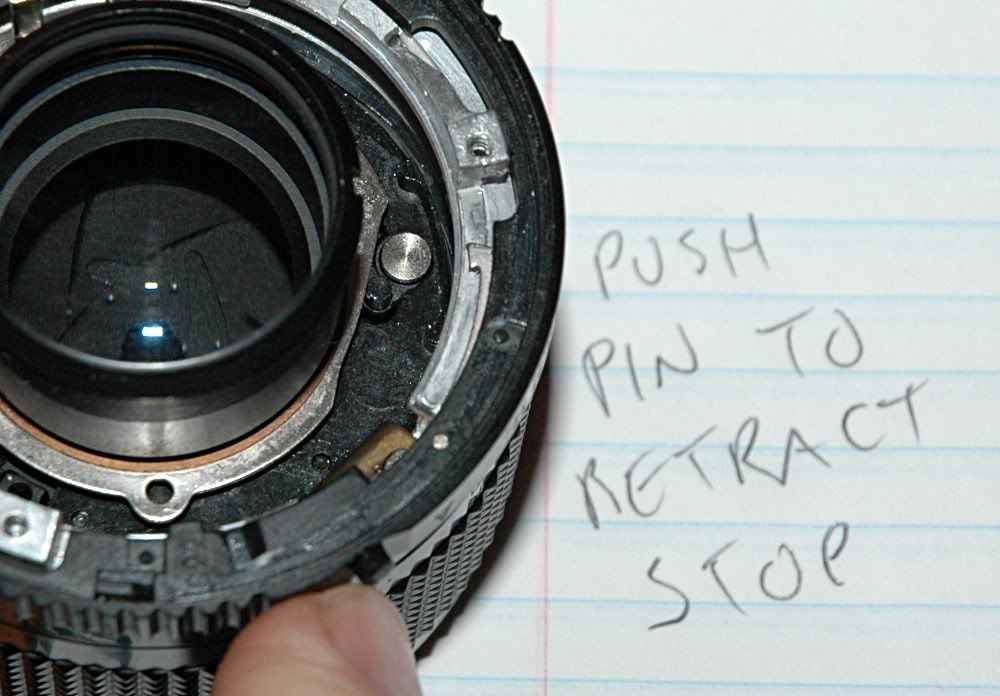
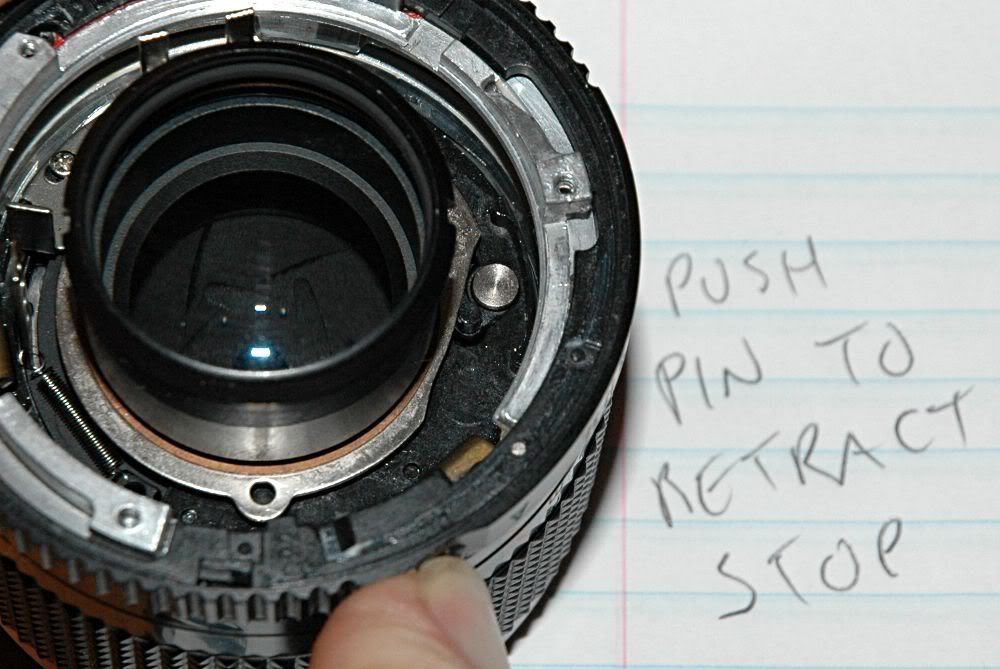
Then rotate the aperture ring into position while holding down the button. If you leave the lever installed, eventually the aperture ring will pop loose and you will have to push the button and squeeze the aperture ring to distort it, until the tab pops back down into position. So I left it out.
At the top of this picture you see the iris-diameter-setting angle on the metal ring around the inner barrel of the lens. Note that the big silver tab on the top/left (10 to 11 o'clock) slopes down to a narrow ring on the top/right (1 o'clock). In the top/middle (12 o'clock) there is a shiny metal dot. That is a pivot point. The pivoting piece has a pin that rides this angled piece of steel. When the pin is farthest from the center of the lens, the aperture is open wide. When the pin is nearest the center of the lens, the aperture is closed.

At 8 to 9 o'clock there is a funky looking thing in that picture. That is the iris lever, attached to the ring that rotates and moves the pin. Sorry, it's a bit tough taking a picture of the side of something down in a hole! Here you can see (about 10 o'clock) the side of the arm a bit. There are two arms, with a brace joining them in the middle.
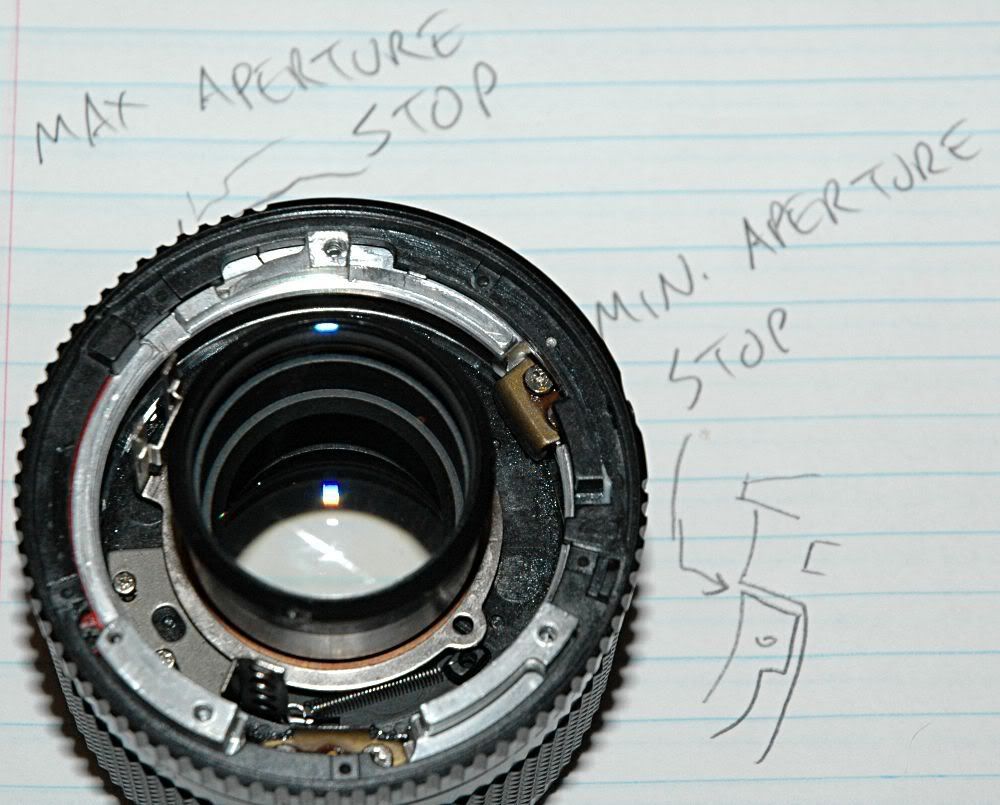
The lens was designed to have a lever reach down between the two arms of this lever.
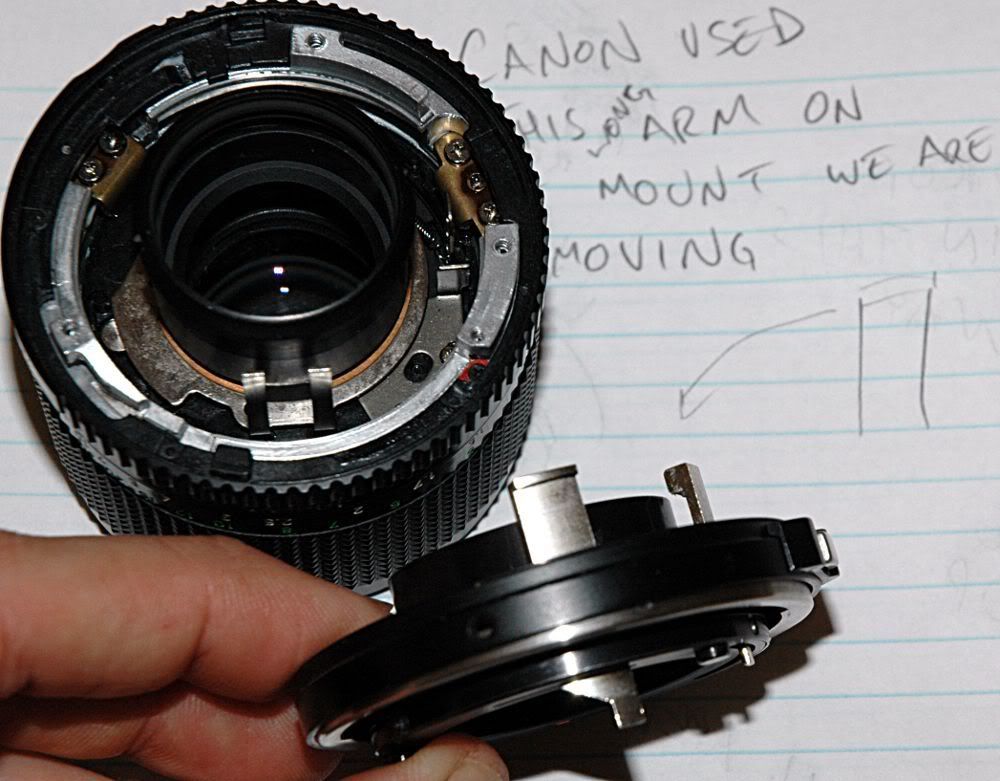
We need some new way to actuate this mechanism! The aperture ring would be an ideal place to mount the new way, because it is already present and calibrated appropriately. There are a couple of problems; one is retention (which we will address later) and one is how far the lenses move during focusing.
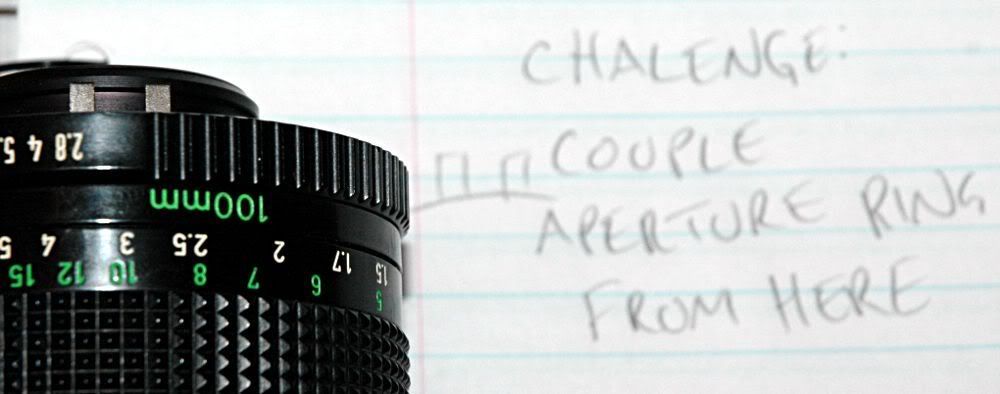
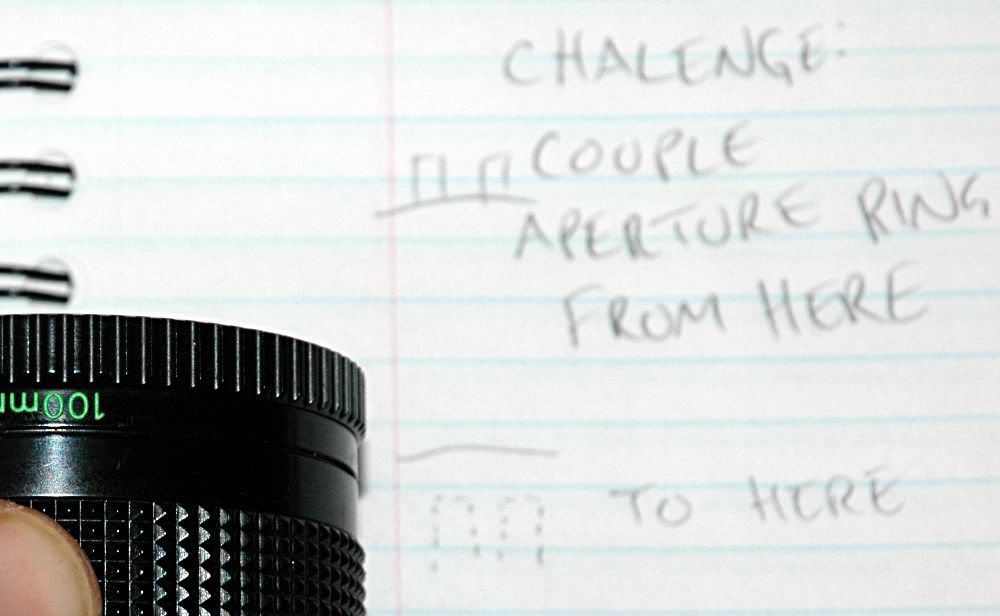
It seems like we will be well-advised to use these long arms designed for the purpose that are left on the lens. But what to use to couple the arm to the ring? How to mount it? THIS requires a bit of creativity.
It turns out that (turns! it's a joke! shuddup you.) AHEM!
It turns out that the f/ clicker is pretty close to the aperture lever when the lens is assembled.
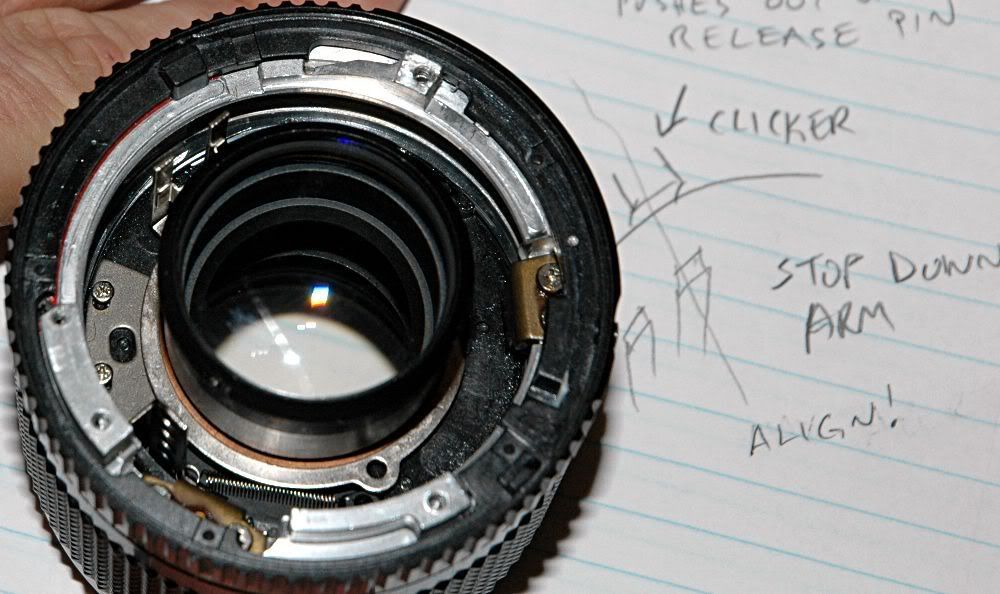
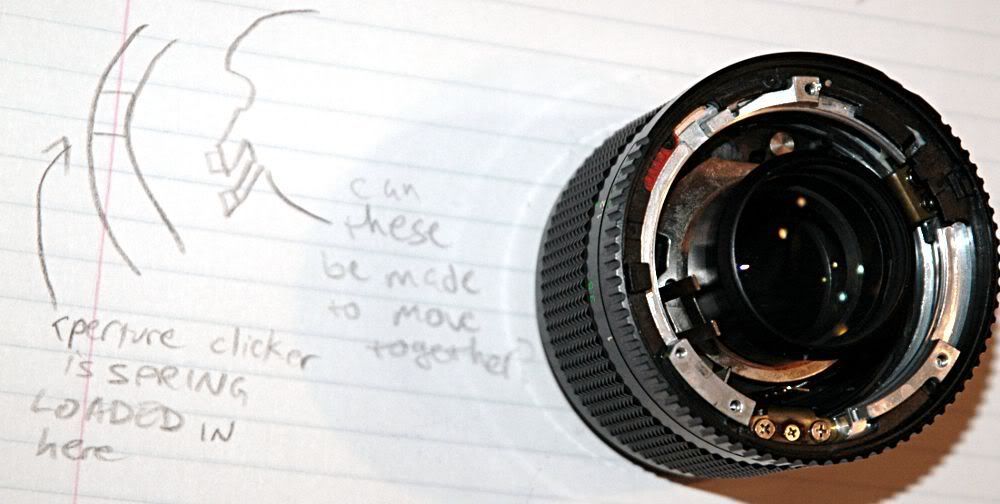
My idea was to use the relatively large and sturdy housing for the f/clicker spring as an anchor point for whatever I used to couple the ring to the lever. But what to use? It has to be long enough down inside the lens to couple through the whole range of focus and small enough not to be in the way of anything or hit anything during operation. What was needed, my friends, is a custom bracket. So I got my custom bracket and . . . oh, wait. So I dug into my pile of parts and found something that looked promising. This part is a piece from the nearly-ubiquitous Nikon 18-55mm kit lens. I don't know what it did in that lens, but it is aaaaalmost ready for use as my custom bracket.
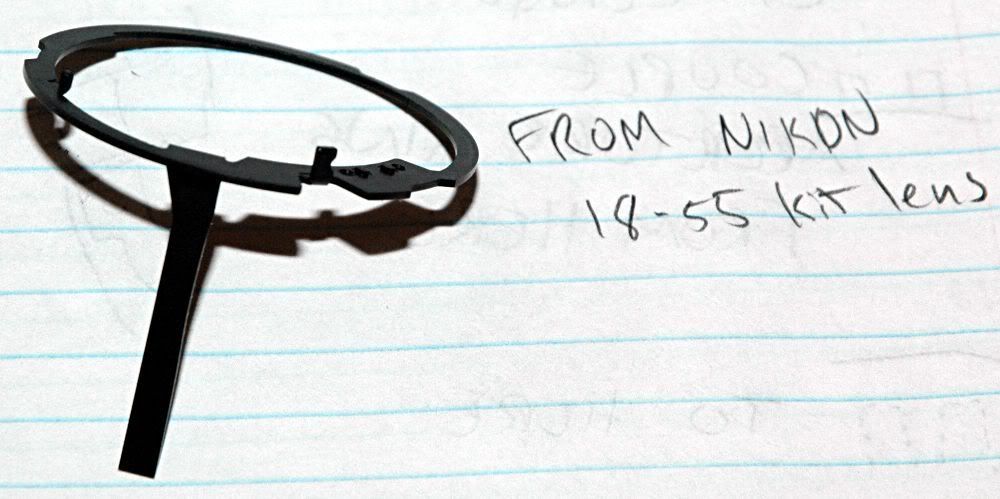
I nipped and tucked, bent and filed, sanded and test-fit and bent and filed and nipped a bit more off the tuck and . . .
you would hardly know I had done anything here!
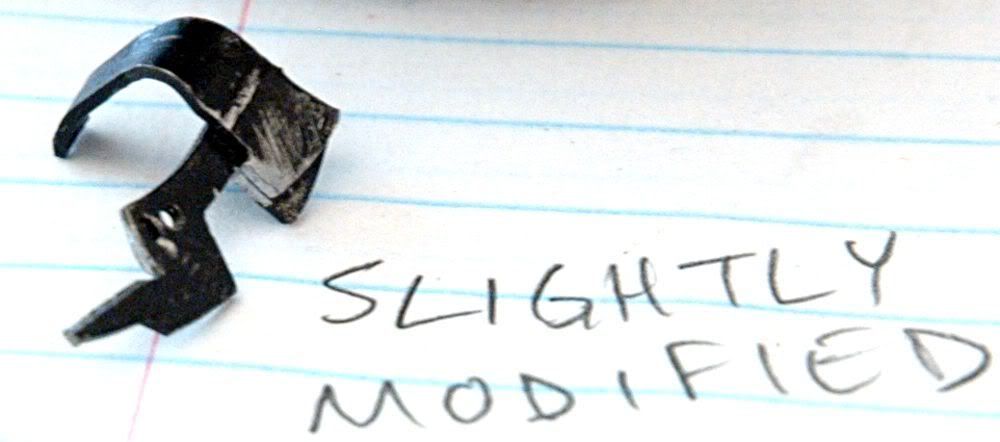
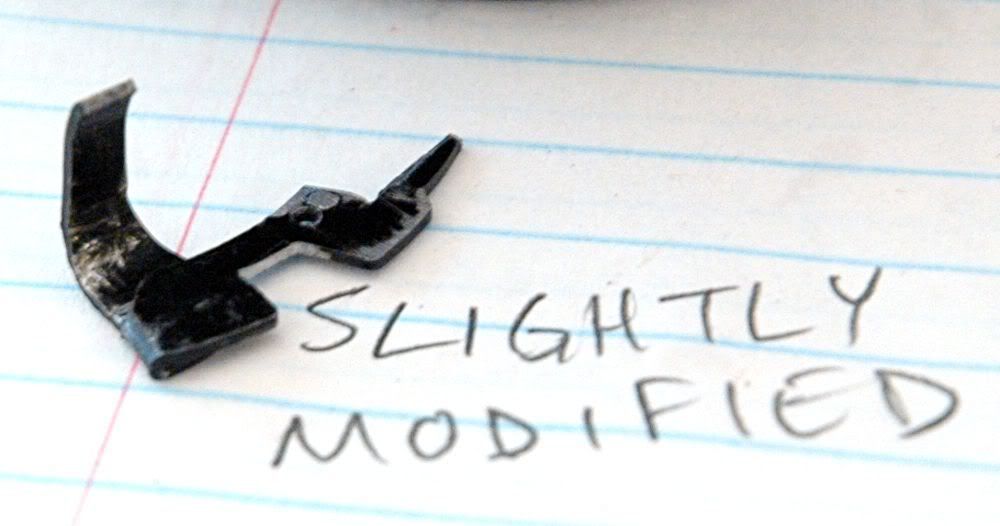
At this point I used a bit of double-sticky tape for temporary mounting.
The notch in my custom aperture coupling bracket is touching on both sides of the f/clicker spring housing, preventing the bracket from moving much as the iris is adjusted.
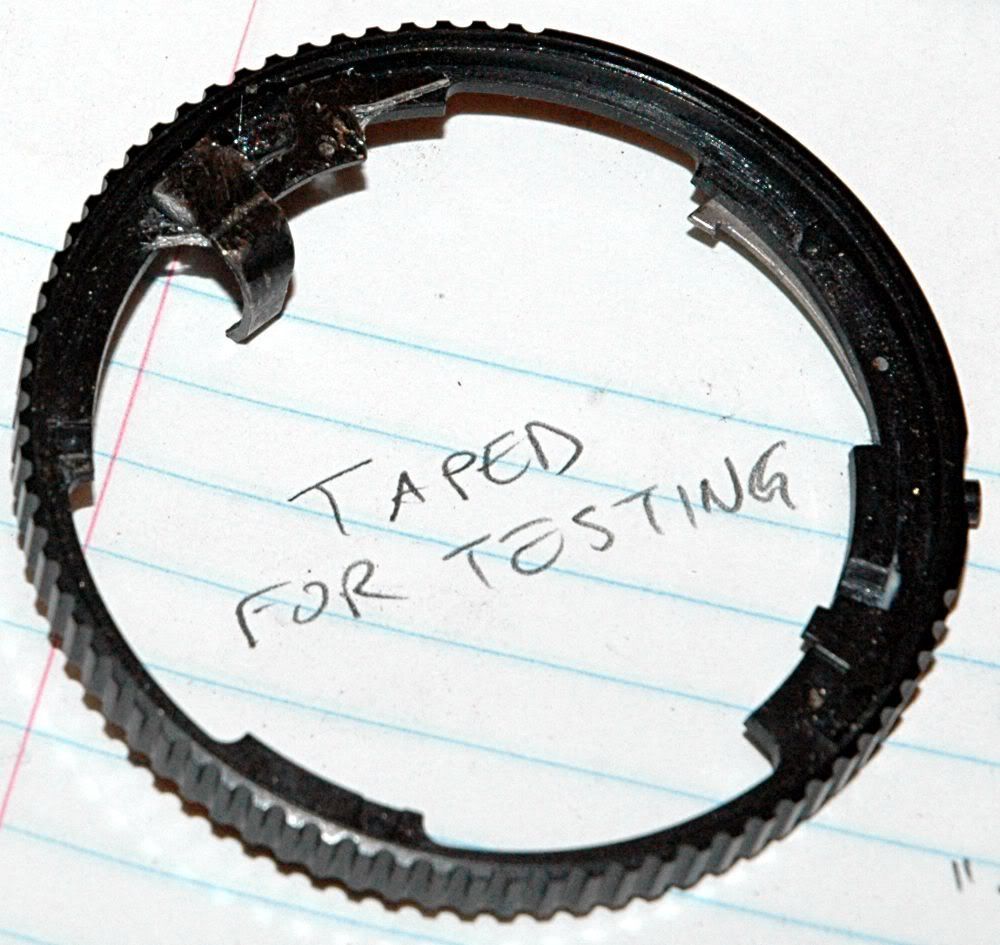
Now it was time to fit the mount and start taking pictures!
Except not. There is yet another lever on the iris mechanism that is useful IF the camera is able to operate the aperture. My camera is not, and this lever pokes out past where I need to mount the F mount flange. This is a problem.

Time to pull the lens apart again. We need to get down there and Do Something with this lever. Take careful note: Do not take this lever out entirely. It spring-loads the iris blades. This is a thing you want to have work, but not be in the way.
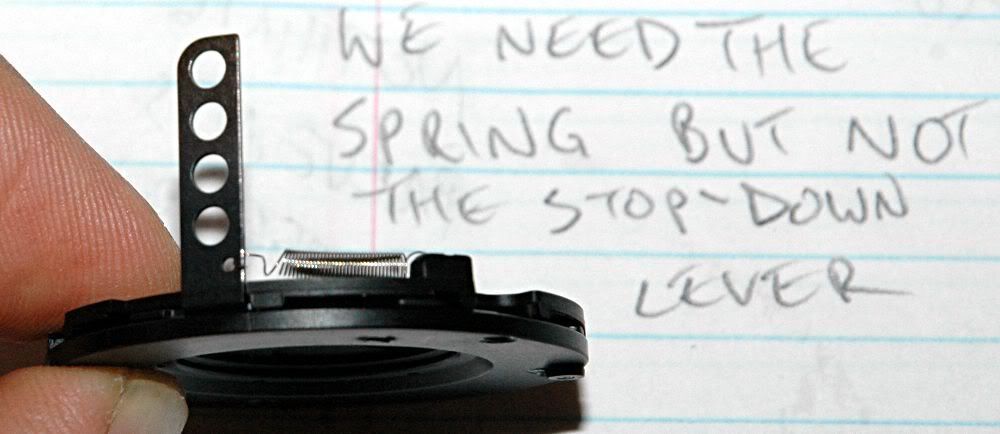
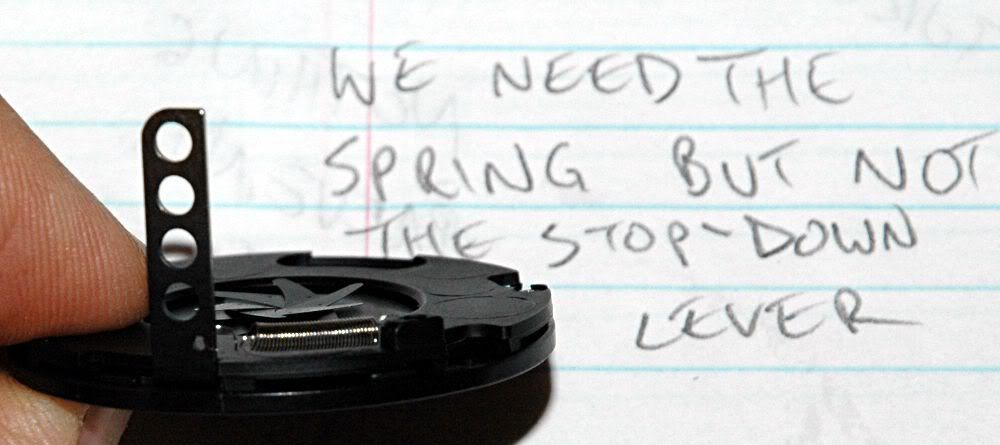
A pair of cutting pliers was employed.
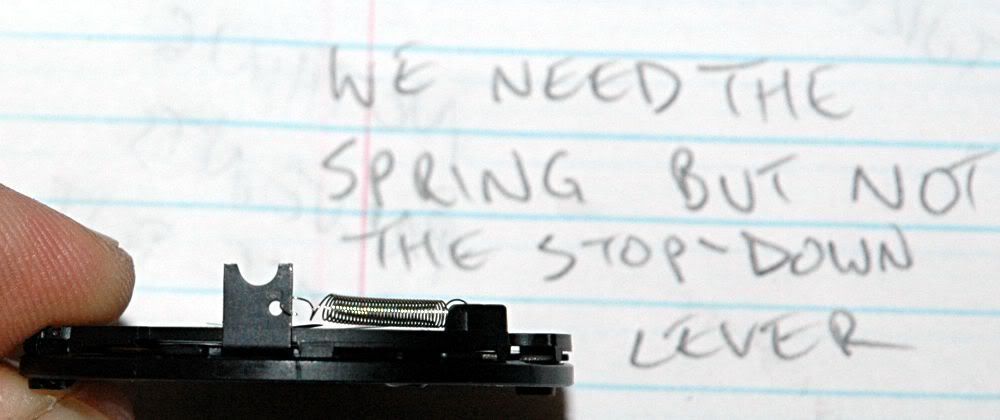
All RIGHT! NOW we can bolt up the mount! Put in the top screw and . . . oh, wait. If you want three screws to hold on the mount, you are stuck here. One will kinda line up with the stock Canon mount, and two are totally off. You need to make two new holes and elongate one. Then you need to make a recess around the holes so the screw heads sit flush or below the level of the mating surface on the flange (where it rubs the camera).
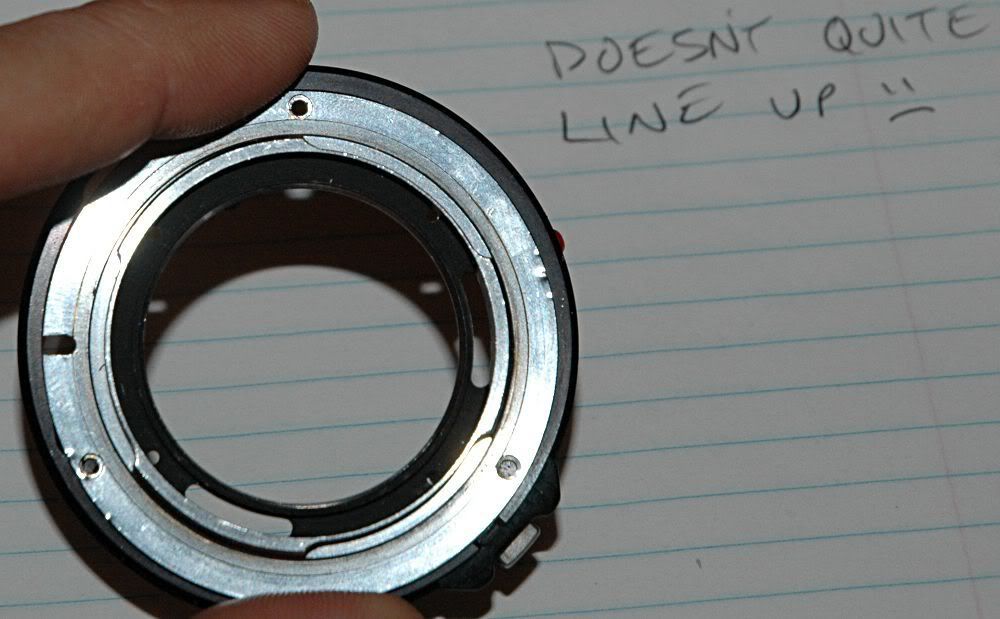
You still have a handy screw hole template, if you didn't throw out the parts you removed from the lens. The part of the Canon lens that used to bolt up to the mounting tab/legs inside the lens has a perfectly spaced set of holes to use as a stencil. Transferring the holes to the new mount seemed simple enough. This little stop inside was in my way, so I pulled that out and discarded it. These two screws I kept for later.
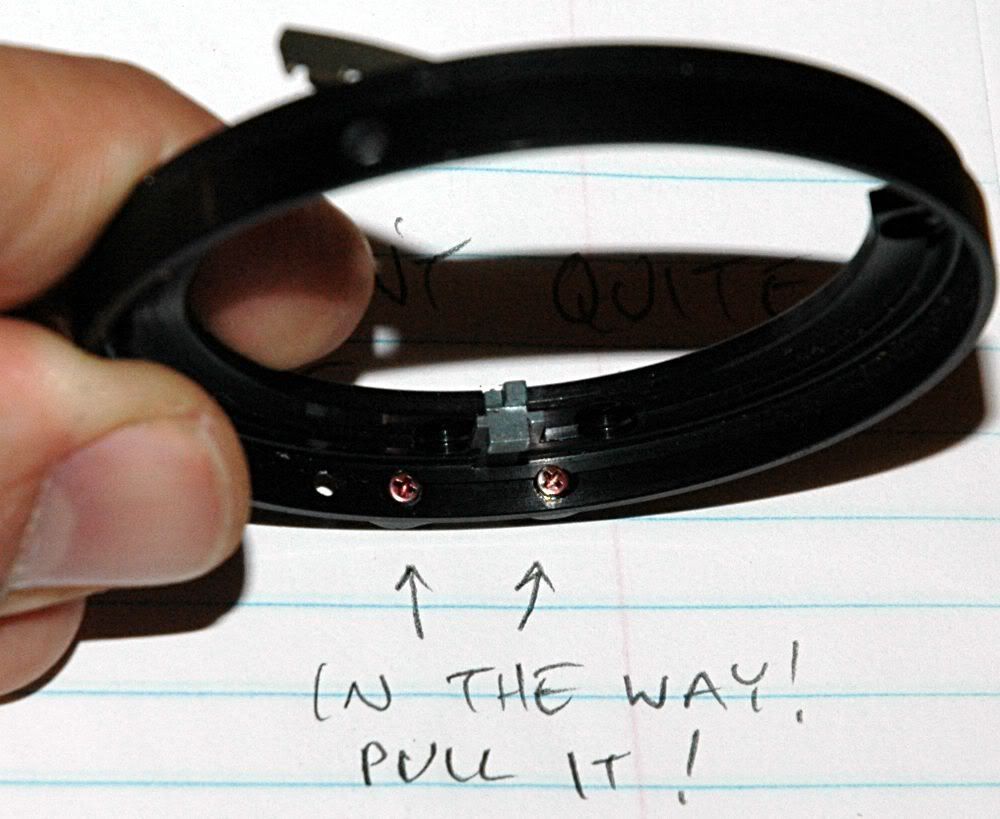
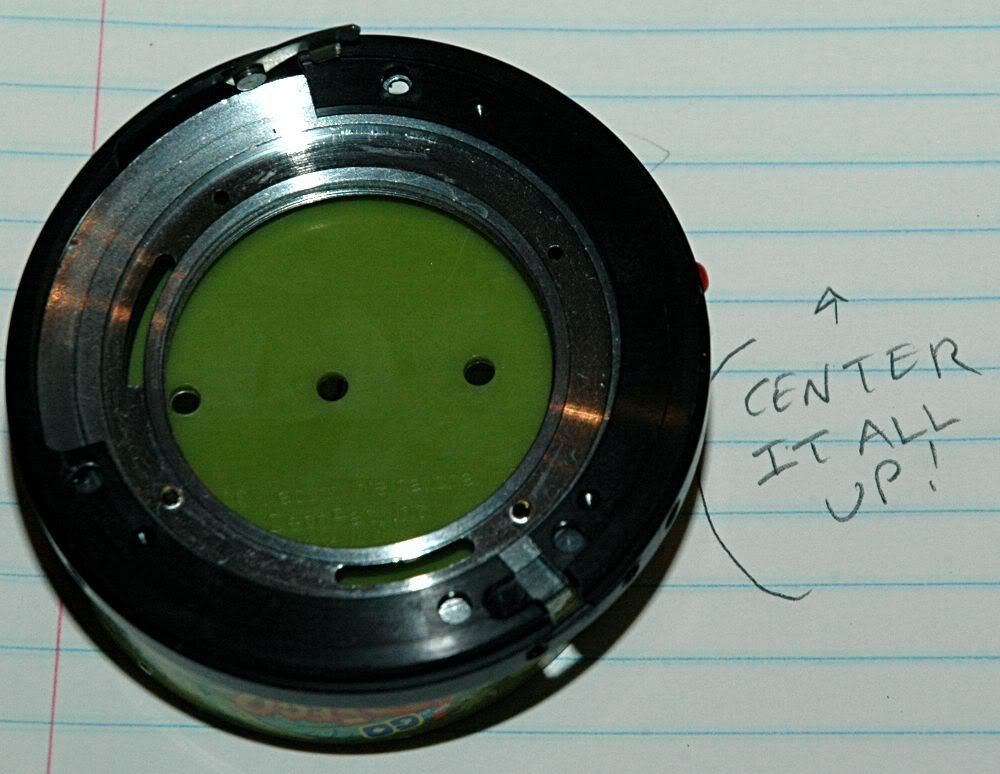
Grab a small cylinder. I used the body of a broken toy compass. Line everything up the right way, remembering that the mount screw locations are not evenly spaced around the circumference of the lens - if you reverse the stencil or your mount, you can have the holes in the wrong place. Be careful. Here I have the mount resting camera-side down on the little green cylinder, and the Canon part is also camera-side down. Center it all up VERY carefully, press down hard, and use a pencil, stylus, marker, or whatever to transfer the screw locations to your new mount. I used a pencil for this.
It showed me that two holes are close and one hole is so close it just needs to be elongated. The fourth hole I chose not to use but you could.
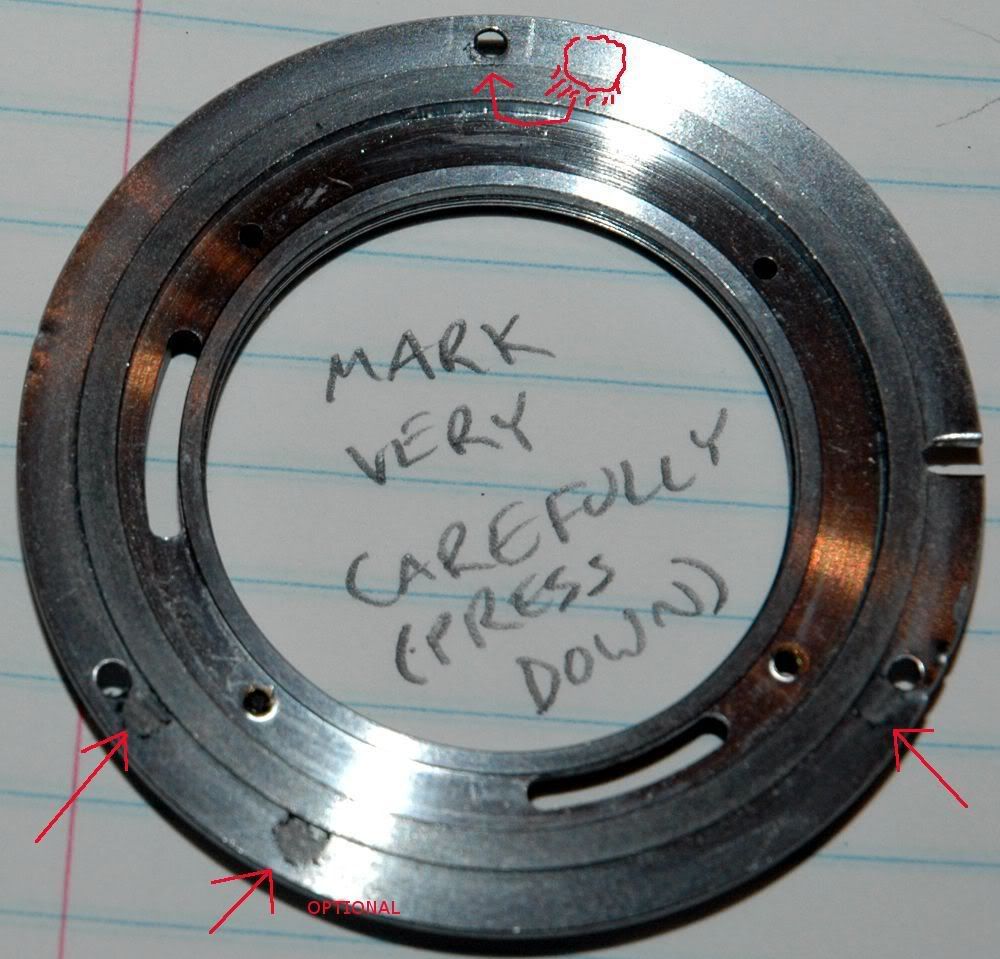
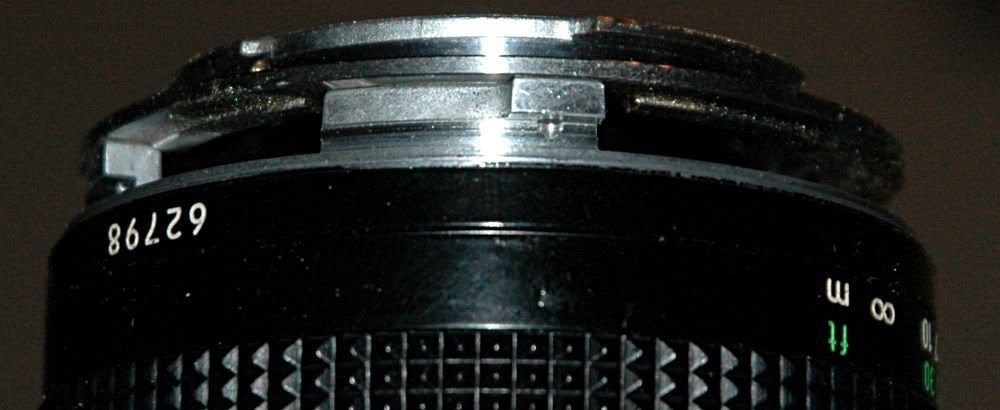
I also noticed that this mount had a rib all the way round that hit on the mounting bosses in the lens. I filed the ridge off in the appropriate spots.
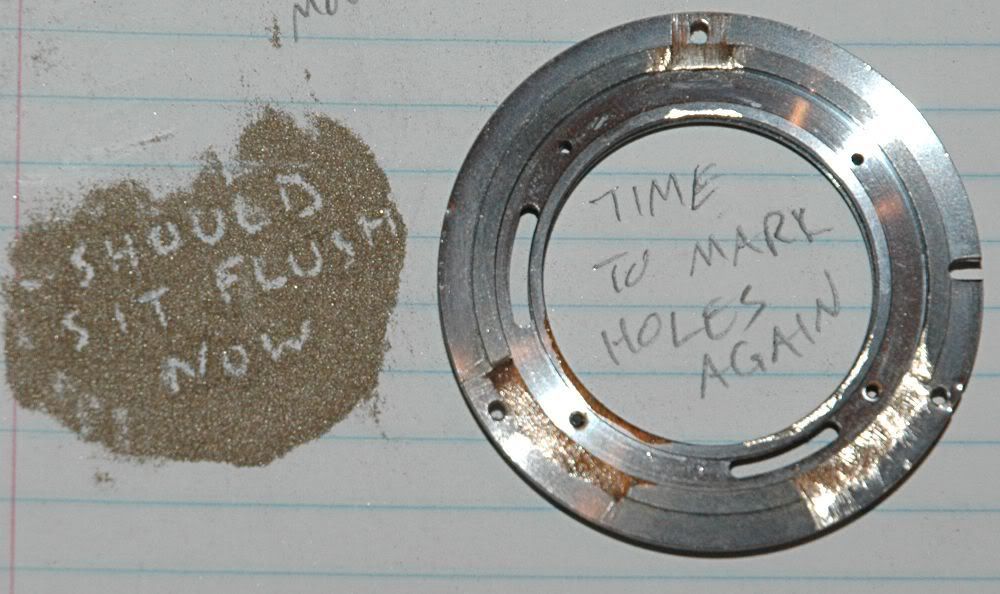
Now the mount will sit flush on the lens. Time to make some screw holes.
A small mill would be great for this. I used hand tools and a couple different size drills. one drill for the screw hole and one for the step/recess around the hole. This took a while and made me nervous. Drill too far and it will be a mount to throw in the trash. Making the recesses for the screw heads was the tricky part, and it took a while but finally I got them all roughly flush. I did touch the screw heads with a file too, as they were a bit round and it saved some thickness on the mount flange to reduce the crown on the heads. The key here is remove a zillionth of an inch at a time, and then test-fit. During test-fitting I found that the aperture lever would hit the inner diameter of this particular mount. I removed a section of the inner diameter to allow the aperture lever to operate freely.
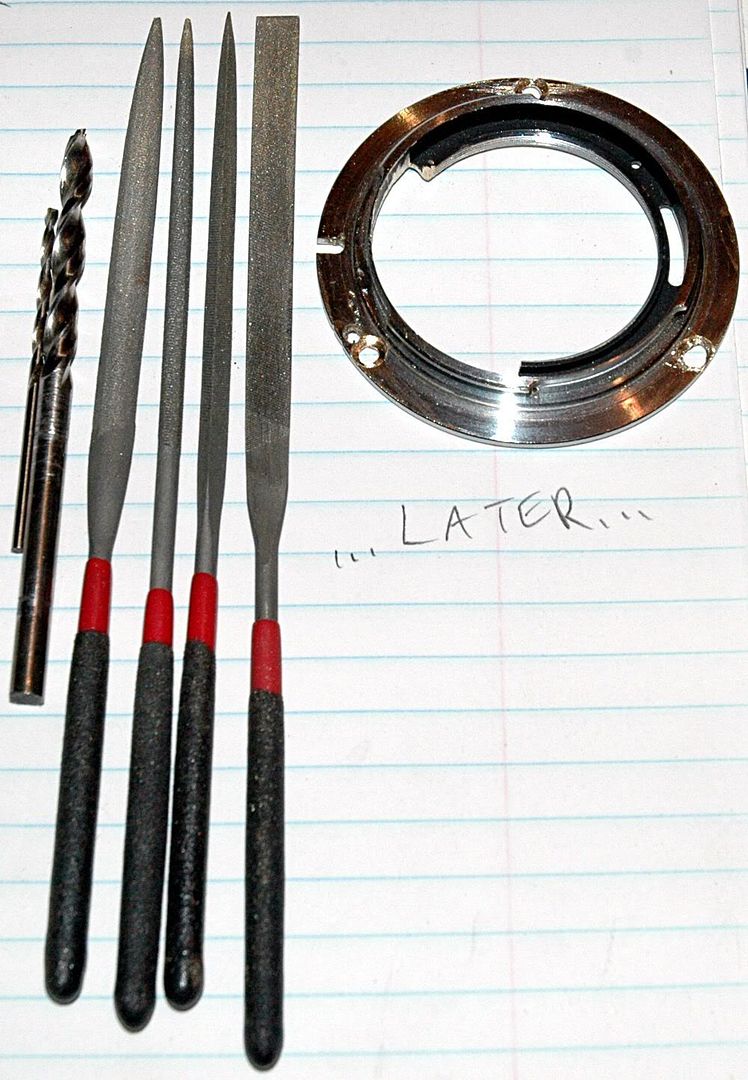
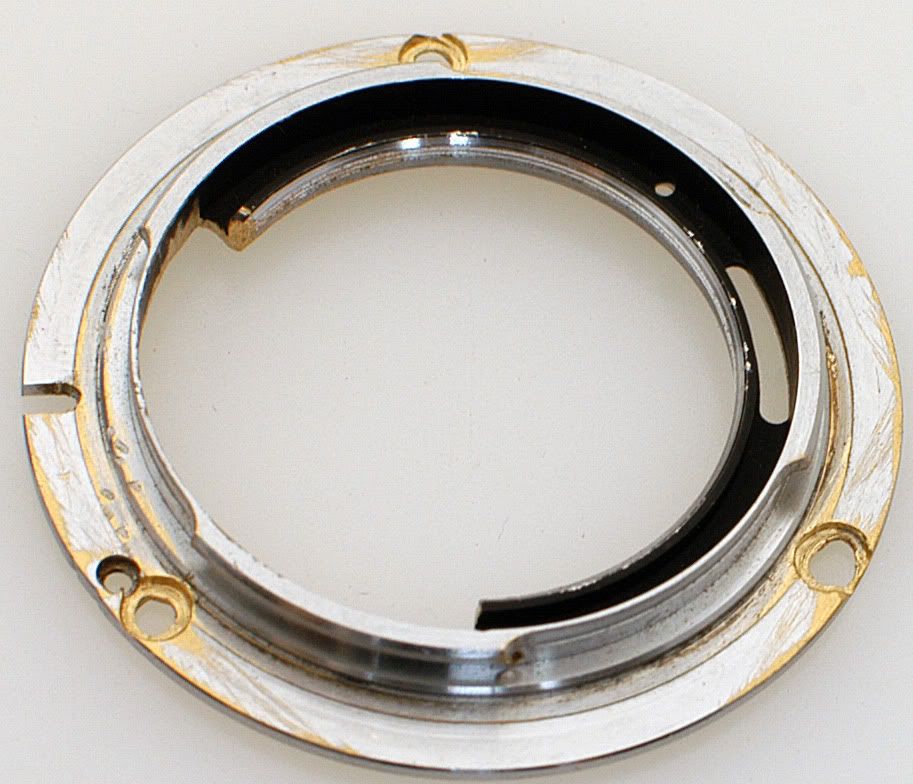
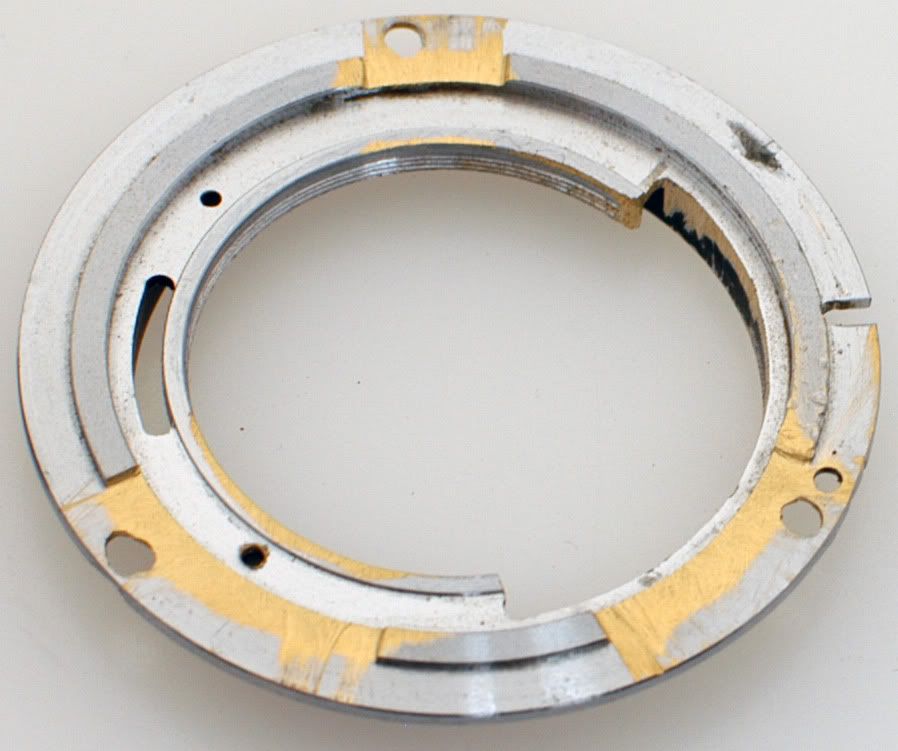
Yes it is rough. Smooth enough for now. Some polishing later will help a bit.
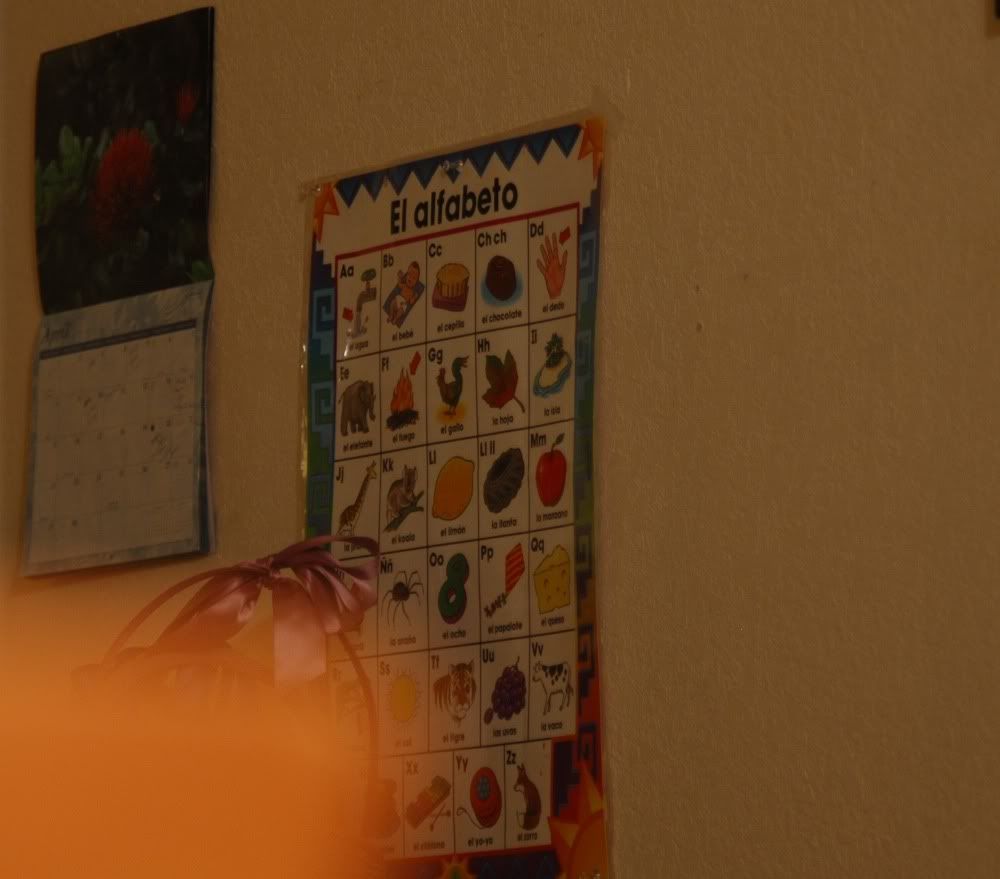
NOW it was time to mount the lens and start taking pictures! CLEAN EVERYTHING and put it back together. I probably should have kept working, but I hadda make a couple of test shots first. Note: this was in the middle of the night. You are looking at a wall maybe 7 yards away lit by the lights in a different room. Iso 200.
Here is my zoom lens, as long and wide-open as it goes, set on the table to allow a 1 second exposure at f/4.5 at 70mm. Aside from the long exposure time this is a very happy result for me.
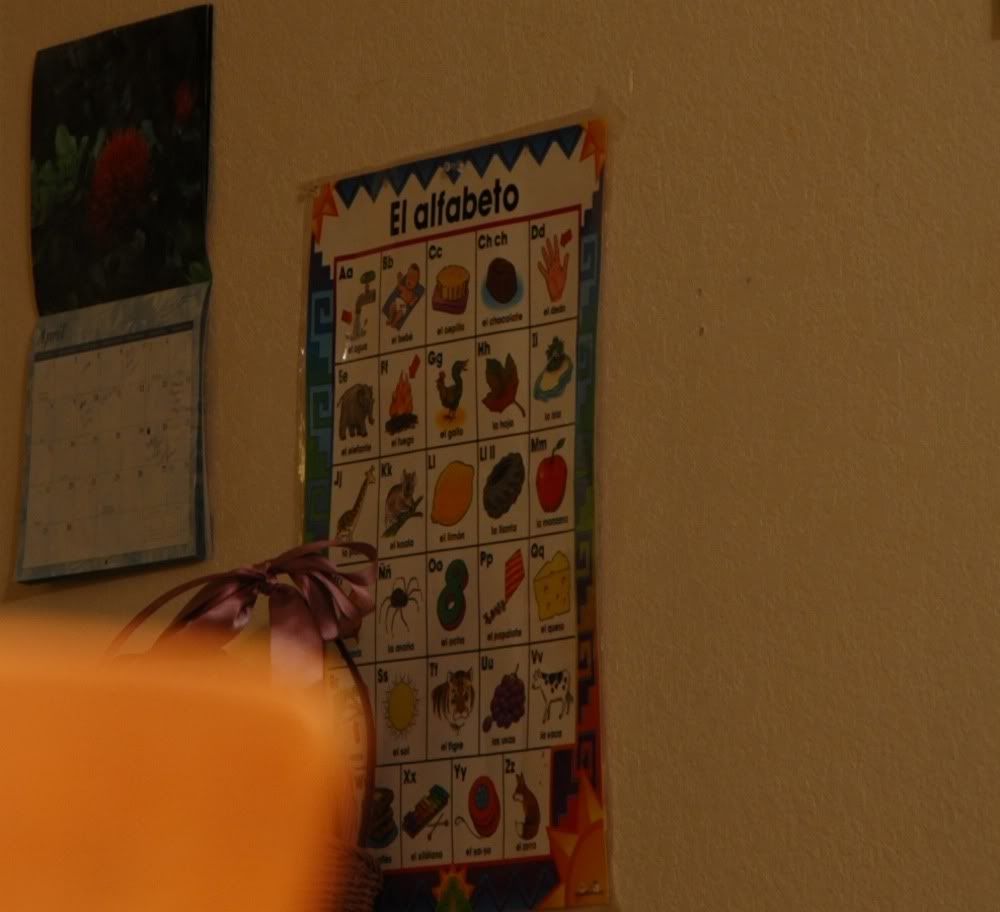
And here is the subject of tonight's experimentation doing its thing. Again 1 second, but this time at f/2.8. Brighter, anyone?
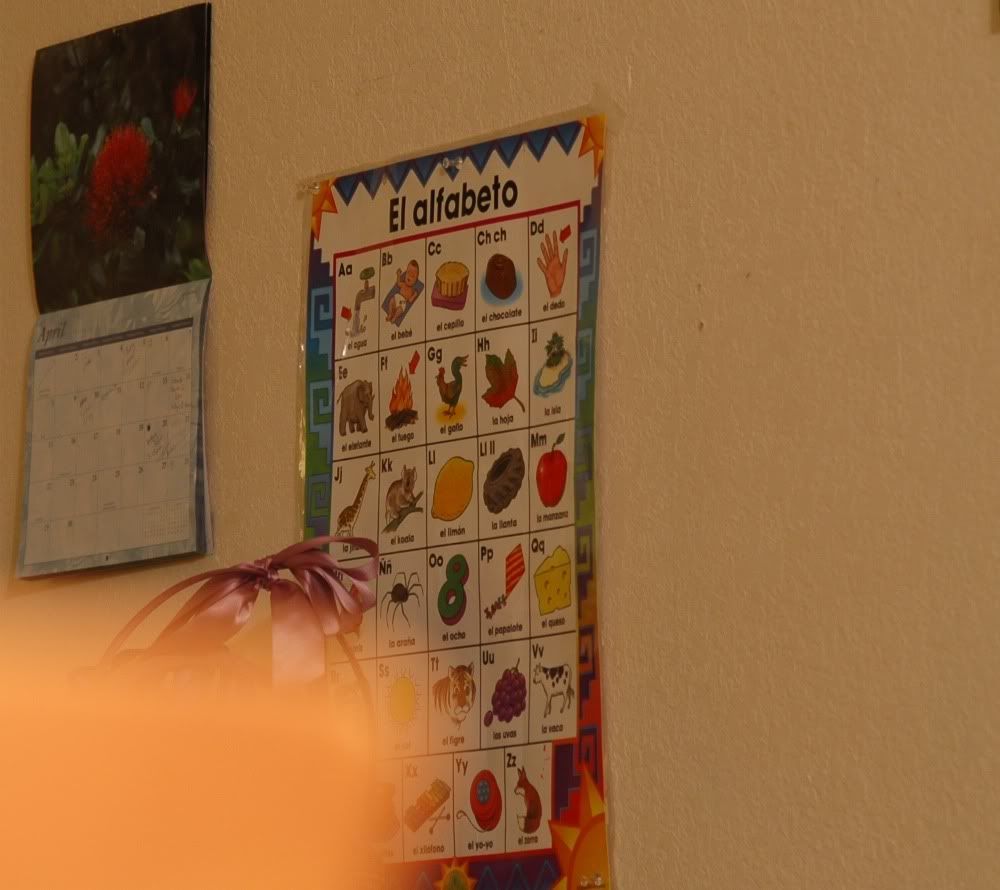
And here we are at the same brightness as with the zoom . . . at 1/3 second.
But will it really focus to infinity? My 50mm project sure didn't. Infinity is down the street in the middle of the night. Let's go see.
This is several houses down the street, on a different block. This was taken at 1/25 second which (for me) is handholding territory. And it is focused. to. infinity. Score! The ISO equivalent is 1600 so it is a bit noisy out of my camera, but still, a useful handheld no-flash shot at night is a huge win.
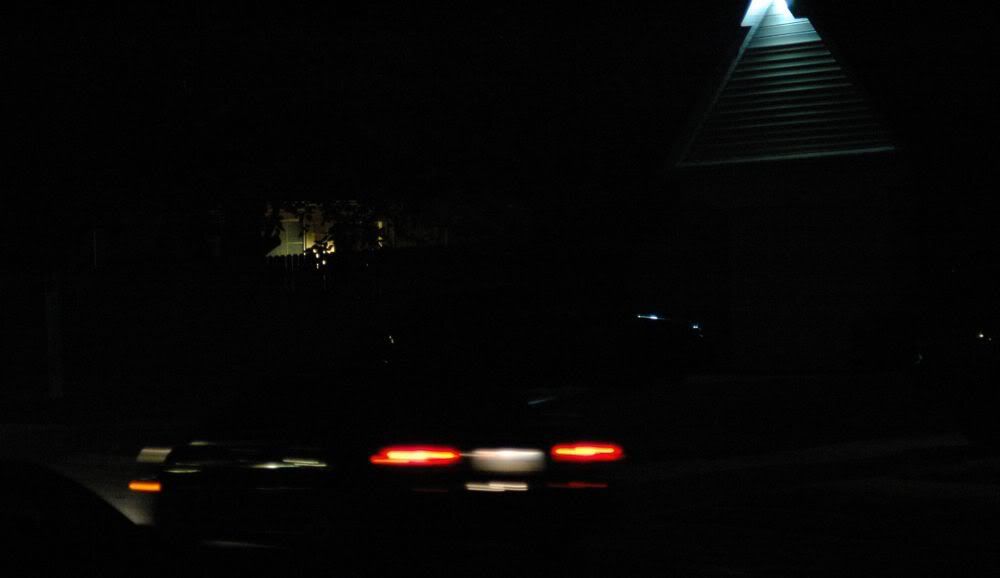
Slightly closer to home, rested on the roof of my car for 1/2 second at ISO 800
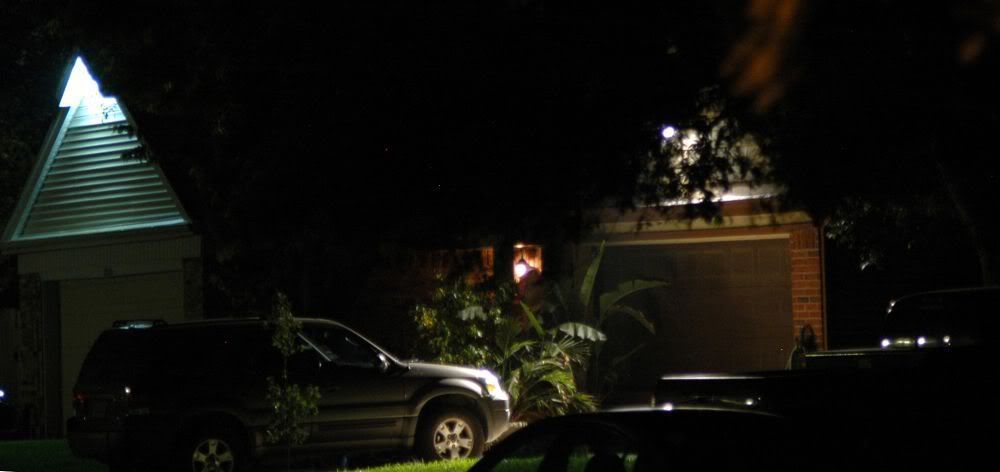
and finally, across the street at 1.6 seconds at ISO 200. Focus is a bit of a guess . . . this is brighter than my eyes saw the scene.
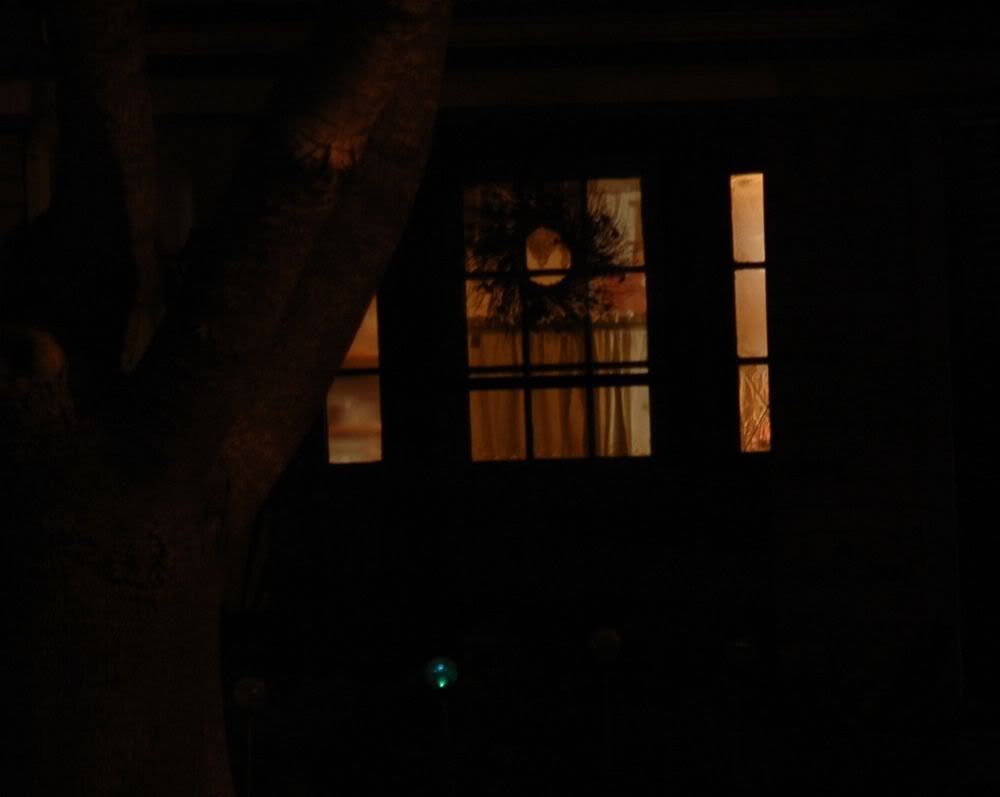
Fine, Enough! it goes to infinity! How is it up close?
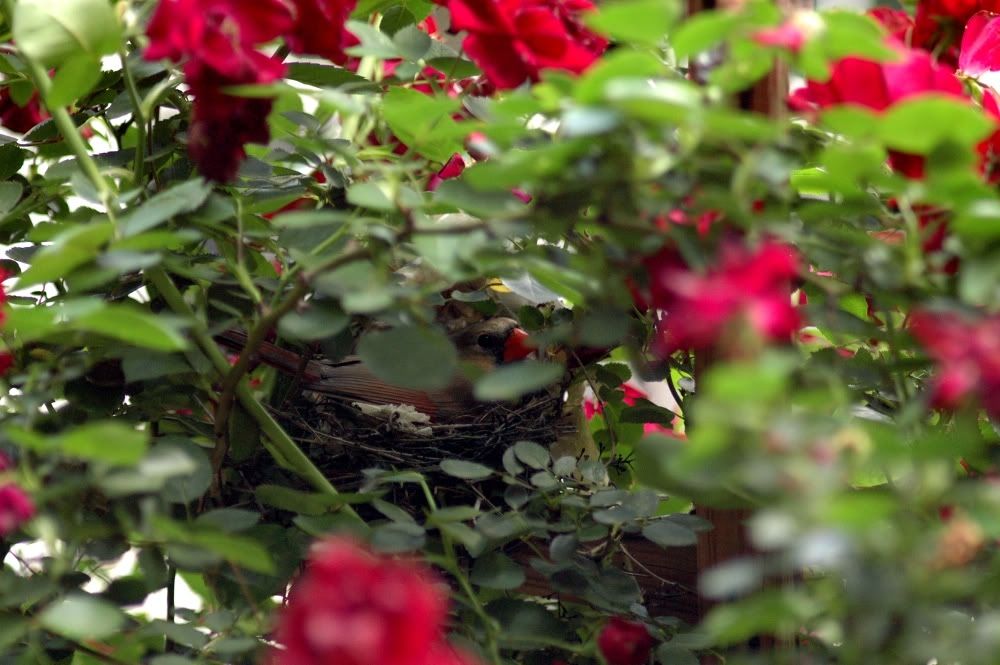
Here is a bit of a noisy shot at ISO 800, but well into easy handholding range at 1/160 second. This is focused just over a yard away, about as close as this lens gets. I touched it up a bit in GIMP as it was slightly OVER exposed. That's what you get sometimes with a lens that won't meter on your camera and you have to chimp exposures to get close. The highlights are well controlled and the defocused areas are smooth. And the cardinal, she is sharp. This is all I can ask out of a free lens bodged onto my camera from an entirely different system!
Well, I could also ask that the aperture ring stays on. This one didn't. Nothing holds it on but a little tongue and groove arrangement that is ineffective wide-open (as it has to be so you can mount the aperture ring on the lens). The f/clicker spring housing kinda prevents it from popping up a bit, as does the metal tab/lever/button arrangement I had you removing earlier, but I had to adjust the aperture setting very gently. Boo.
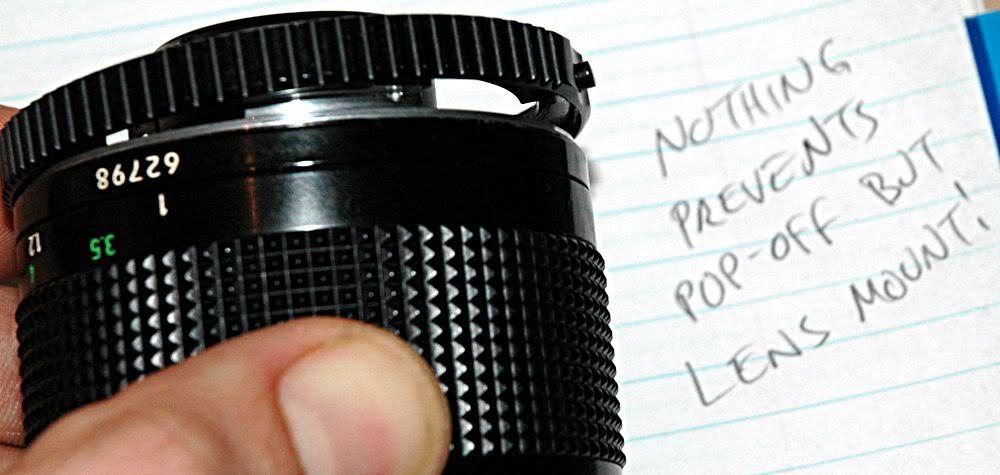
So I broke out the soldering iron and some black plastic. I used a very fine tip and "stung" the parts to melt on a few strategically-placed blobs of plastic. Then I trimmed it very carefully until the mount would fit. Three points of contact prevent any side of the aperture ring from popping up.
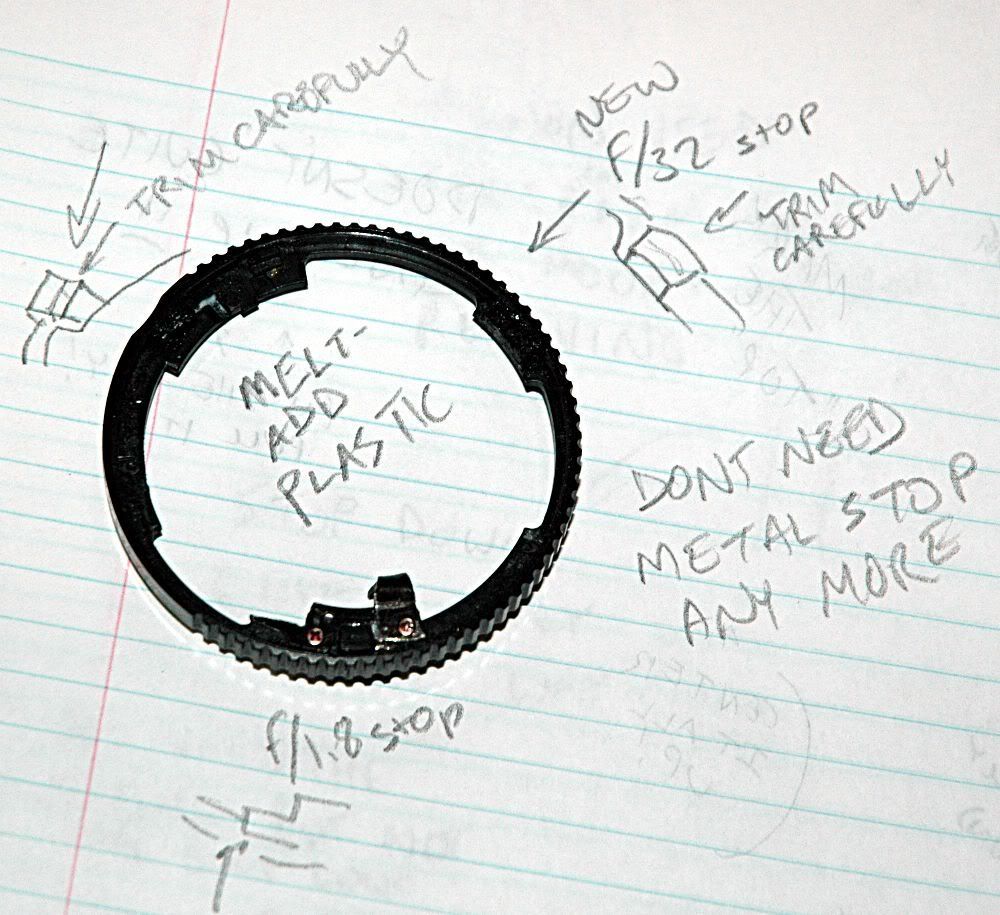
I know it says 1.8. So sue me.
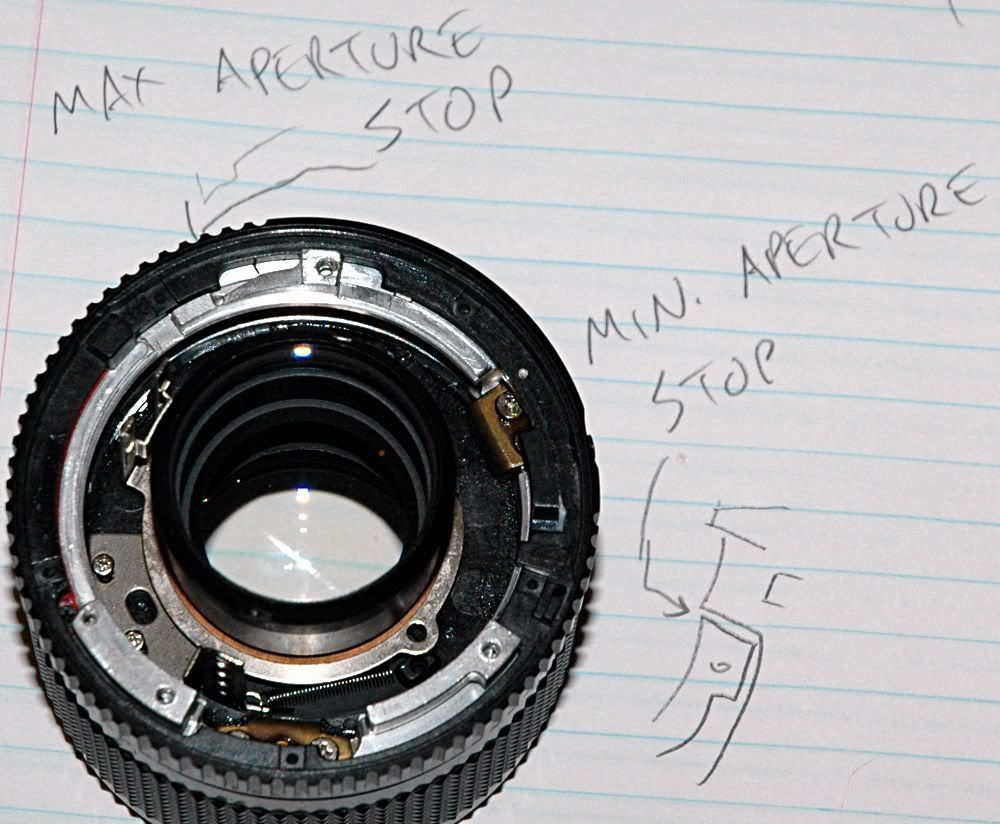
Between the new plastic and a bit that was still there, I ended up with reinforced stops at both ends of the aperture adjustment range, which is awesome. This is all it had for stops before:
I found the tape didn't hold the aperture coupling bracket at all well, after a bunch of adjustments. So I found a couple of teeny tiny screws (I am pretty sure these were from the little stop we just removed from the hole-marking template) and drilled teeny tiny holes in my custom bracket. I stung a couple of teeny tiny holes in the aperture ring with the soldreing iron and trimmed them with a knife. Then I super duper carefully threaded the screws into the holes. It worked perfectly.
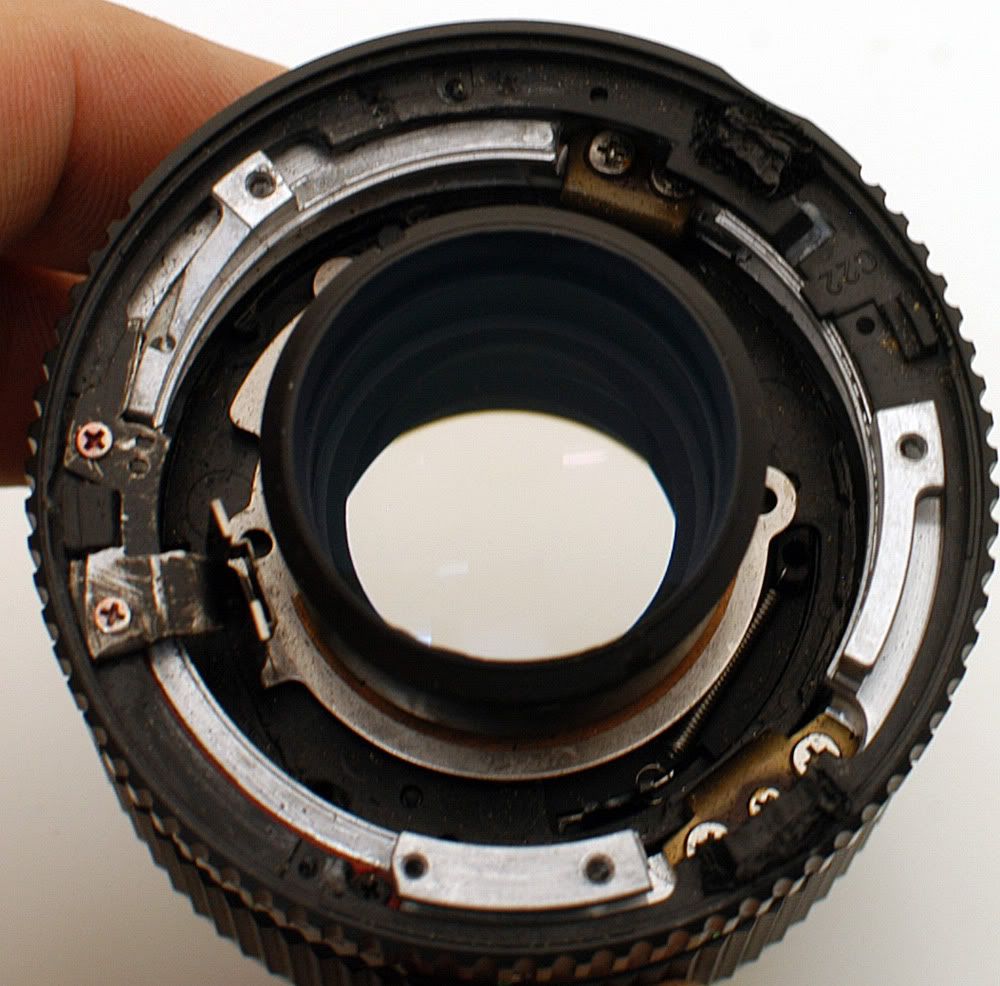
Now the lens does, also.
Manual focus self-portrait, GO!

What about reassembly, VFD?!
If you can't figure it out, you're probably not the right person to do this work. Reassembly is the reverse of disassembly. Be certain you either didn't touch or can clean the lenses before reassembly. Canned air and a microfiber come in handy for this.
Lens Porn: CANON LENS FD 100mm 1:2.8 CANON LENS MADE IN JAPAN
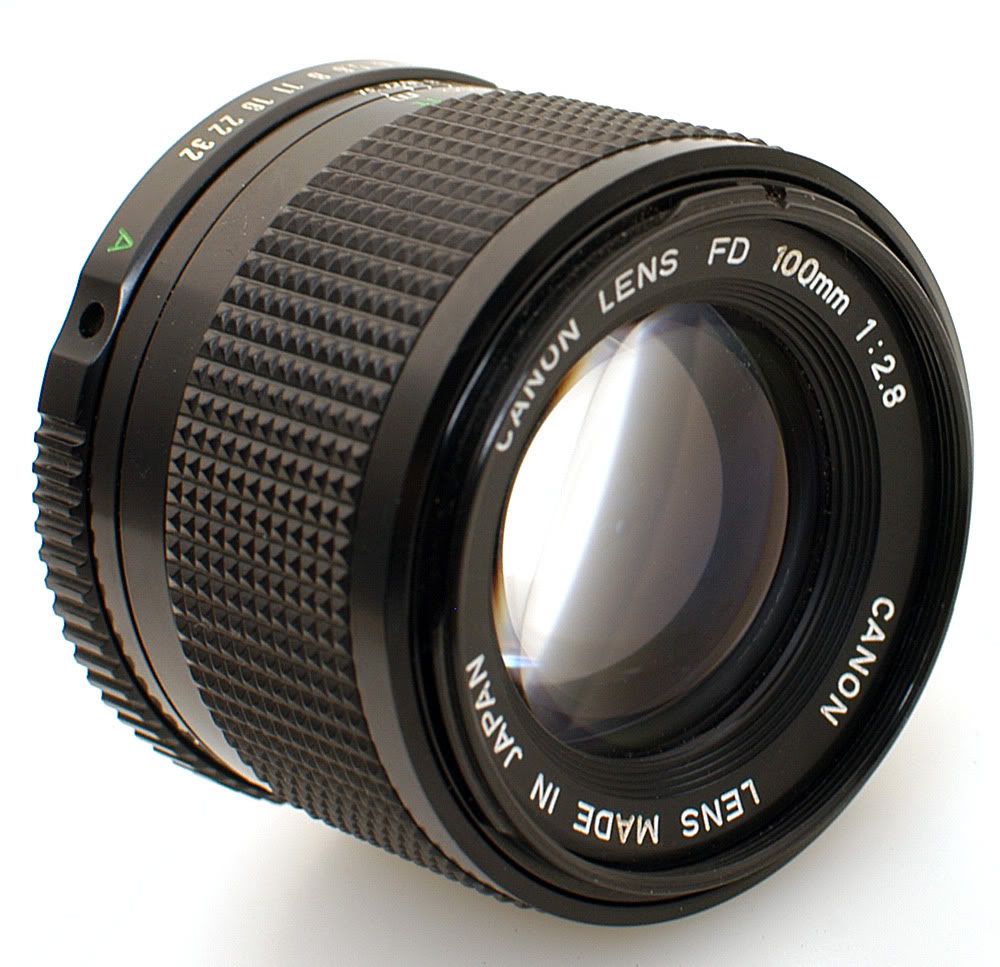
. . . With a metal Nikon F lens mount!
Here it is, mounted on my high-visibility workhorse
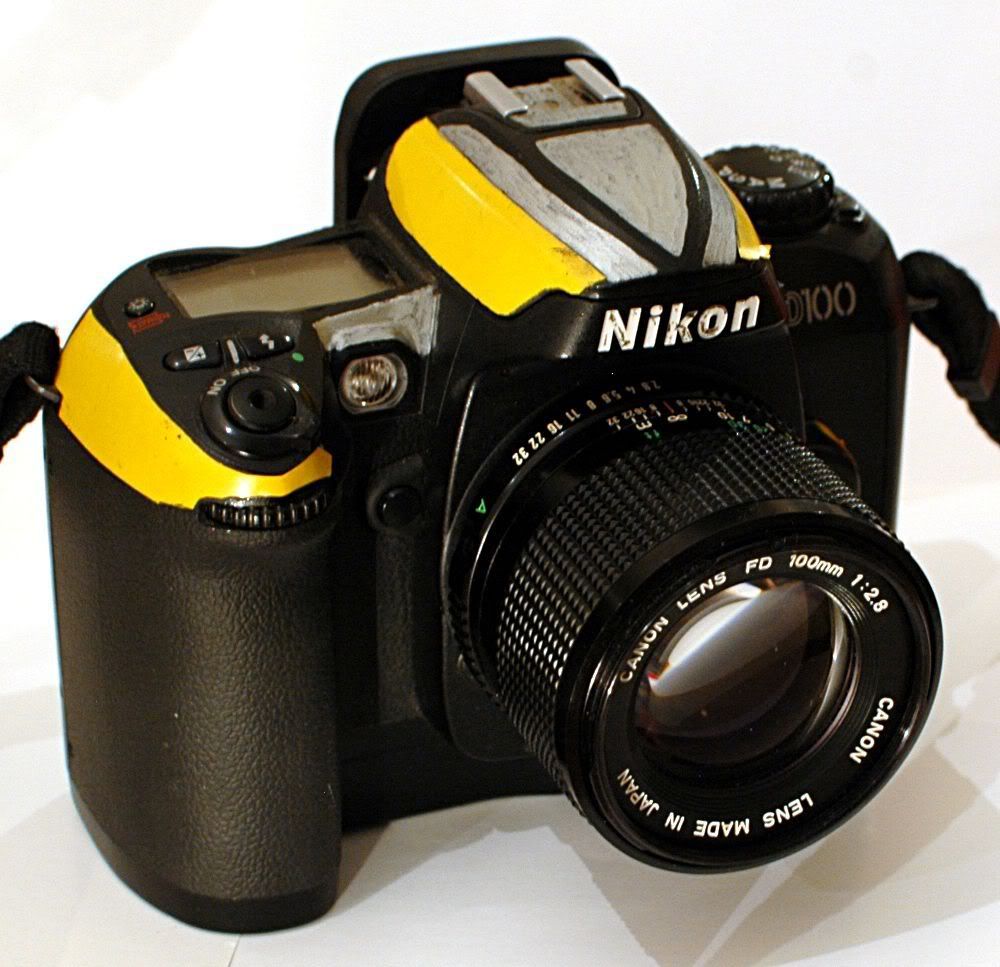
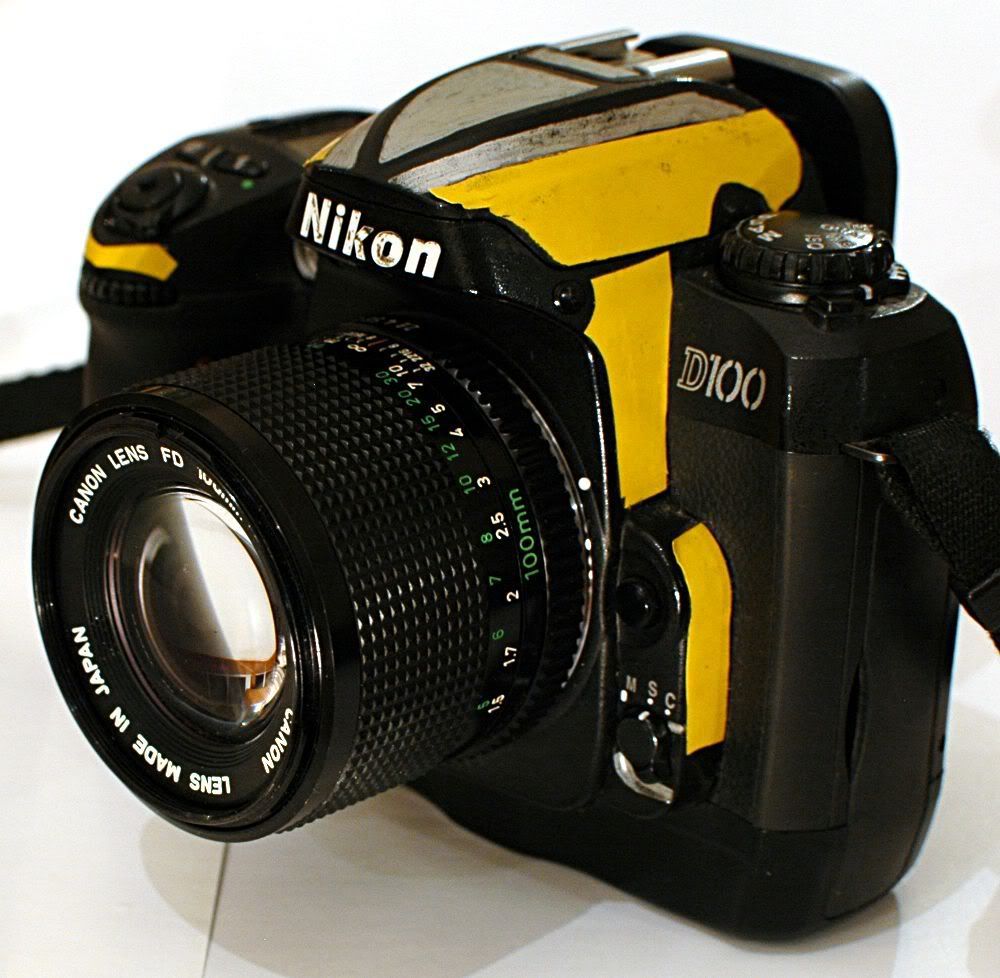
This is a 100mm lens. It is much smaller than my zoom that goes to 70mm only, and WAY smaller than JM's zoom that reaches out to 135mm.
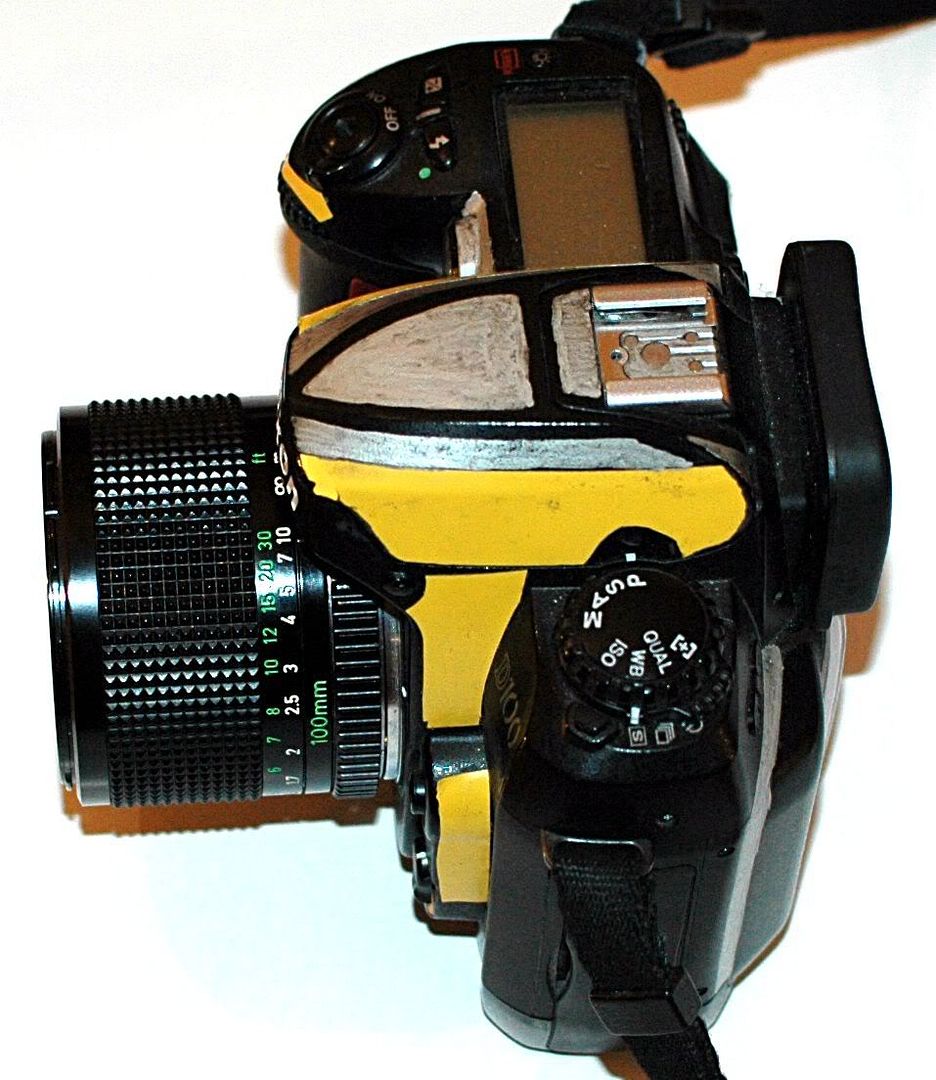
Focus is via that huge knurled ring around the middle of the lens, and it is buttery-smooth. This lens is clear, bright, and sharp all day long with reasonable bokeh. Whether you can deal with full manual control -including exposure metering- is up to you!
Vote For David disclaims any and all liability for damages incurred when you destroy your lens. If you don't think you can do this work, please stop and let someone else do it who can.


No comments:
Post a Comment