This page was last updated on 16 December 2012 with a long-overdue status report.
My rifle is the 'victim' of a half-decent sporterization. The stock is a replacement, and the sights and their ears have been heavily modified, as has the magazine. Some of the disassembly steps will vary between my rifle and yours. For full military stock disassembly and assembly, you can refer to the excellent instructions at Surplus Rifle.com
In stock form, the trigger on this rifle was slightly rough. The main problem is that it seemed to have about 1/2" of creep. Keeping the crosshairs on target while pulling the trigger was a challenge, because it took so long to fire that the delay was actually a distraction from staying on target.
Tools Required:
NOTE: Google reduces image quality on this page to speed up page loads. Click on any image to see it at full size and resolution.Before doing anything else, you need to ensure you will not be killing yourself (from this) today.
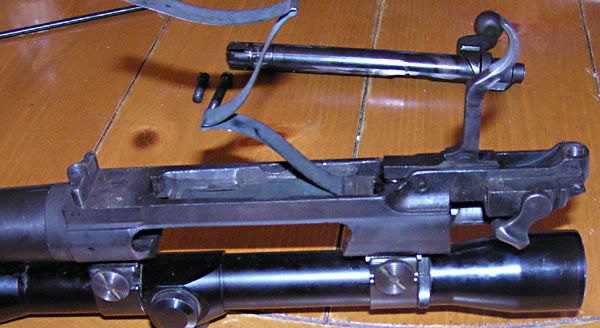
First: Check to be sure the weapon is unloaded. Point the rifle in a safe direction. Rotate the safety lever all the way forward and lift the bolt handle. Pull the bolt all the way to the rear. You should see something like this:
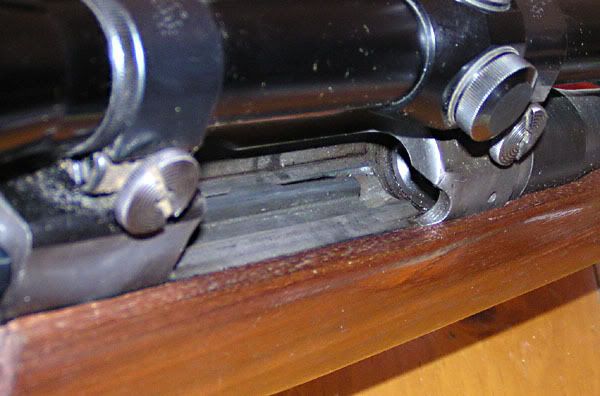
If the rifle was loaded, it just spit out one cartridge. If there are any more, push the bolt handle forward and down again, then up and back again, until there are no more cartridges in the magazine. If your rifle still has the original magazine configuration, you can depress the magazine release catch and allow the contents of the magazine to spill out. Either way, you will not be needing those cartridges for a few hours so go ahead and put them away.
The bolt is all the way to the rear because you just unloaded and checked the rifle, right? Good, now pull out on bolt stop lug until you can feel the bolt stop release the bolt, and pull the bolt back farther until it is free of the weapon.
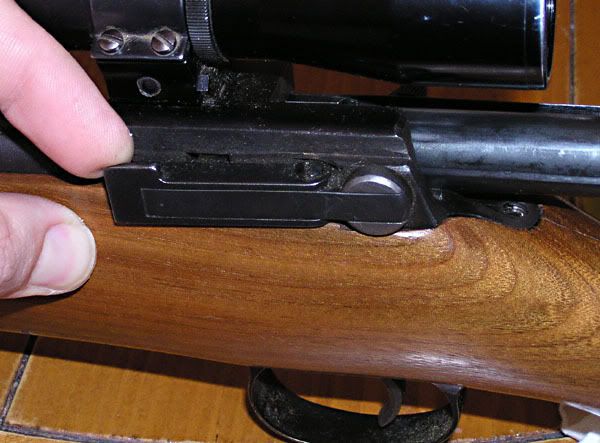
On the military stock, there is more hardware involved, but on this sporter there are 3 screws you need to deal with. The orange one holds the trigger guard to the stock. Leave it there (unless your trigger guard rubs the trigger and you want to adjust that clearance later)
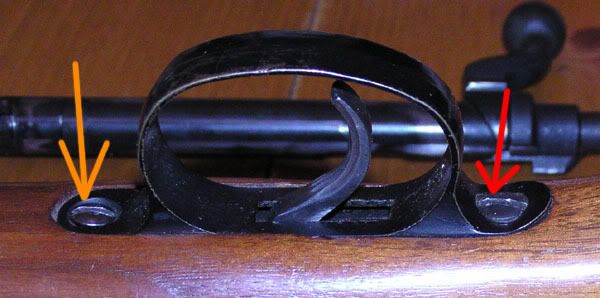
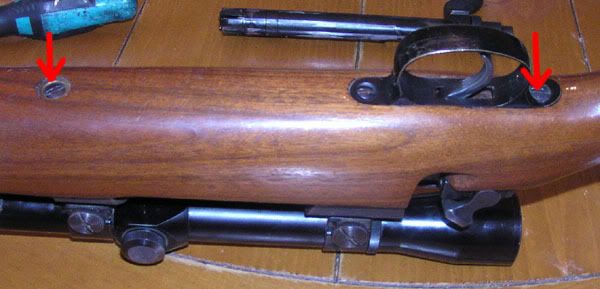
These two screws are the only ones you need to pull in order to release the barreled receiver from the stock
This is what the action of my rifle looks like when the stock is lifted off
A brief vocabulary lesson: If you are unfamiliar with the various parts of the 1917's action we will be discussing, study this before you read any further.
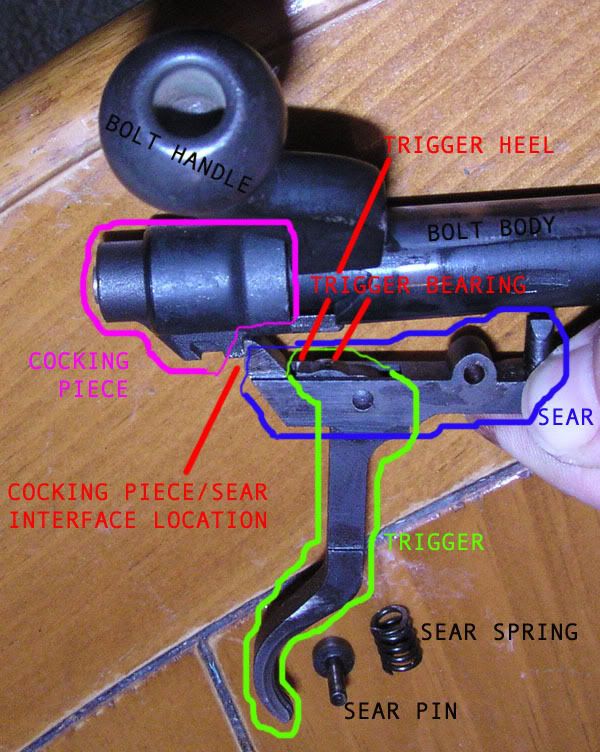
The stock trigger mechanism is a very simple affair. The trigger itself pivots on a pin in the sear. The trigger/sear assembly pivots on a pin also. The back of the sear holds back the cocking piece on the bolt. Pulling the trigger slides the sear away from the bolt, releasing the cocking piece and firing the weapon.
Here is a bolt and trigger/sear group out of the rifle, to show you their relationship more clearly. As the trigger goes back, the back (heel) of the trigger pivots up, pushing the rear of the sear down.
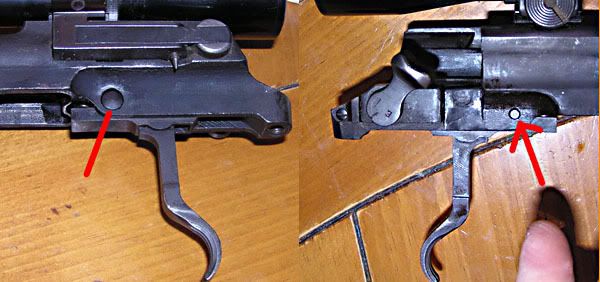
The trigger pivots at this bearing point against the bottom of the receiver
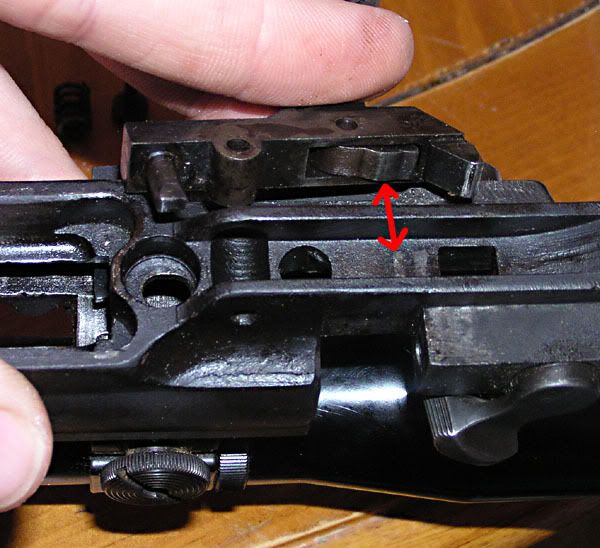
The white rectangle is the top of the sear.
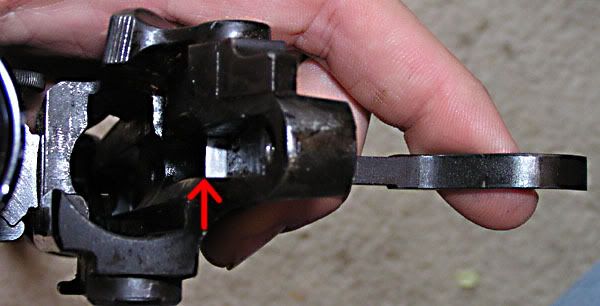
It pulls all the way into the receiver when the trigger is pulled
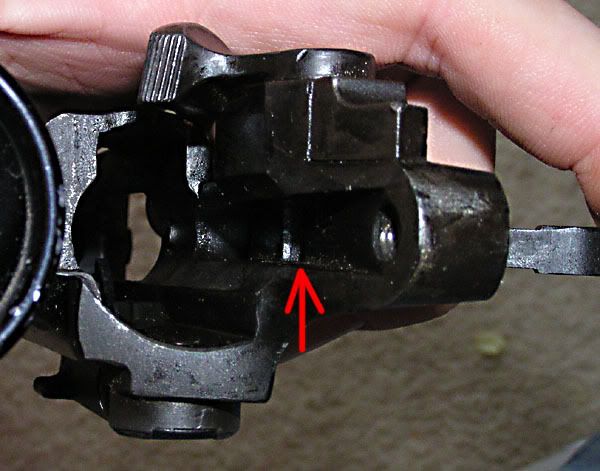
When the bolt goes to the rear and comes forward again, the cocking piece catches on the extended part of the sear. Pulling the trigger lets the cocking piece (and the sriker) forward.
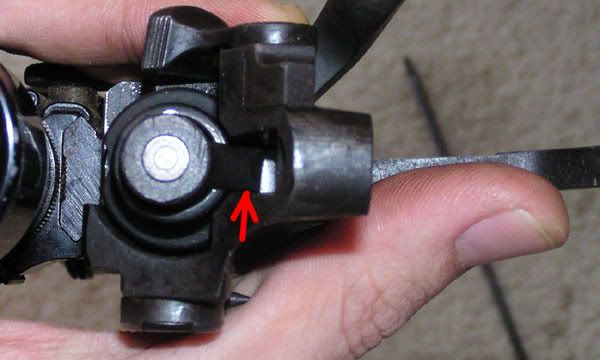
A brief bit of Model 1917 trivia: you should under no condition try to decock the action by holding back on the cocking piece and/or pulling the trigger while moving the bolt forward, if there is a live round in the rifle. There is a VERY HIGH PROBABILITY (approaching 100%) that this will cause a negligent discharge.
The next two shots are of the bottom of the receiver, showing the bottom of the cocking piece that catches on the sear when the bolt is back, and when the bolt is forward and the action has been fired
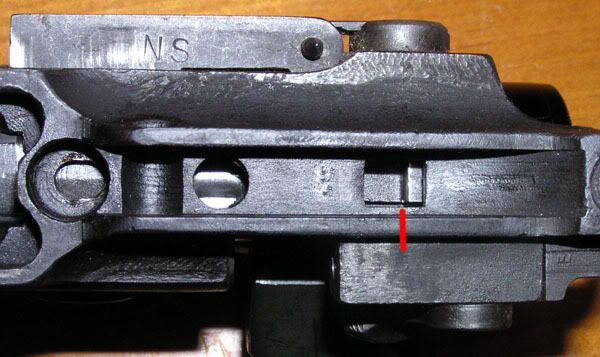
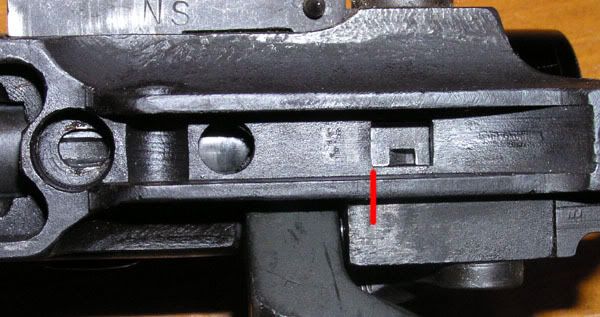
All the foregoing text and photographs were to illustrate one thing for you: this trigger is very simple. It could be simpler by one pivot and lever, but that's as simple as it gets before you are talking about throwing rocks.
The feel of the trigger action is made up of only a few components: the sear/cocking piece interface surface angles, the smoothness of the mating parts, and spring weights.
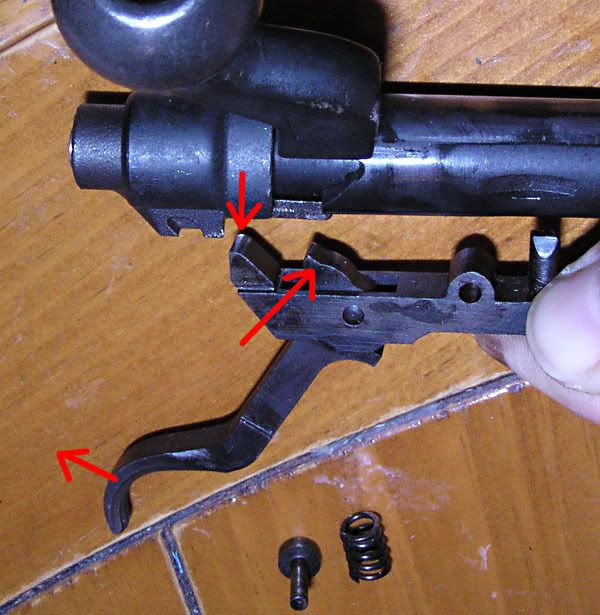
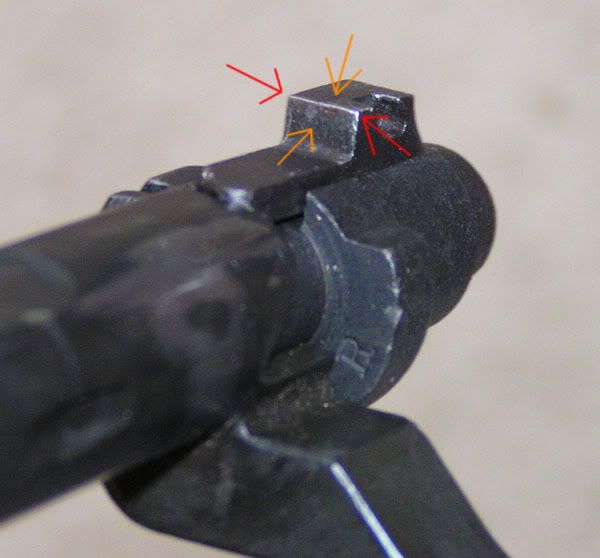
If your primary complaint about your rifle's trigger is that it is rough, the main thing is smoothness of the parts that slide across each other. The areas of the cocking piece with orange arrows need to be flat and smooth. The angle pointed out by the red arrows needs to be straight across, 90 degrees (normal) to the vertical and longitudinal axes of the bolt, and fairly sharp.
The sear rubs on the cocking piece as shown. The surface on the back of the sear rubbing on the cocking piece must be smooth also. The angle across the top of the sear should (like the bottom/front of the cocking piece) be normal to the vertical axis as well as the longitudinal axis of the rifle, and fairly sharp.
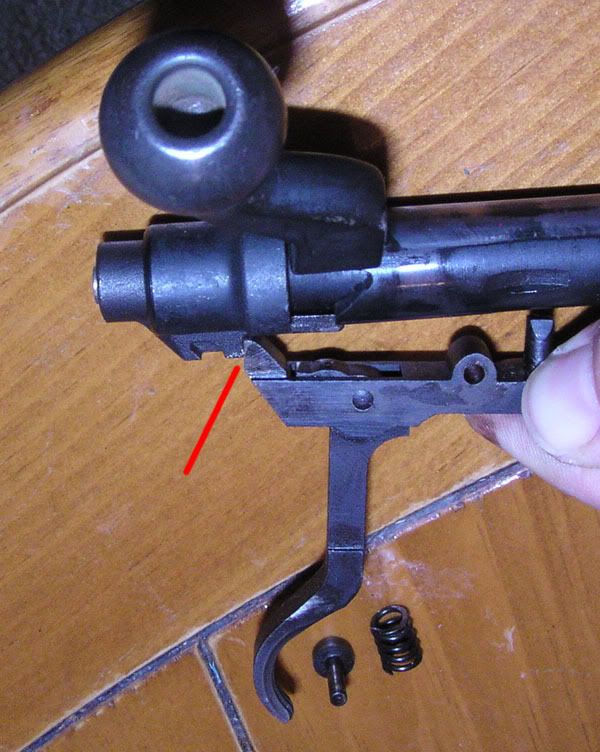
If your complaint about your rifle's trigger is a too long "creep," the top of the sear must be made shorter. This can be overdone, but I'll get to that in a little while. I used a file and worked very carefully to reduce the top of the sear. I ended up taking off a very small amount as I'll show you later.
If your preferences are different to mine, you may want to eliminate the first stage ("slack") in your trigger. My rifle has none, but I usually prefer a two-stage trigger if the second stage is short. You can un-pull a little slack, but you can't recall 180 grains of lead that have been sent at 2700 feet per second in whatever direction the rifle was pointing. If you want to eliminate slack, you can do one of a couple of things. First, you could put a daub of very high strength epoxy on top of the heel of the trigger. Much test-fitting would be involved, but you could use a fine file or sandpaper to reduce the height of the epoxy until the action works properly. The route I would recommend is the following. In the place where I have put a red line, through the heel of the trigger, install a tiny set-screw. Adjust as required to take out the slack. This would involve, at a minimum, a drill press, tap, and a leeeeetle tiny screw, preferably a brass or brass-tipped one.
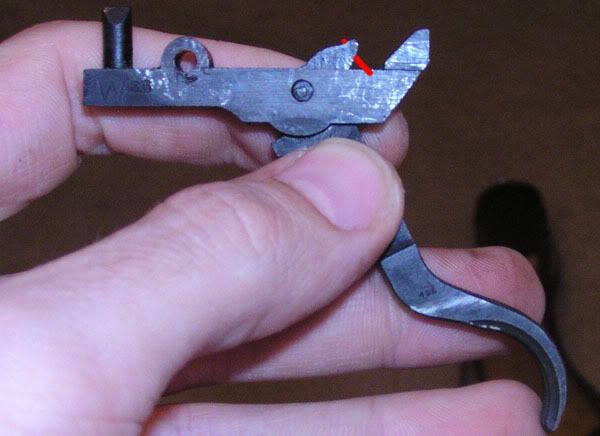
If you don't like the over-travel after the firing pin is released you can do what I think I will do, when I finally get some free time: Drill and tap a hole in the back of the trigger guard and stick a screw in it to stop the trigger just past the point where the sear releases the cocking piece. This could be done so it was ugly and a finger-snagger, so I'll have to think about it and get back to you on that one.
Okay, enough talk about it, let's pull the trigger out!
Push the sear pin out and the trigger is free. I used the tip of a bullet. Depending on the condition of your rifle, you may need to use a small punch and mallet.
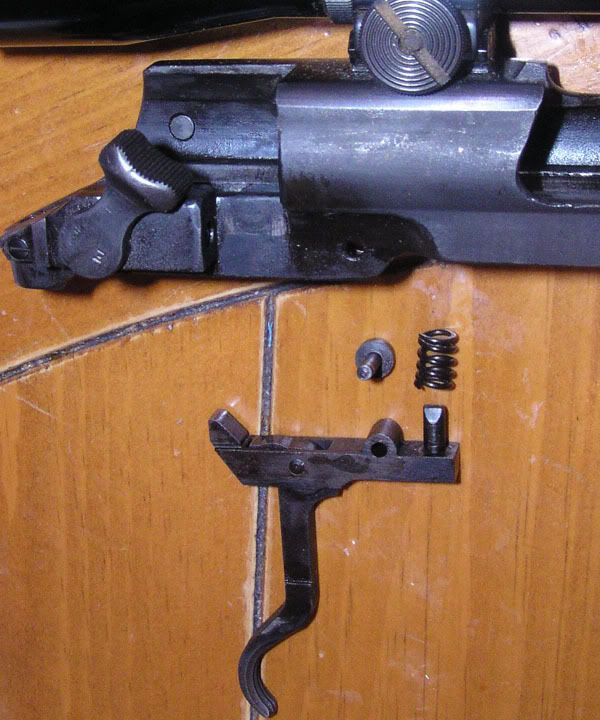
It all goes together again with the parts in these relative locations (in case you get lost later):
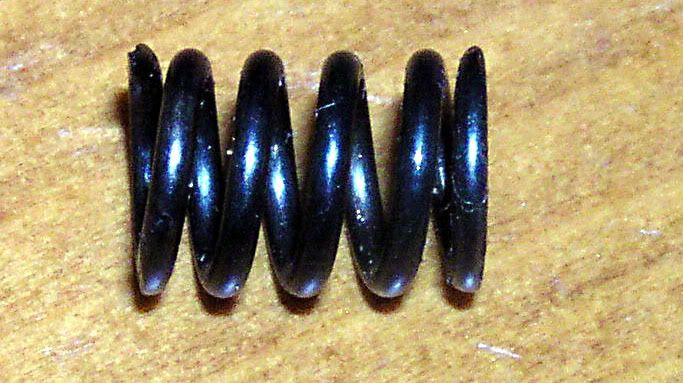
If your main complaint about your rifle's trigger is that the trigger is too heavy, then you have a remedy but you may not need it. The sear is forced up into the cocking piece on the bottom of the bolt by that little sear spring. You could make the sear spring weaker/shorter by grinding or cutting it, and there would be less spring pressure on the trigger. Also your rifle could be rendered unreliable if the spring is made too weak, and the sear may not reseat against the cocking piece when the trigger is released after being pulled part-way. I elected to leave my spring unmodified (for now). If you were to install a lighter firing pin (main) spring, that would also tend to reduce the trigger weight. I say you may not need the lighter-springs remedy for trigger weight because, after you are done with the other parts, you may find the trigger acceptable.
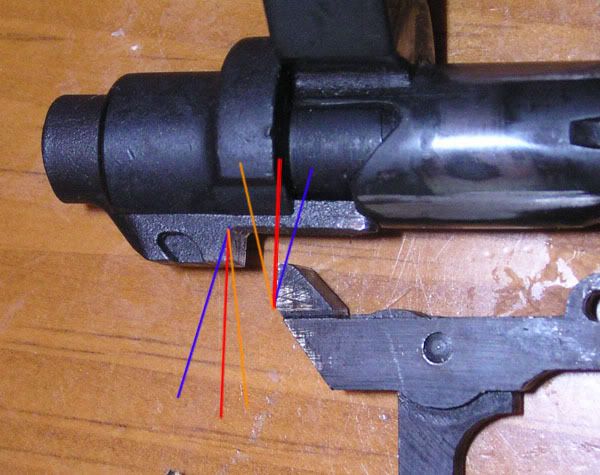
One word about safety and you're almost ready to get to work. The sear engages the cocking piece at a fixed angle. That angle can influence the weight of your trigger pull. That angle can make your rifle unsafe to carry loaded. If the angle is normal (90 degrees), you will have Neutral sear engagement (red lines). That is safe. If the angle is too shallow, you end up with Negative engagement (blue lines). That is not safe. A rifle with negative cocking piece/sear engagement may fire without the trigger being pulled, if it receives a shock (dropped from a tree stand) or even a bump (setting it on the floor). If the angle is too great, you end up with Positive engagement. That is safe, but makes the trigger heavier. With Positive engagement, you actually pull against the sear spring AND the main spring when you pull the trigger. Since you are out to make the trigger easier to pull, you want to have very little to no positive engagement angle.
Okay, so you're off! Go for it!
What's that, you don't know what to do? Oh that!
It's not very complicated. All the surfaces that rub each other need to be smoother than a baby's bottom. I used 1200 grit sandpaper and went slooooow. As mentioned previously, I also used a (fine toothed) file on the top of the sear. You have to be very careful when you are working on these parts. You must maintain sharp right angles on the corner of the cocking piece, as well as the sear. If you get corners rubbing on each other at an angle, you have trigger creep. If you have all of one corner slipping off another sharp corner all at once, you get crisp trigger action. I had to do quite a bit of material removal to flatten the bottom of the cocking piece, and then again to flatten the front of it. I had less work to do, smoothing the back of the sear. It took quite a long time (2 hours+) to remove as much from the top of the sear as i wanted. I very lightly smoothed the bearing point on top of the trigger where it rotates against the receiver, as well as the matching bearing surface of the receiver, but I think that is a low-importance spot where you just want to make sure there are no rough bits. My trigger/sear ended up looking like this:
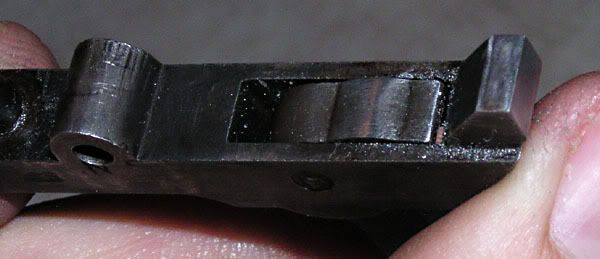
and the cocking piece now looks like this:
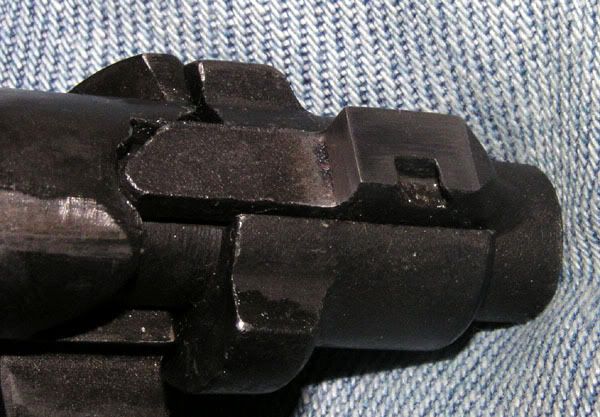
. . . and the trigger is now MUCH shorter, smoother, lighter, and more crisp. One important(to me) question is: how much shorter is the trigger pull (creep) now, and how much came off the top of the sear?
Here are the angles when the action is cocked: Red lines are the bottom of the receiver and the bottom of the sear, for reference. Note: the angle opens up to the front when my rifle is cocked:
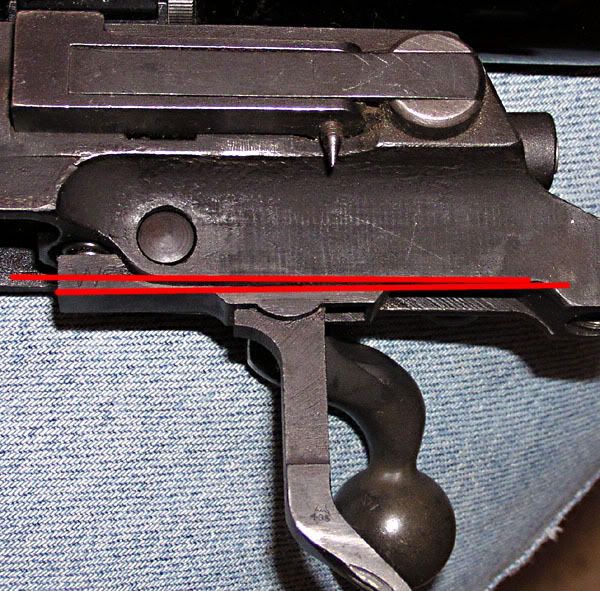
This is how far the trigger has to go to release the firing pin, stock:
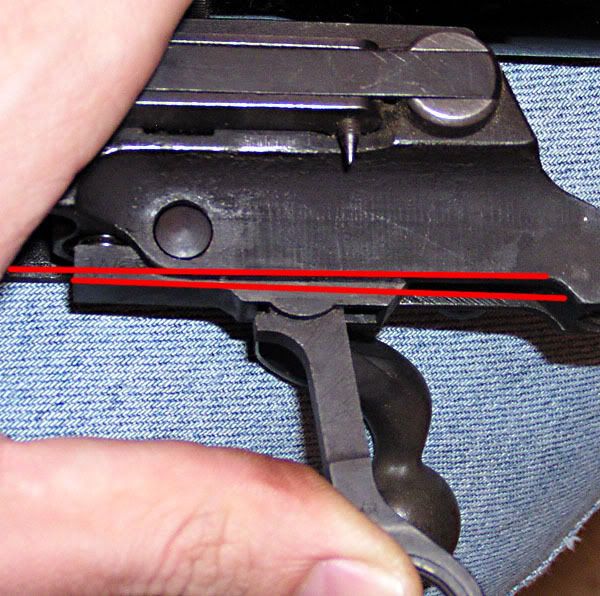
and after my work was done for the day (this took a few hours)
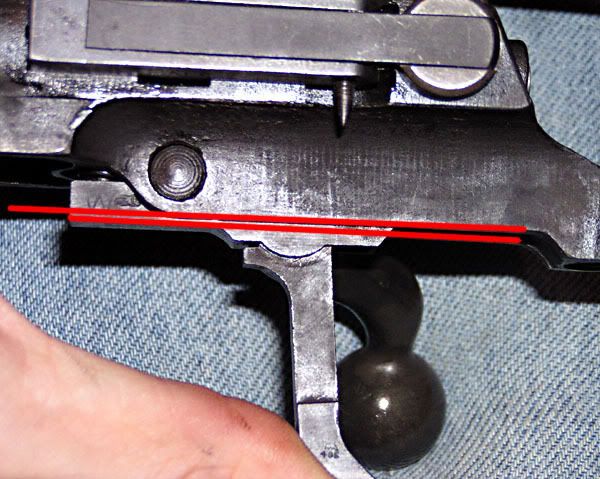
Now, that is not a great big difference. Due to the leverage involved, however, it took my trigger creep down by at least half. Scroll up again and compare the relative angle of the trigger in the above photographs. Those last two photos show you (indirectly) how much to take off the top of the sear. The trigger pull is shorter by the amount that the sear was made shorter, multiplied by whatever the leverage adds up to. The top of my sear was reduced by maybe a millimeter or so. That plus the slightly shallower (from flattening it) cocking piece is all the distance required to make the difference shown above. Removing too much from the sear or cocking piece* will result in a bolt that will not stay cocked. If it will not stay cocked, and the safety is working as advertised, the striker will fire when the bolt is closed. If you don't want to use the bolt handle as a trigger, go slow and test-fit often!
You are fairly safe making the cocking piece as smooth as you like without test-fitting. When it comes to the sear, however, I recommend frequent test-fitting and test-firing the action (with NO cartridge in the firing chamber!) to check your progress. Be careful not to nick the corner you are trying to sharpen, when using a file. Be careful to keep the sandpaper flat (I used a small sanding block) when rubbing surfaces flat. A small fine sharping stone would be useful for this work if you have one. Once you have everything as flat/smooth as you like it, go back and break the corner. You don't want a razor-edge on the corners of the sear and cocking piece, because they will dull themselves with every shot, leading to inconsistent trigger action. Just hit the corner with one swipe of the paper to blunt it very slightly. Try to keep all the strokes of your file and sandpaper in the same direction as the parts rub against each other in the rifle. This is not always possible but it is good to at least mention.
And that's all there is to it. Blue the parts if you like (I might, but my trigger is greased and I'm comfortable with the white metal for now). Your rifle now has a shorter, smoother, lighter trigger that is more crisp than it was. I left mine with a little tiny bit of creep (see above photos again) because this is a hunting rifle, not a match rifle.
I made this page after searching high and low online, but finding only replacement triggers. I think there should be at least one decent DIY webpage up online, so I wrote it. If you don't mind modifying your own rifle, give this a try first and see if you still feel the need to spend your money on a replacement trigger. My searching also led me to the sad information that Huber and Canjar no longer produce triggers for the M1917. If you want a Timney Sportsman or a Dayton-Traister replacement trigger, they are still available for around $50 as of May 2009.
Some people feel that it is dangerous for anyone but a Genuine Gunsmith to do this work. If you are one of those people after reading this and sleeping on it for a week, send your rifle to a 'smith. If, after reading this, you wonder what all the fuss is about, consider that you are working on deadly dangerous machinery, but go ahead if you feel yourself to be qualified. If you have any questions or suggestions as to how this page might be improved, please e-mail me at the address on the bottom of the page.
******** Update:
*After much firing, a not-entirely-unforeseen event has occurred. The edge of the cocking piece that mates with the tip of the sear has worn round. This results in a rifle that will not cock (not dangerous) or will not STAY cocked (fire at random = dangerous!). The solution is probably in a new cocking piece bought from a place like Numrich, but I'm going to see if I can keep up the "super-duper low budget" theme and come up with a work around that does not involve permanent modification to something structural.
Those who rolled their eyes when they saw what I was getting at on this page, will of course see a new cocking piece and a Timney trigger in the near future of this rifle. We shall see.
********Update, the second:
It ended up getting a new cocking piece from a seller on eBay and the rifle is back in commission. The new cocking piece is less rough than the old one so I am probably going to leave it for a while.


2 comments:
hello i have found to that if you just want to get rid of the play in the trigger you just add a little weld where the trigger heel and trigger bearing have the low spot seems to work very well for my self great job thanks for the post
Thanks for that, it makes sense.
It is amusing that you mention it at just this time. Finally I found both that Numrich has my cocking piece for $6, and the one I went to far on is at a welder's shop as I type. This page should be updated . . . relatively soon.
I was thinking of using a set screw instead of a weld bead, but at the time I did not have a tap that small. Times change, and we'll see what happens before too much longer.
Post a Comment